Opening UpHello again! Apologies - I have been offline for so long because of my studies, but with the summer holidays underway, I hope to start posting much more regularly again. For today's post, I have some good news: the shop is now open! We have had to make a few adjustments to the layout of the shop and the overall experience; however, if you can come down, I definitely recommend that you do. Today was my first day back and I felt that the day was both enjoyable and incredibly safe. The first change you need to know about is our opening times. Instead of being open from 10am until 4pm, we now close at 1:30pm so that we can clean the shop at the end of the day. When you come in, you will be asked to wear a mask and sanitise your hands. You will only be able to stand in a small area of the shop that has been blocked off with screens, which means that you will be able see and to buy anything in our stock but browsing and handling wool is restricted for the time being. Therefore, I would recommend having a basic idea as to what you want before you come in. If you want to buy some new wool but you are unsure of what you want, below are a few of my recommendations. All of the yarns below are on discount. Another important thing to note is distancing from others in and out of the shop. Only one person/family is allowed in the shop at a time, so if you see someone in the shop when you arrive, please queue outside on the markings so that you are socially distanced from others that join the queue.
We are doing are best to make your experience as enjoyable as possible but in order to benefit everyone, we have to prioritise safety too. For the safety of yourself, us and our other customers, please stick to these and the Government's guidelines. Until next time, happy crafting and happy shopping, Caiti
0 Comments
When It Feels Like All Has Failed...Crafters, I'm quite sure you all know how it can feel when a project goes wrong. A forgotten increase, a purl where there should be a knit or even a dropped stitch can make you feel down in the dumps for the rest of the day if you let it. However, there are ways that we can make things a little bit better when they do go wrong. For today's post, I have compiled just a few of these. Starting Something NewStarting a new project might seem like the last thing you would want to after something has just gone wrong. You may be worried that the new project will go wrong too and that they will pile up or alternatively, you may just not feel up for it. However, if you do something simple and quick it can take your mind off of the mistake. Also, you may feel more motivated if you make something for a friend or family member. Here's a present I made for a friend recently. It was relatively simple, but making it felt really good and my friend liked it too. It was made using a kit from a company called Diamond Dotz. 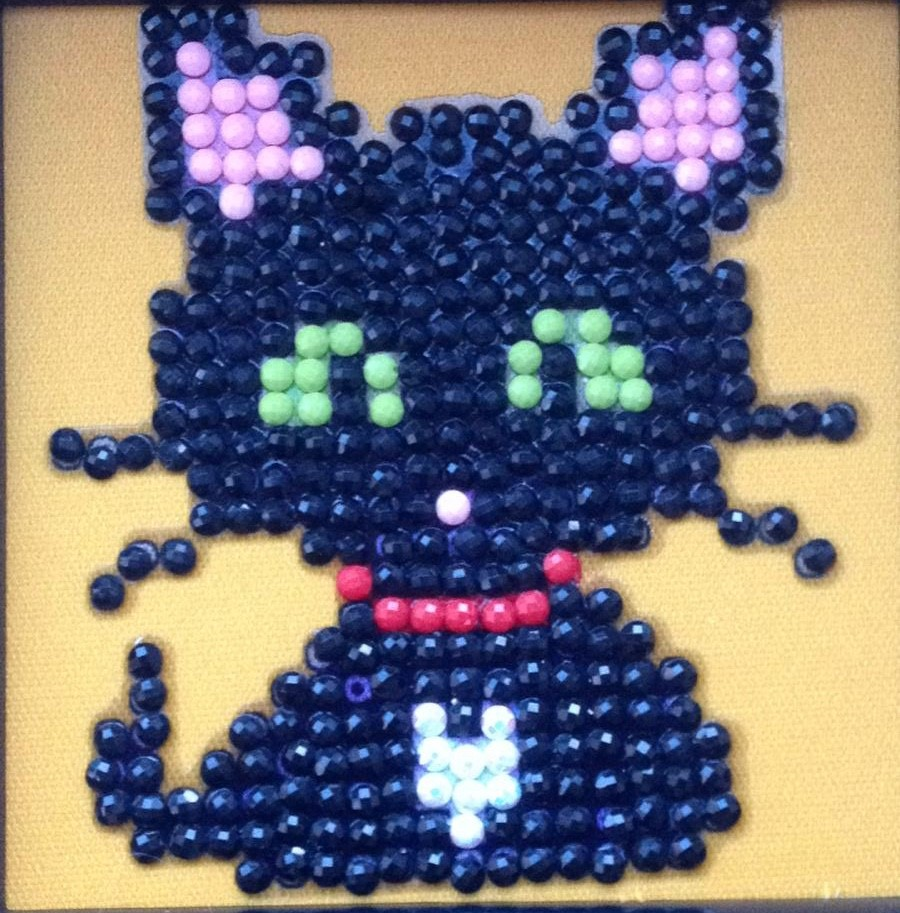 Organise and Bag Up Your CraftsUnless you are naturally organised, this may not be a great one to do straight after a craft has gone wrong. However, every once in a while, you may make a mistake on a long-term project, which may make you feel down in the dumps and not in the crafting spirit for a few weeks. This is when organising your crafts can be a perfect way to spend the time and possible persuade yourself to fall back in love with your project. Organisation means different things for different people but personally, I like to have projects that I take out of the house in knitting bags (ideally ones that have compartments for the other things I need) and projects that don't leave the house on shelves, in cardboard boxes, etc. Though, to be honest, I am not the best and getting round to organising them! Watch a Craft TV ShowRight now, there are loads of TV shows about craft at the moment, with The Great British Sewing Bee (BBC1, Wednesdays, 9:00pm or on iPlayer), The Repair Shop (BBC iPlayer) and Grayson's Art Club (Channel 4, Mondays, 8:00pm or on All 4) amongst them. Notice that, with the competitive craft shows, almost everyone makes a mistake at some point - it's completely normal, even if you are an expert! You may be tempted to watch the show thinking that they are only making mistakes because of the pressure and that you have no excuse for your flaws. Instead, think about what you are going through - perhaps you are feeling a lot of pressure yourself at the moment, particularly with the lockdown. Even if it is a different type of pressure to competitive pressure, it will still impact you in a similar way. Alternatively, if you were not feeling pressure until before the mistake, it is not your fault either! Mistakes are healthy - if you did not make them, you would make no progress. Often, the competitors that make mistakes are able to turn them around or if not, it is usually due to a lack of time. In real life, their are a lot less time constraints, so that is less of a worry On the contrast, when watching craft shows of any kind, pay attention to the amazing things that can be created through crafts. The possibilities are endless; you can be as colourful or as plain as you like, it can be as quick or as slow as you like, and you can use pretty much anything. Surround Yourself With FriendsIf the other tips do not work for you, this one should. Talking about how you feel is great and if you have any friends that love craft, then that's a bonus. If not, don't worry. If you explain to your friend why you are frustrated, they will probably be able to empathise; we all know how it feels to work on something for a long time, put lots of effort and energy into it, then notice that we have made a mistake. Your friends can uplift you by reminding you that things will get better soon and can distract you in the meantime. A Final Word...Of course, different things will work for different people, so be not be disheartened if not all this advice works for you. However, I hope that trying some of the tips or even just reading this and knowing that you are not alone helps. Also, perhaps this doesn't just apply to craft. Right now, it can be hard to feel motivated to do a lot of everyday things. Therefore it is important that we care for ourselves. Hope that you had a good mental health awareness week and are feeling OK at the moment.
Happy crafting, Caiti UpcyclingA couple weeks ago, I talked a little bit about upcycling and its importance. You can make almost anything using old clothes, plastic rubbish and even furniture, and by doing so you are helping to improve the environment and also your mood! Today I will go into a bit more detail about it, giving a few ideas of things you can make in the comfort of your own home. Button JewelleryDo any of you have lots of spare buttons around the house? I know I certainly do - I was doing a small clear out a little while ago and found loads of them. If you are a particularly avid crafter, chances are you come across buttons every day and sometimes in the weirdest of places! So, if you are looking for something to do with surplus buttons, then look no further. Here are the instructions for how to make some button bracelets and necklaces. This craft is perfect for all ages and abilities. 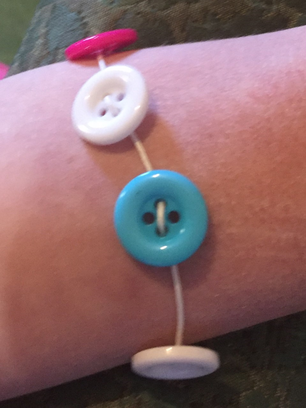 You Will Need:
Instructions
Phone Socks 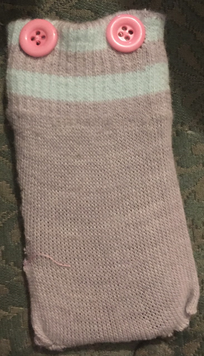 I made this phone sock out of an old glove. This craft is a little more complicated than the previous one, but it still is relatively quick and straightforward. You Will Need:
Instructions
Other IdeasHere are a few other ideas of things you can make through upcycling:
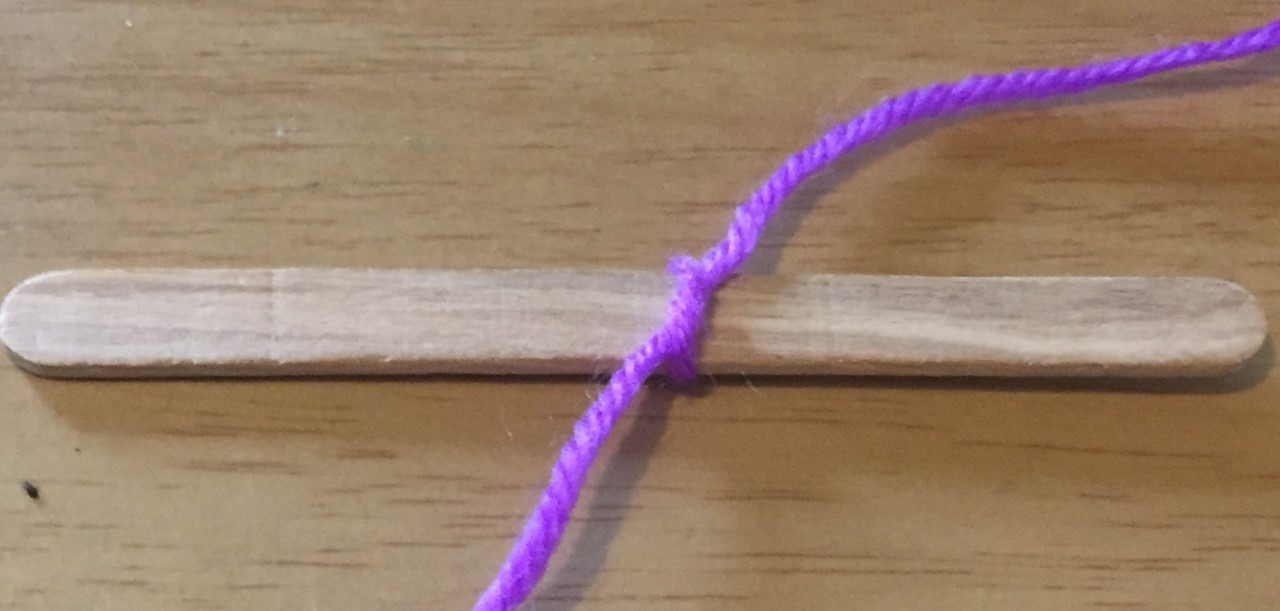
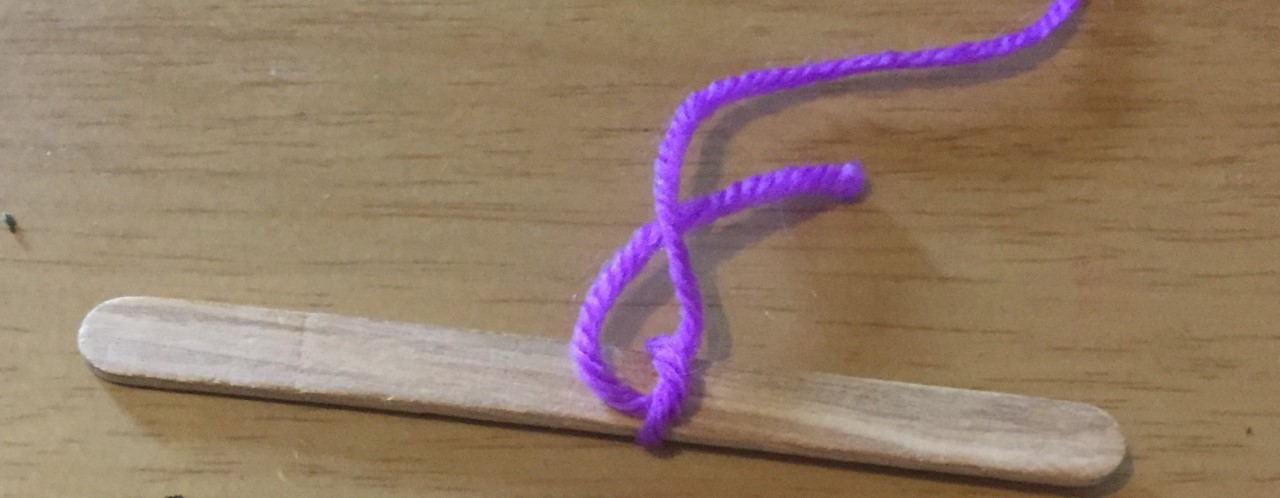
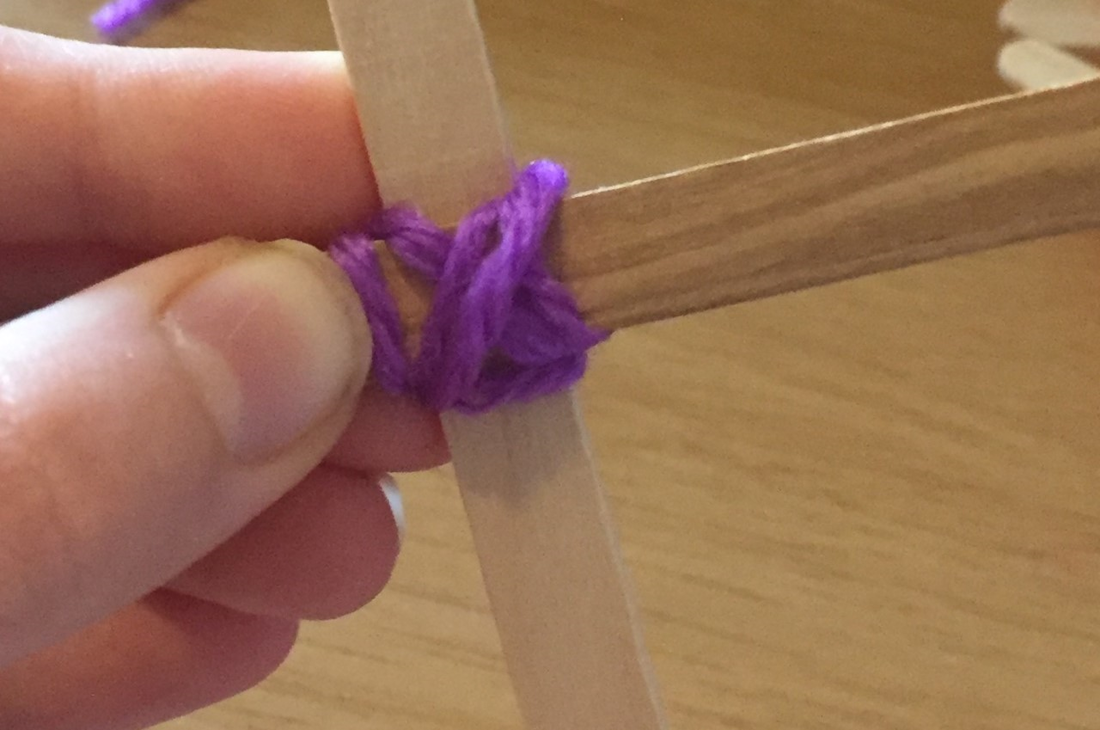
That's all from me today. I hope you have fun trying a few of these. Until next time, happy crafting! Caiti How To Make Mini Yarn StarsHappy Saturday and happy Yarn Shop Day! It is a shame that we cannot have the shops open to celebrate, but it is so important that we keep social distancing. Also, if you need any wool, you can order some by clicking "contact us" on this website. I don't know about you but whilst on walks, I have seen lots of rainbows in people's windows. Perhaps you have one in your window yourself? If not and if you are unable to go out, you can find loads online by searching "NHS rainbows in windows." I also decided to make my own rainbows with a difference: they are made of wool and lolly sticks. 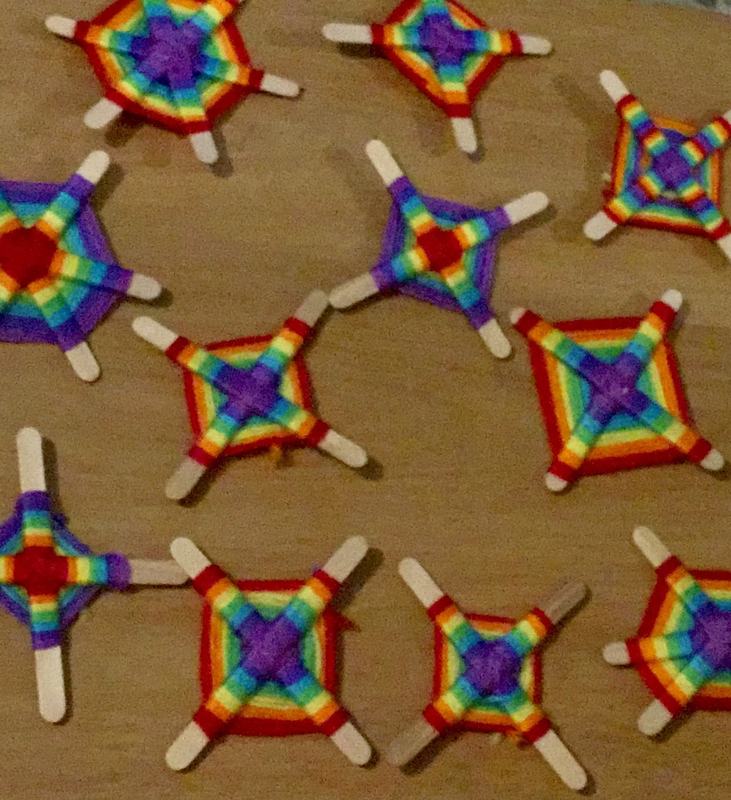 Here are the instructions for how to make your own. You Will Need:
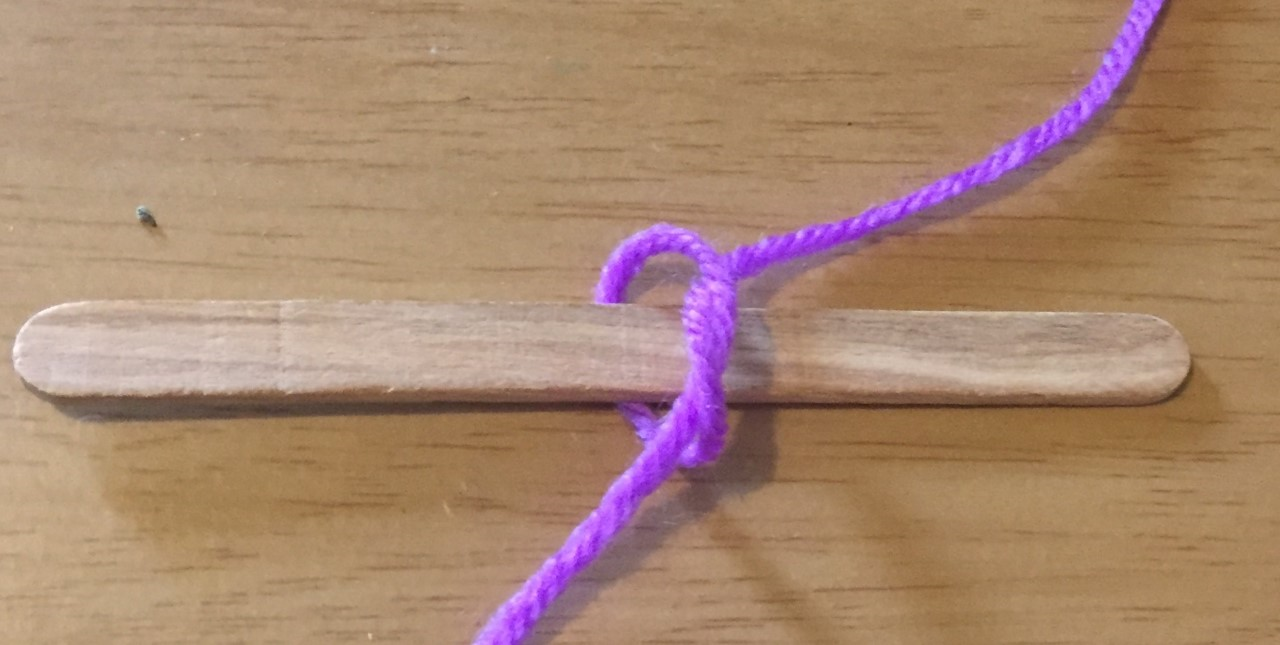
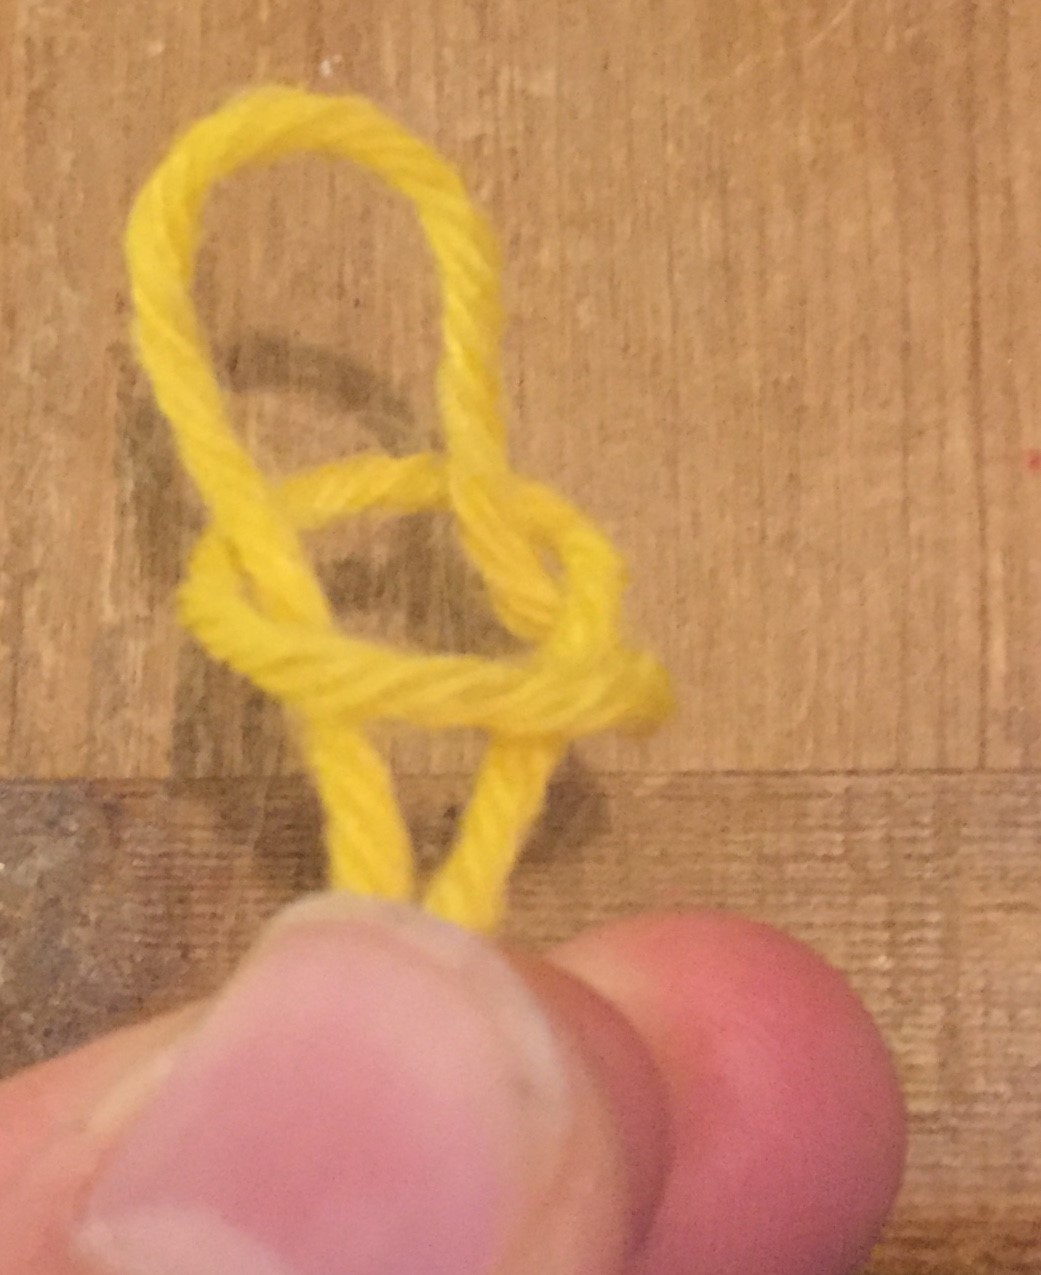
InstructionsTo start, tie a knot around one of the lolly sticks with the violet wool. Double knot it for extra security then trim the short end. Then hold the stick with the knot vertically and put a second stick in the middle of it, leaving the loop at the top. After you have done that, wrap the wool round the stick on the right, turn the sticks anticlockwise then do it again. Do this until you have one loop on each part of the cross. 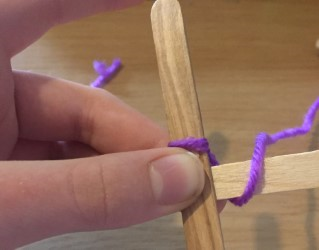 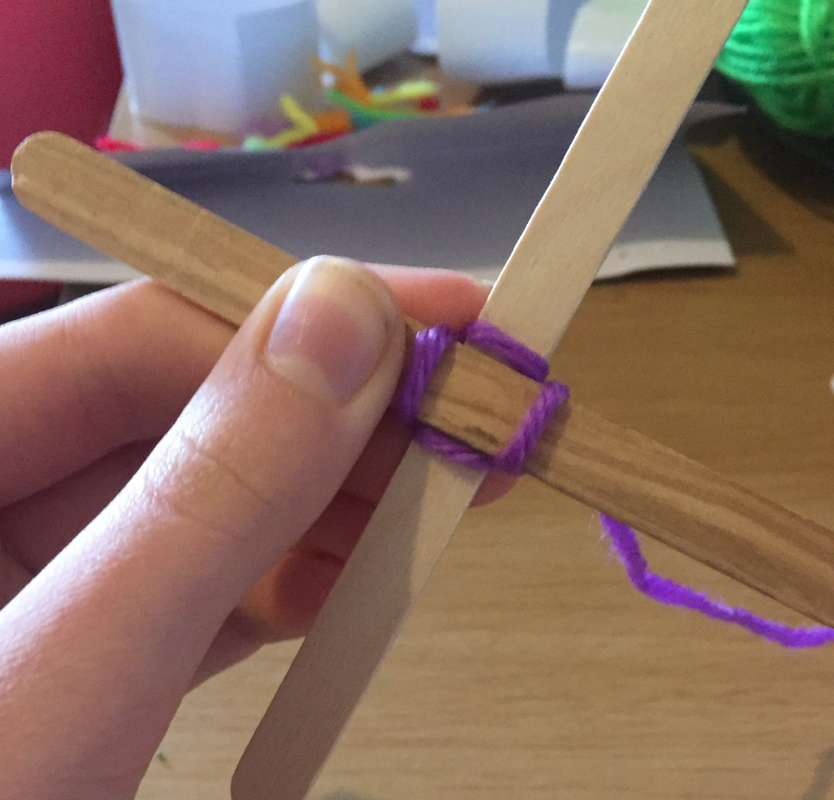 To fill the middle and secure it, loop diagonally between the two sticks a few times. Then, go back to looping round as you were before until each stick has three or four loops. It should look something like this. 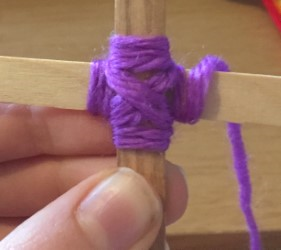 To change colour, tie the next colour around the first one. 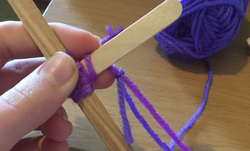 Then tie the short end of the new colour, which in this picture is on the left, to the first colour, which is on the right, and trim the two ends (but don't trim the end you are about to use!). Then continue to loop and change colours until you have done the last loop of the final colour, which should be no closer to the end of the sticks than 1cm. Once you have finished the loops, cut the ball off, leaving an end which is a similar length to the lolly stick. Thread this through the back of the star, where the knots from other colour changes should be, and double knot it. This is what the back should look like. 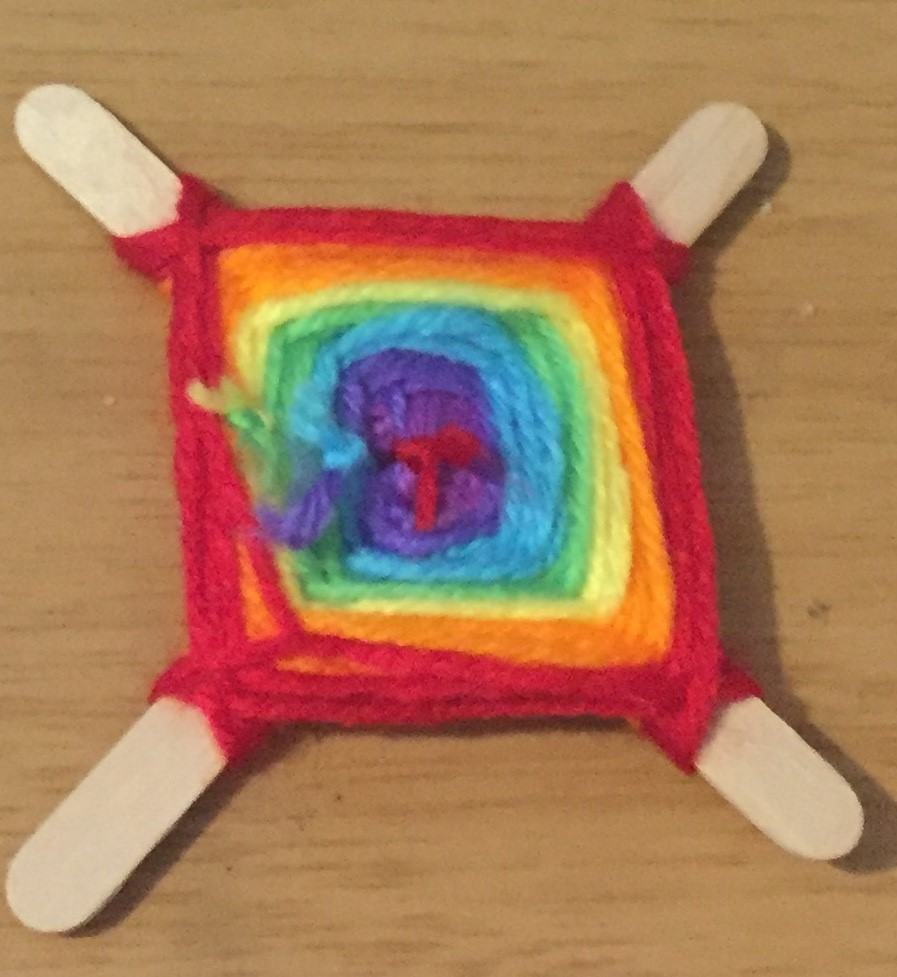 And here is what the front should look like. 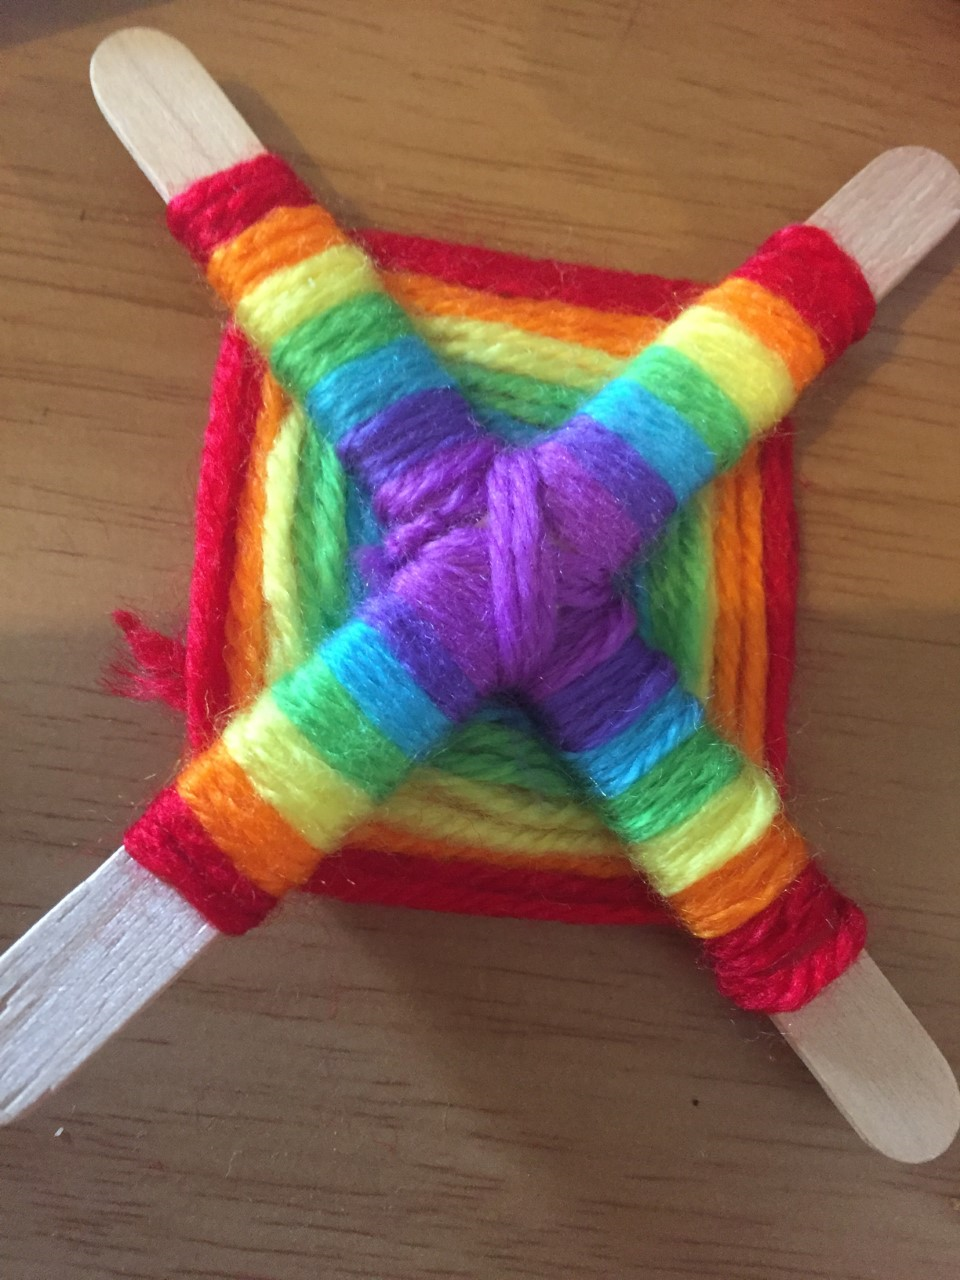 VariationsYou may have noticed that in the first photo of the post, not all of the stars look the same. This is because I varied them in a range of ways. Here are just a few ideas of how to make it look a bit different.
If you can, display them in your window or post them on social media (don't forget to tag @avicraftwool on Instagram and FaceBook!). Hope you enjoyed this post and happy crafting! Caiti Top New Crafts To TryBeing in lockdown can make us feel a range of emotions: sadness, anxiety, boredom but their can still be positive moments as well. One thing that I would recommend is starting a new craft. It may seem a bit daunting to introduce something new into this already uncertain time. However, not only does it make you feel less bored but it can help you to relax and give yourself a sense of achievement. Here are my top five crafts for you to try. If you need to buy any materials, contact us by clicking on the "Contact Us" button on the top of this website. 1: UpcyclingAt number one is upcycling! Pretty much anyone can upcycle; all you need is something old and unwanted, such as old clothes, and anything you can use to convert it into something useful, such as glue, scissors and/or sewing equipment. Another added bonus to upcycling is that it is good for the environment - with climate change and pollution on the rise, it is so important that we use energy and resources wisely! 2: MacraméMacramé is also becoming popular. It involves weaving or tying threads together to make patterns and decorations. We do stock kits, though they are running low. If we stock up, you can also use wool and follow instructions online. I would recommend that you find a tutorial that you like before buying though as certain patterns work best with certain thicknesses of wool or thread. 3: Tunisian CrochetTunisian crochet can sort of be described as a mix of knitting and crochet as it uses a hook and the method is similar; however, the hook is longer as it holds more than one stitch as once. As with macramé, there are lots of tutorials available online. Here is a photo of a cushion cover made by Sharon using Tunisian crochet.  4: Needle FeltingNeedle felting is when a barbed wire is repeatedly stabbed into a light, fluffy piece of wool to turn it into a felt-like consistency. We sell the wool and needles so you can follow online instructions or alternatively we have moulds, which you fill with the wool and hold in place while you felt so it forms to the specific shape. Once you master the skill you can make a range of figures. Here are a couple that Sharon and I made. 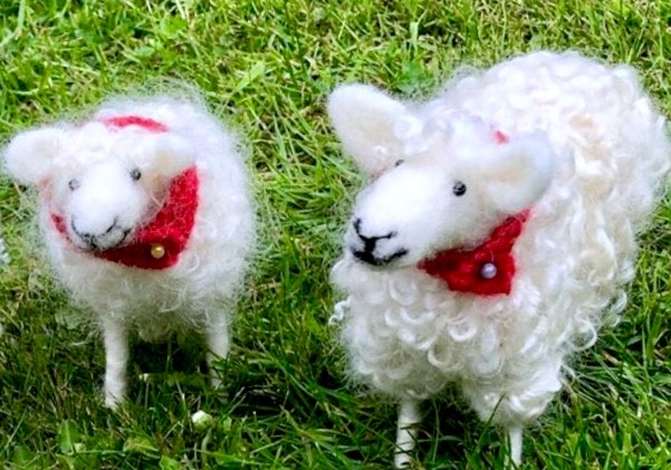 5: Pompom MakingIf long projects are not your thing, pompom making is perfect for you. All you need is some wool and stiff cardboard or a pompom maker (I recommend pompom makers, which you can buy through us, as I personally find them a lot easier to work with). If you buy a maker, it has instructions on the back; otherwise, as with the other crafts, tutorials are available online. Hope this helps and makes time indoors more enjoyable. Until next time, happy crafting! Caiti Is it just me, or has anyone else got stuck into a load of brand new box sets to pass the time? One of my favourites right now is Fame - I have started to fall in love with everything about the eighties and have even started a jumper inspired by the decade! For those of you that are new to knitting, making a jumper is not nearly as daunting as it sounds - it very similar to the flat mitten in the sense that you do the same types of stitch and structure. It is just on a larger scale and consists of more parts. Below are the colours I am using for the jumper  The yarn is Number One DK. You dont have to wait until lockdown is over as we can send out, drop off or you can collect from the shop 7 days a week. Use the contact us form to tell us what you would like.
I recommend you get some. It is super soft, easy to work with and there are 20+ colours available, all of which we stock. My jumper consists of a variety of thick and thin stripes of colour, white ribs and a white collar. For those of you that are experienced knitters, it is dropped sleeve (keeping true to the decade!) and may be twisted at the back, though I have not decided quite yet. When it is finished, I'll let you know and upload a few photos. Can't wait to write again, but until next time, happy knitting! Caiti A Variation To the Mitten Pattern (Part Two)Today will be the last day of the mitten knit-along (and this time I really mean it). We will start by looking at stocking stitch before casting it off and sewing it up. Final Bits of Knitting.Once you have completed the rib, you do the main part of the mitten in a stitch called stocking stitch. This is relatively straightforward as it uses stitches which we have looked at before, but a slightly different arrangement - instead of alternating between one knit stitch and one purl stitch across the row, you do a whole row of knit stitches for your first row and every other odd numbered row and a whole row of purl stitches for your second row and every other even numbered row. This creates the pattern shown below: Front  Back 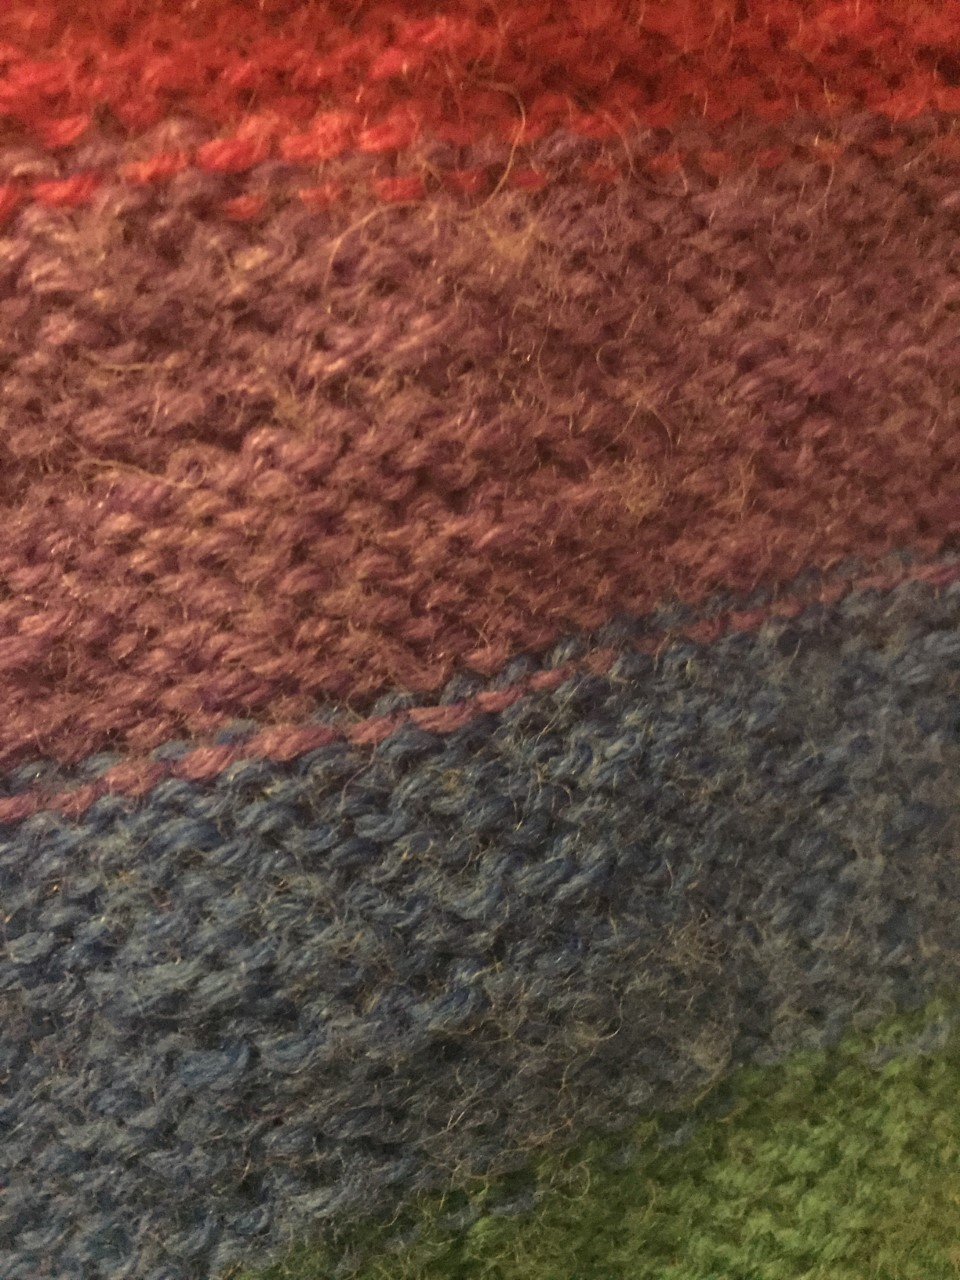 You can do as many rows of this as you like, so long as you keep track of it. I did fifty-eight rows. Once you have done this, do a short rib to finish. Cast OffTo cast off, you start by doing the first two stiches of the row in the knit pattern. 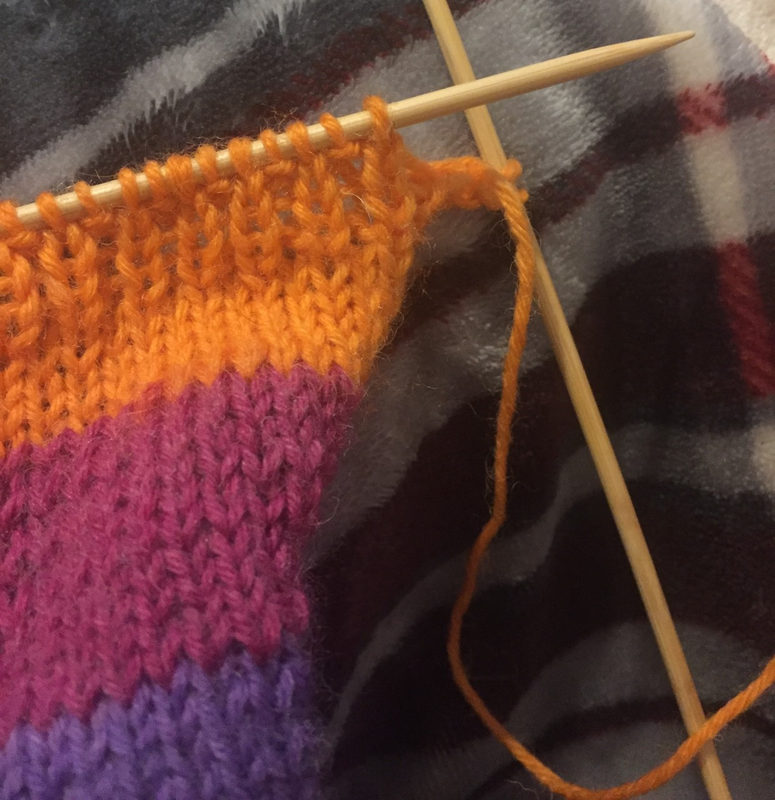 Then, pull the stitch on the right needle (or left needle if you are left handed) that is furthest from the end of the needle over the other stitch and off. 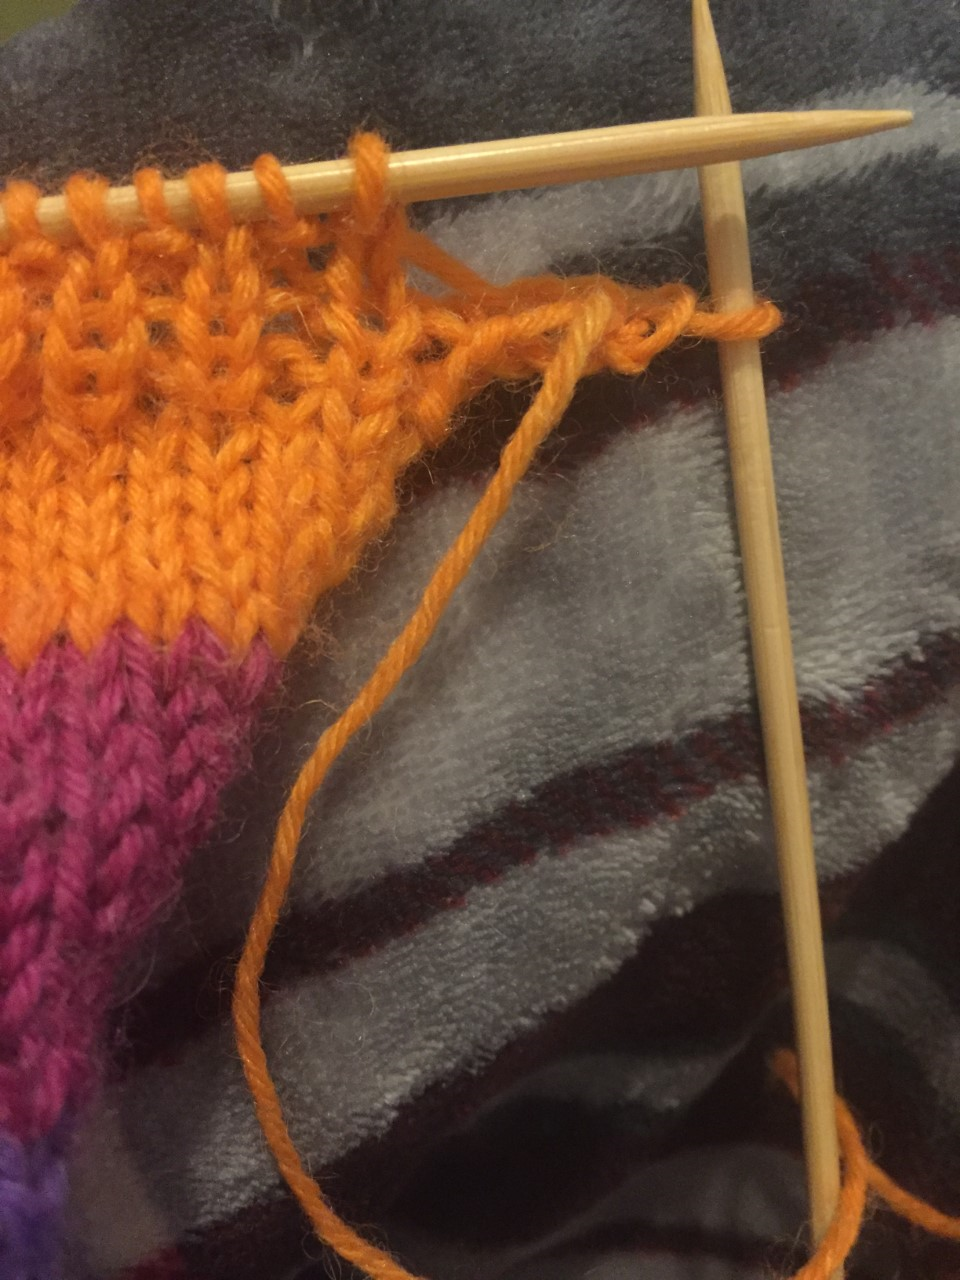 After you have done that, knit the next stitch and repeat the last step. Keep doing this until you have just one stitch left in your writing hand. 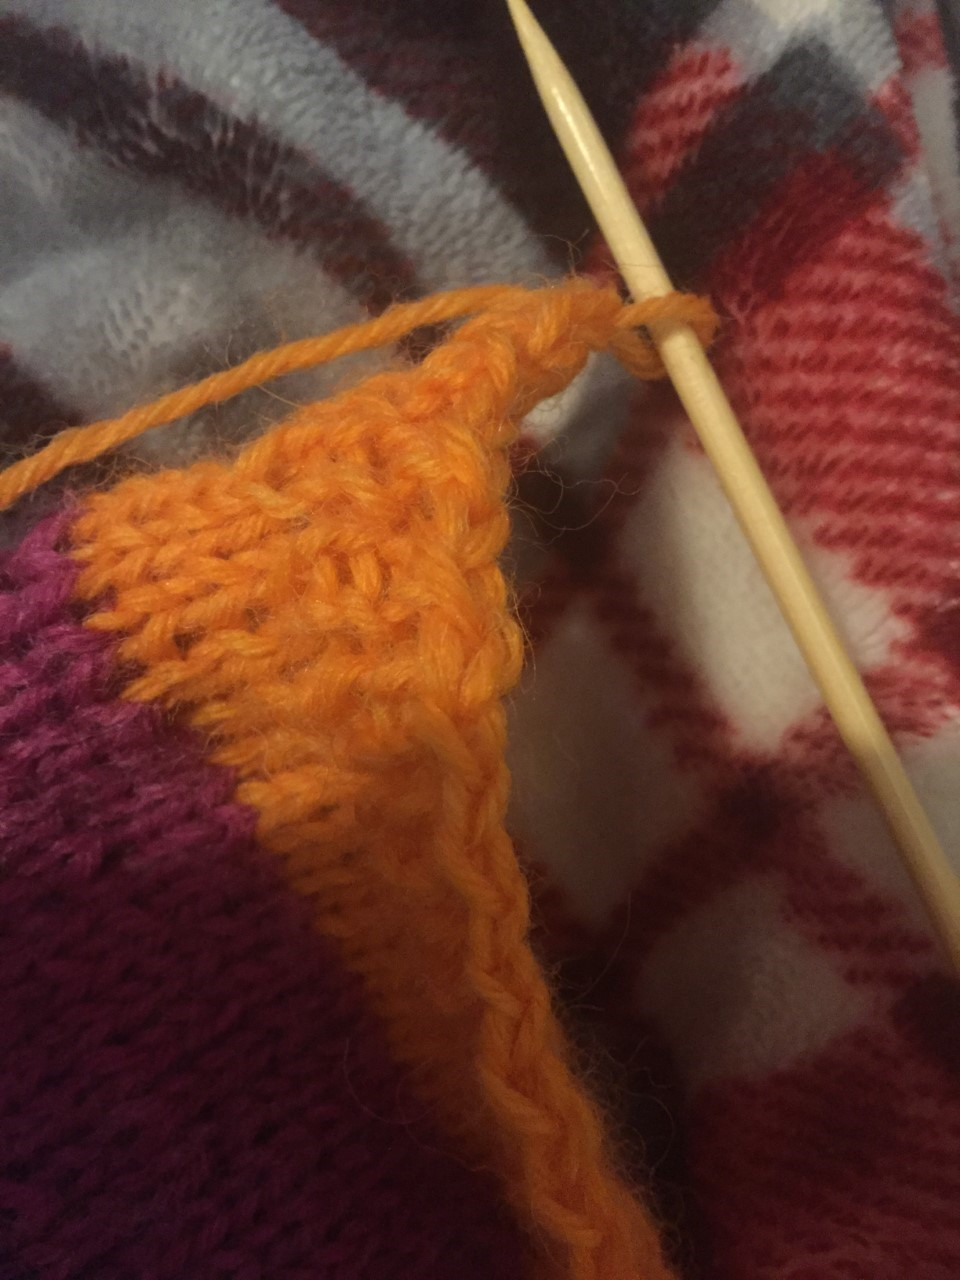 Now, cut the ball of wool off, leaving an end that a couple inches longer than the mitten. Take the final stitch off of the needle and thread this end through it tightly, forming a small knot. 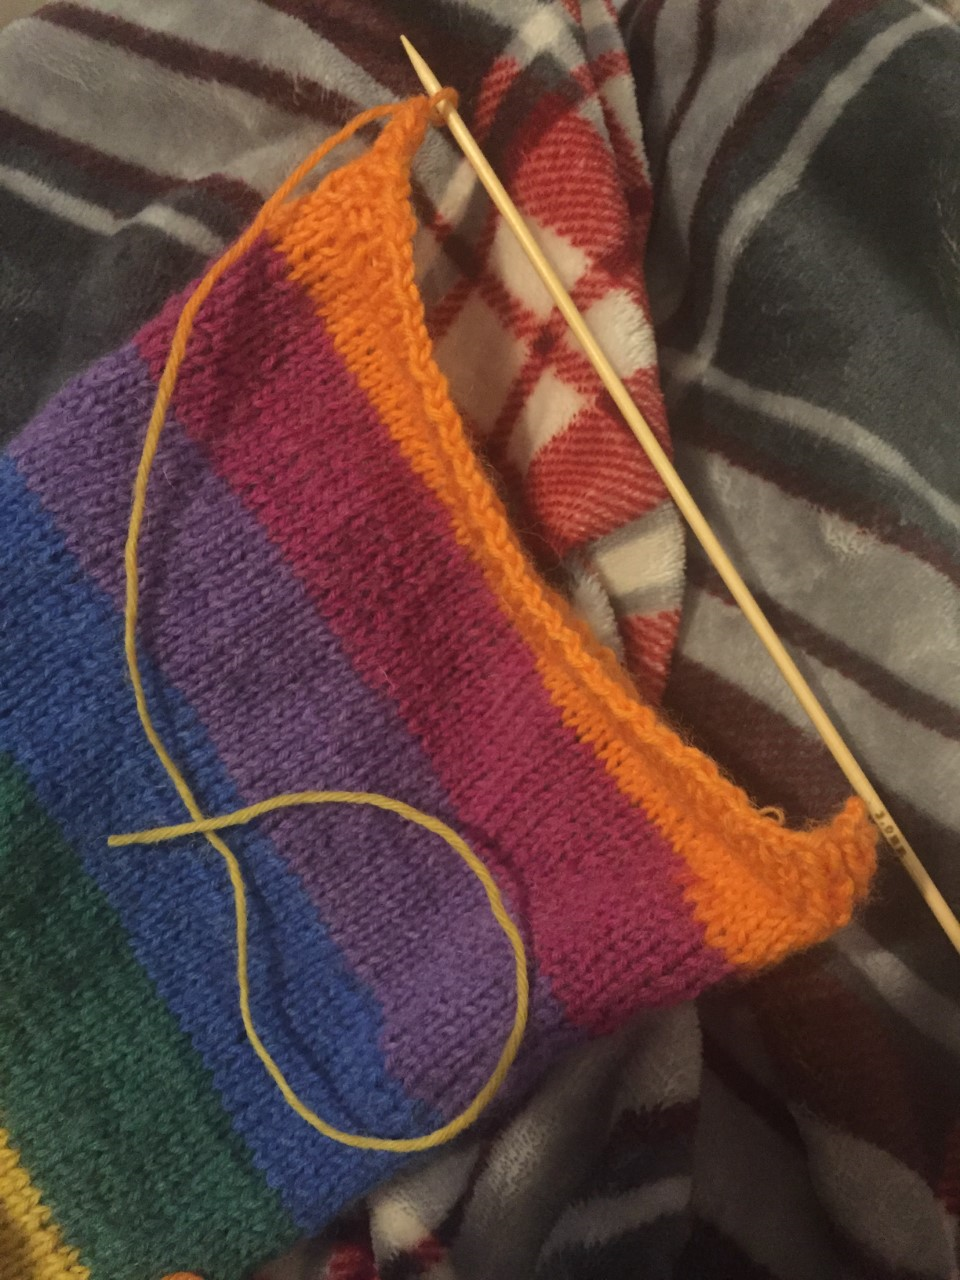 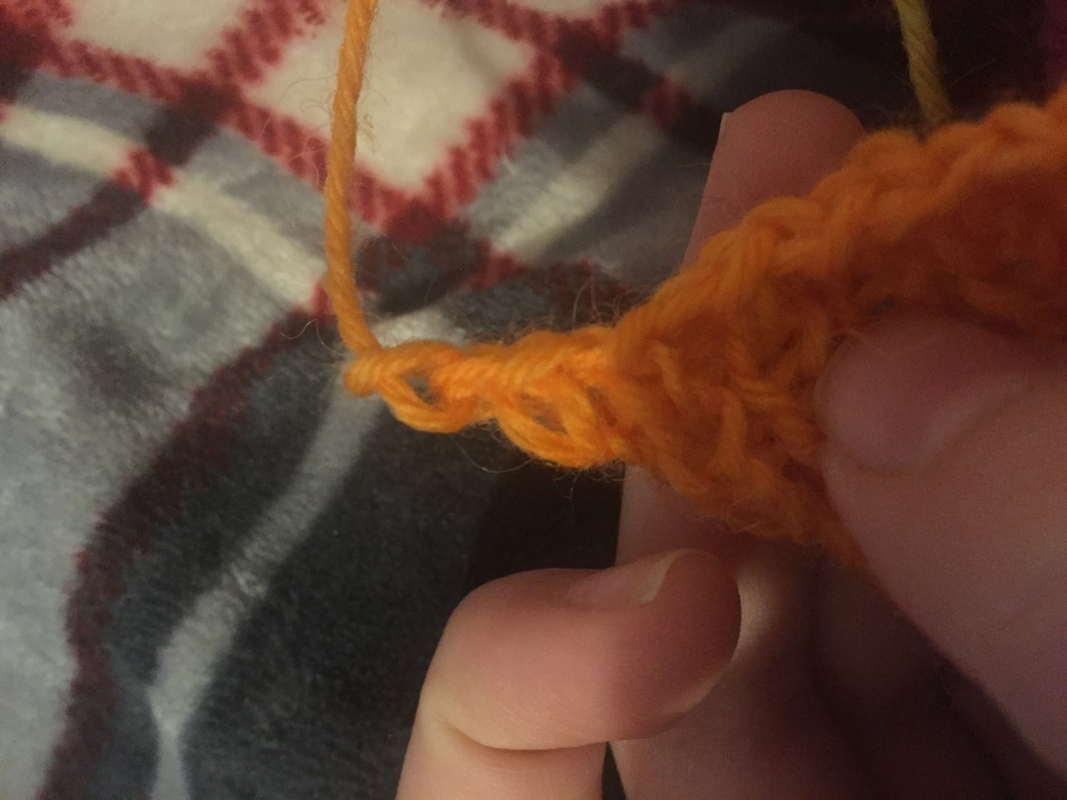 All that's left to do now is to sew it up! Sewing UpWe will be using the end that you left from casting off to sew it up. To start, hold the knitting as shown below and put the yarn through one stitch on the other side and pull it tight. 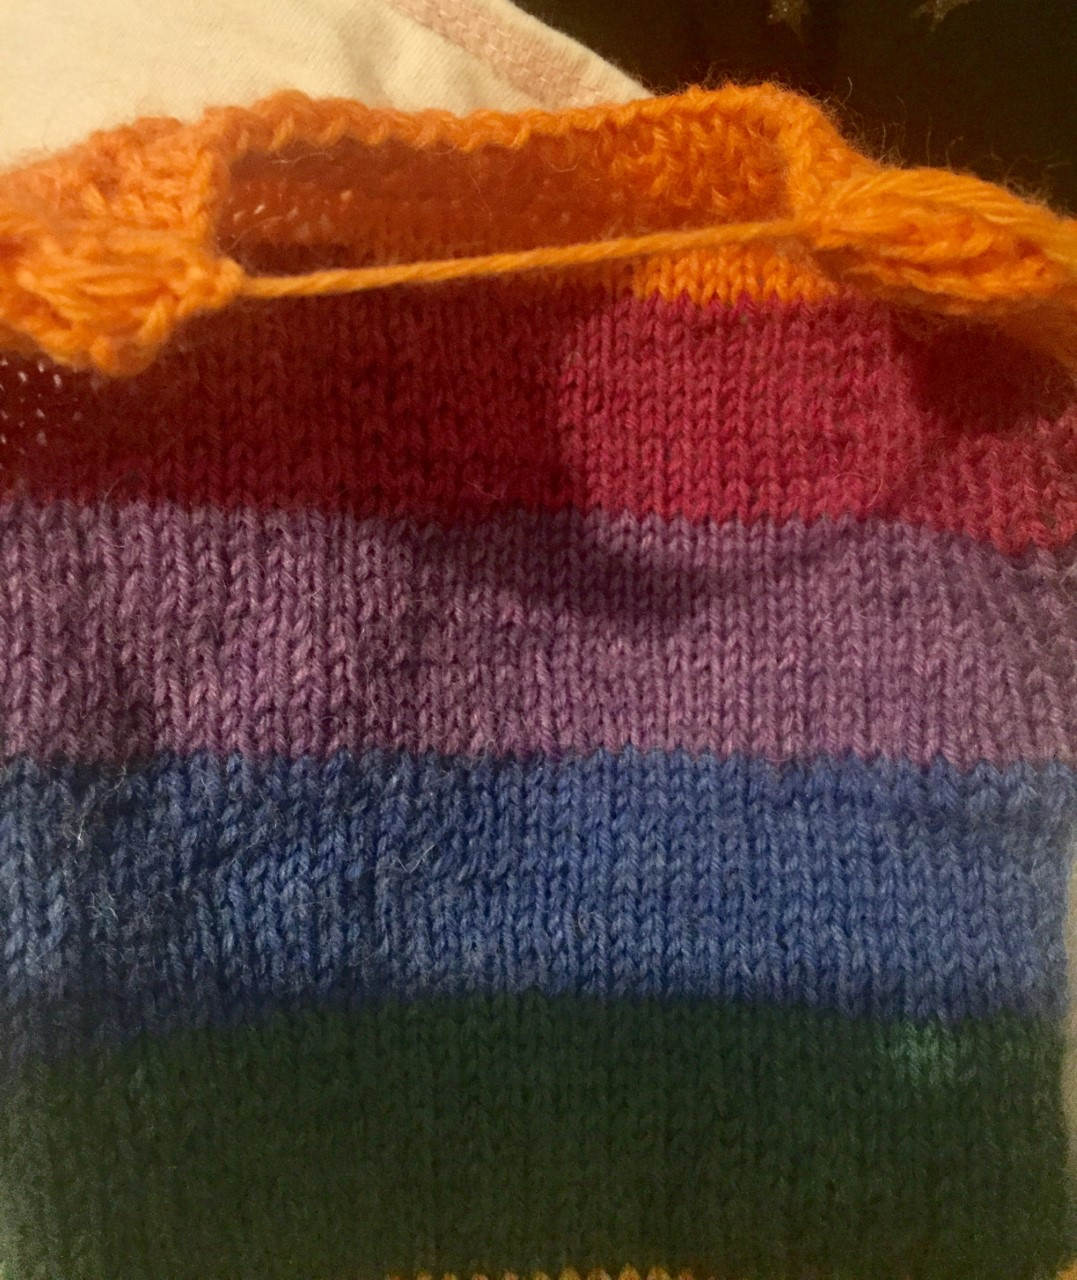 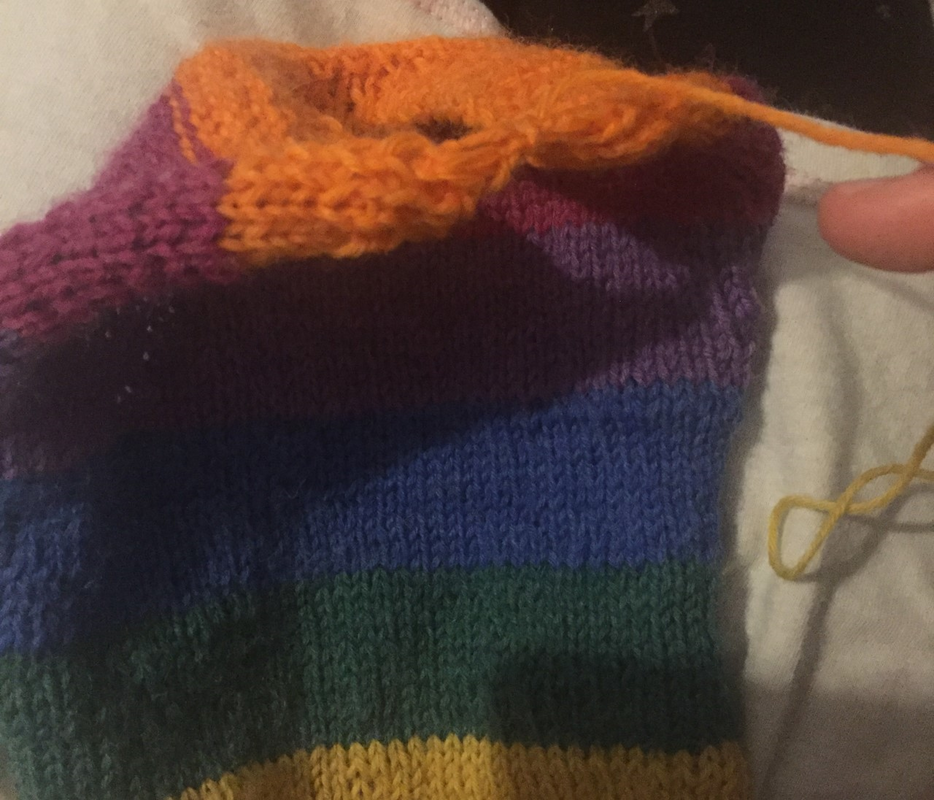 This causes it to fold with the back on the outside To secure it, go over it again. This is called a double stitch. 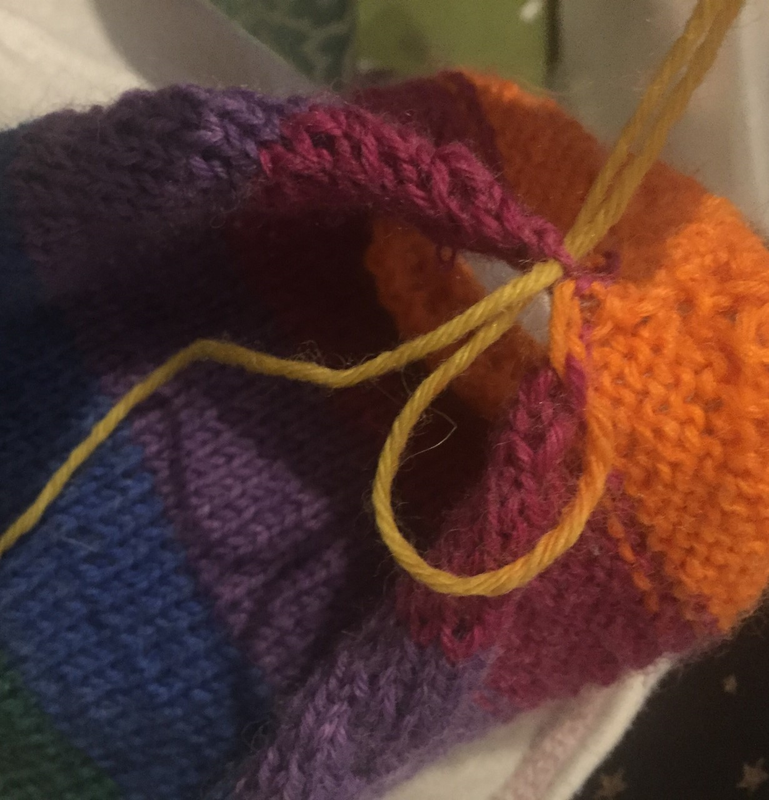 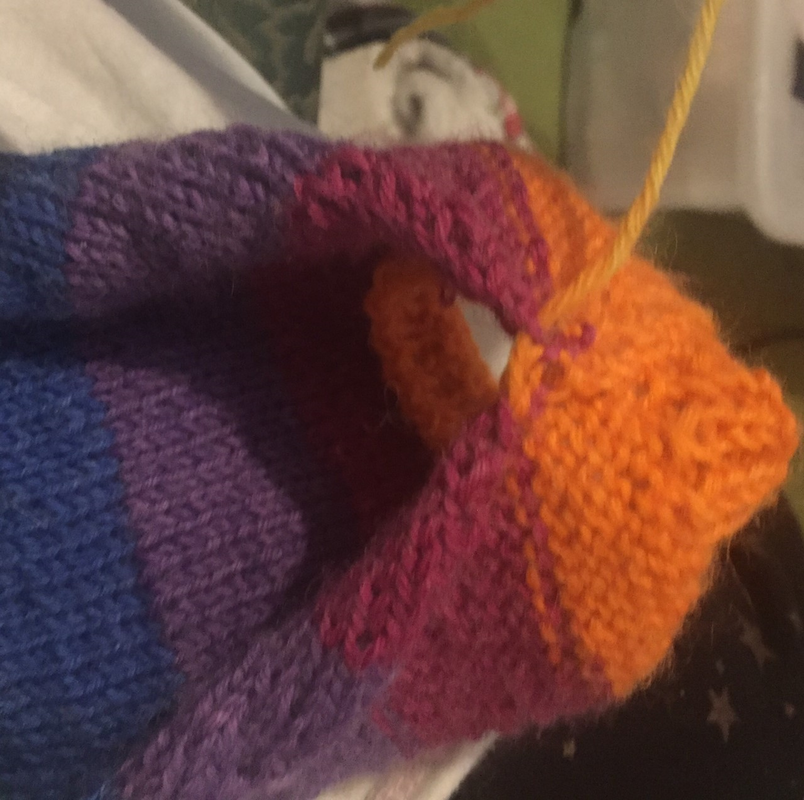 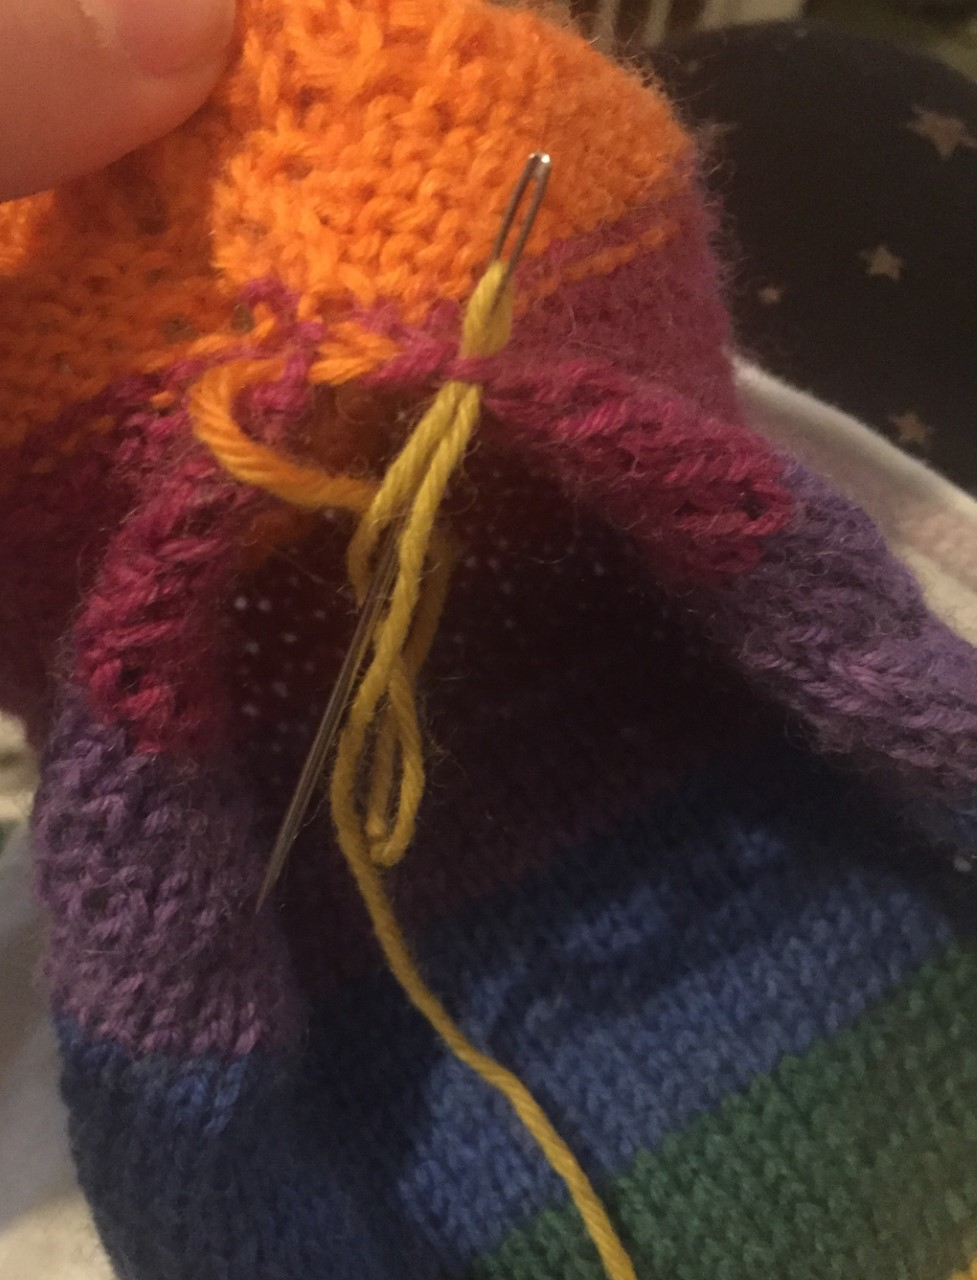 Then, sew below as normal. Keep doing this until the seam is a similar length to the seam in the image below. 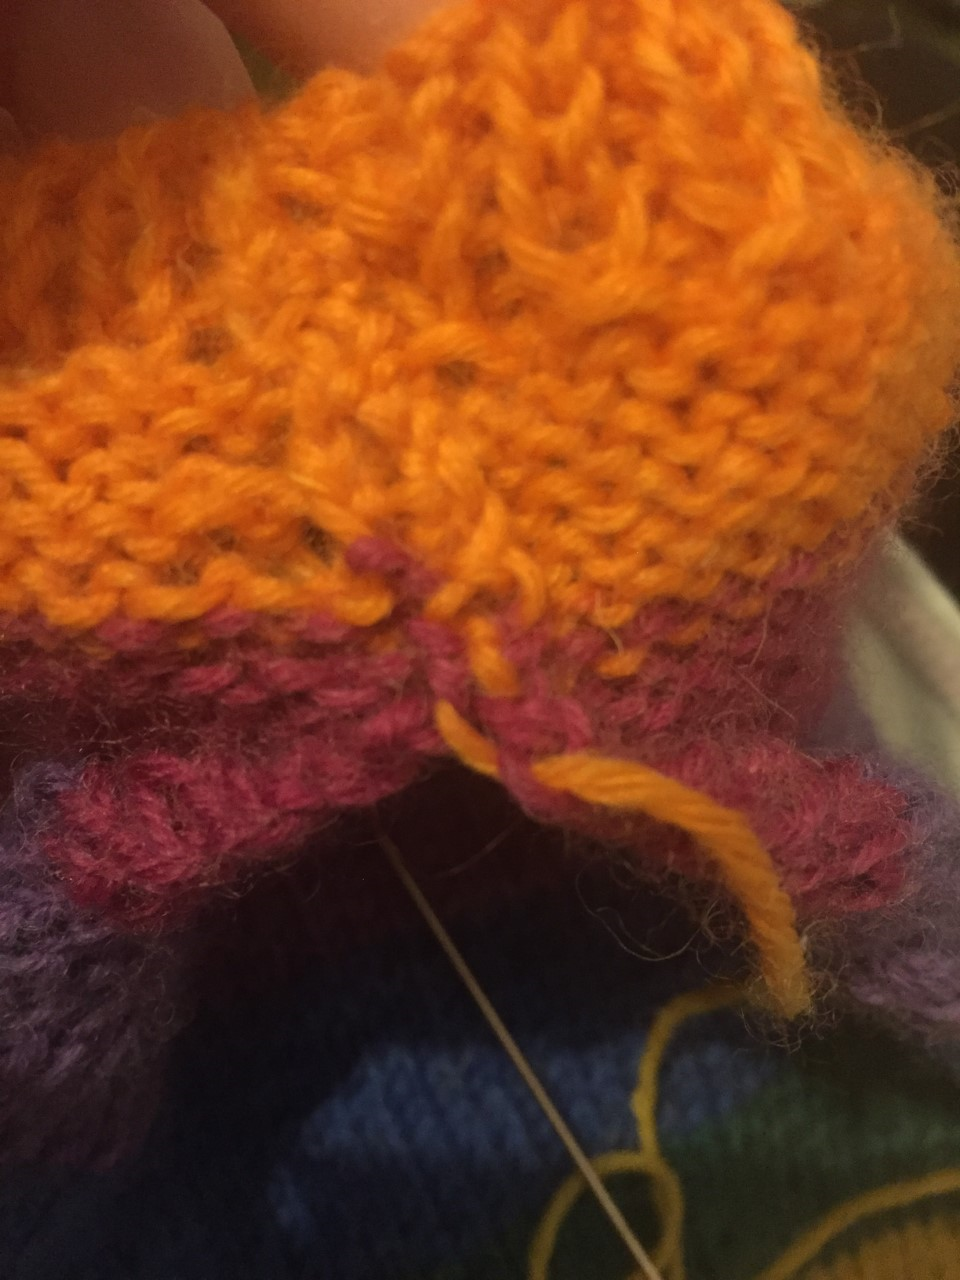 *Do not worry if your seam looks chunky or wonky. Mine certainly did! Fortunately, you will be turning it in the other way later and people will not be able to see it. When you get to this point, weave the yarn through on one side until the length of the weaved section is just a little more than the thickness of your thumb. 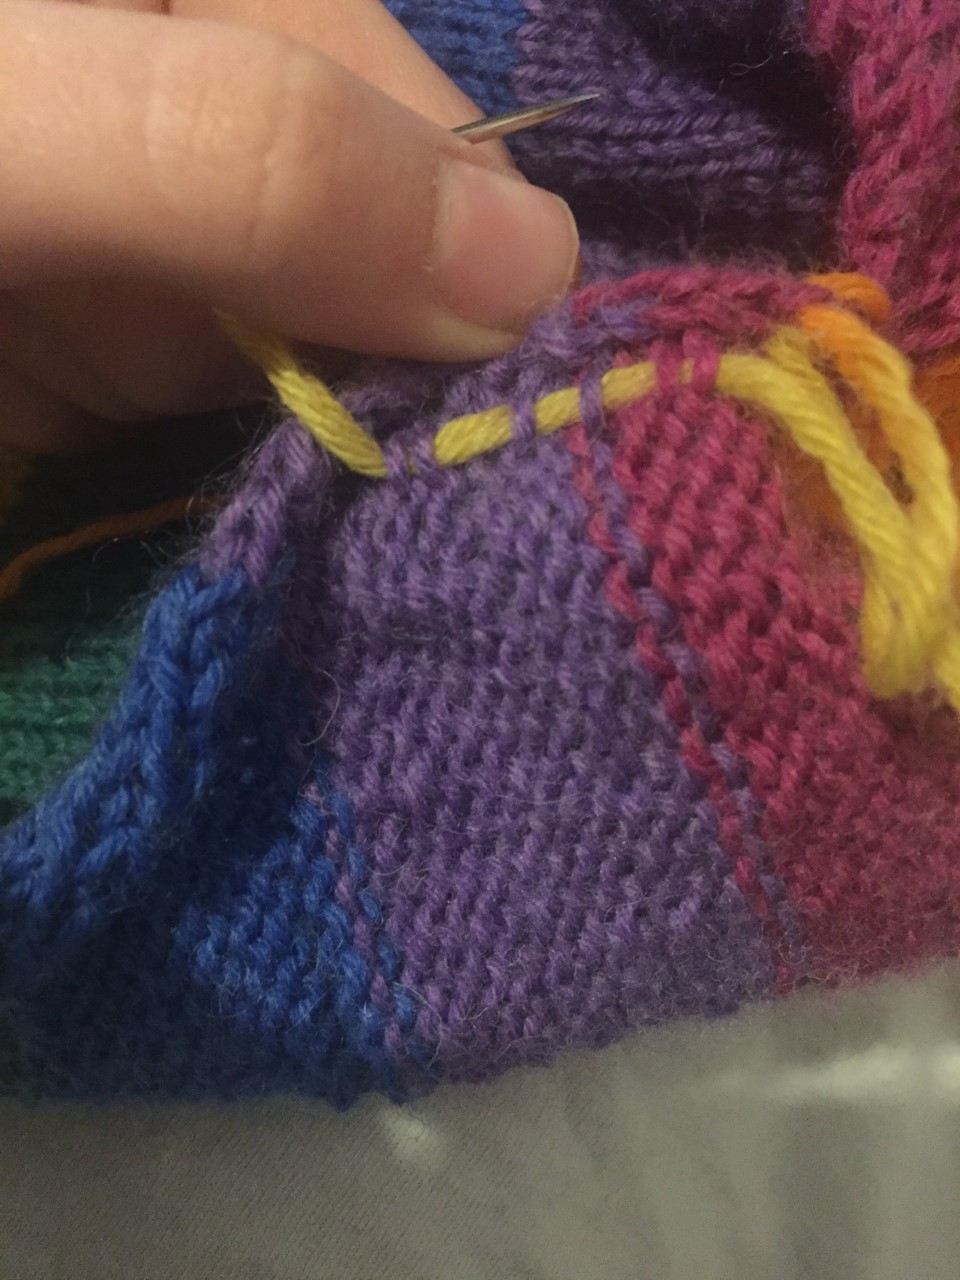 Once you have done that, continue sewing as you did before with a double stitch to start.  When you get to the end, pull the needle through the final stitch to form a knot. 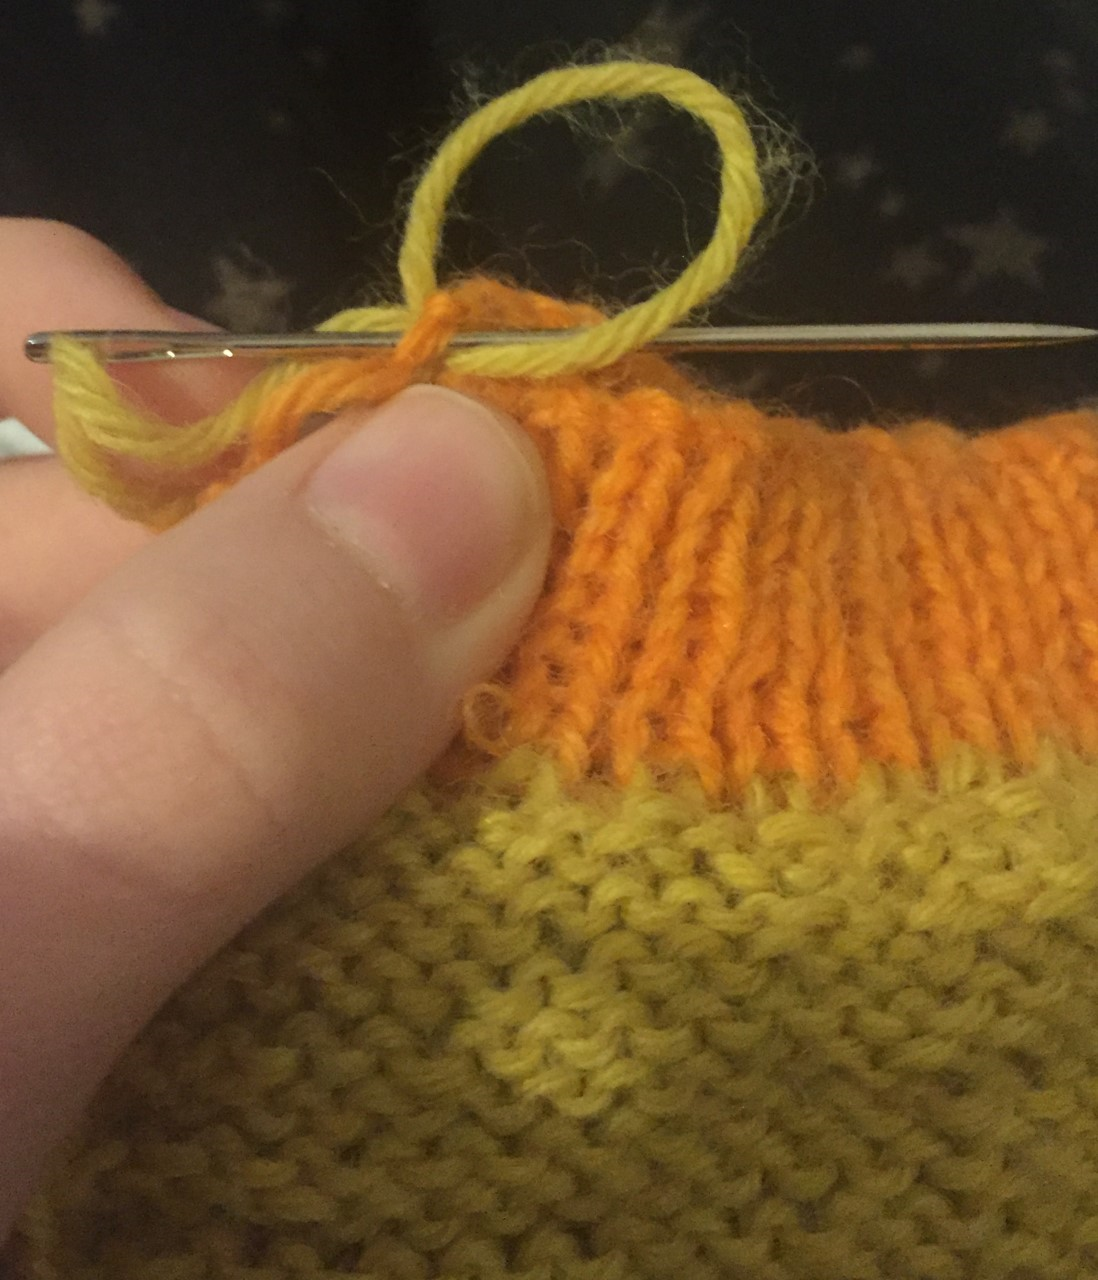 For extra security, do a double knot with the two ends before trimming them. 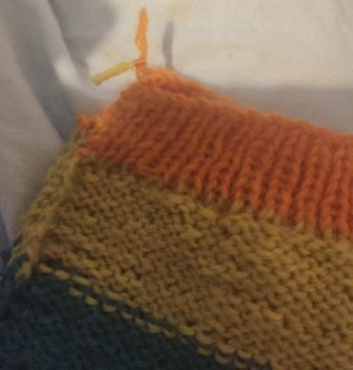 Finally, turn it in the other way and voilà! You have a mitten. Everyone's will vary, but here is mine for guidance. Don't worry if your stitches aren't quite perfect or if you can see the seam in places - that is completely normal! Practice makes perfect. 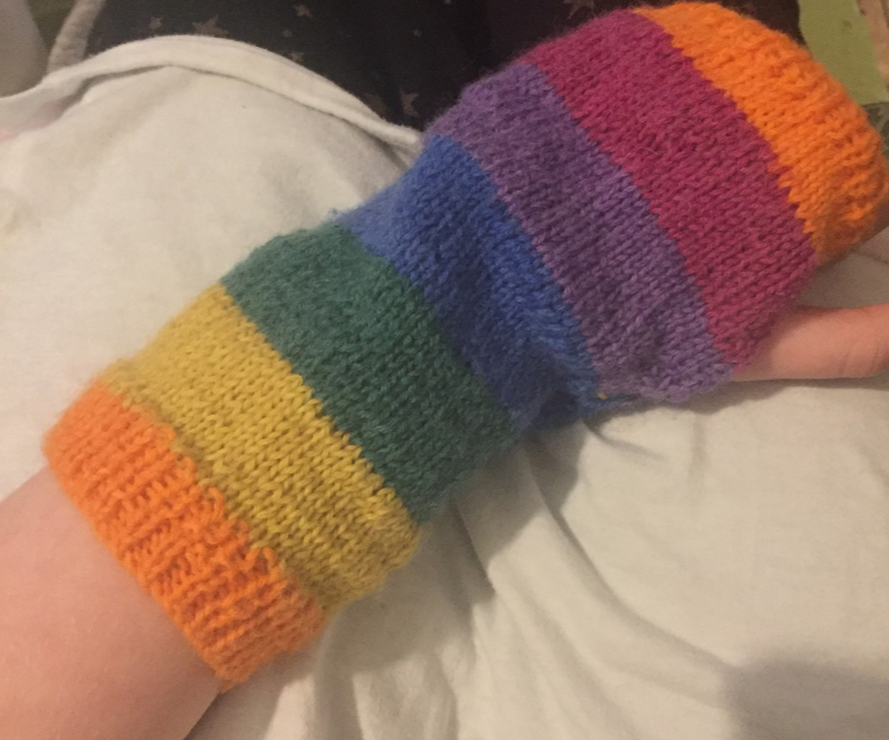 How do yours look? Don't forget to post your knitting on social media and tag us @avicraftwool on FaceBook or Instagram.
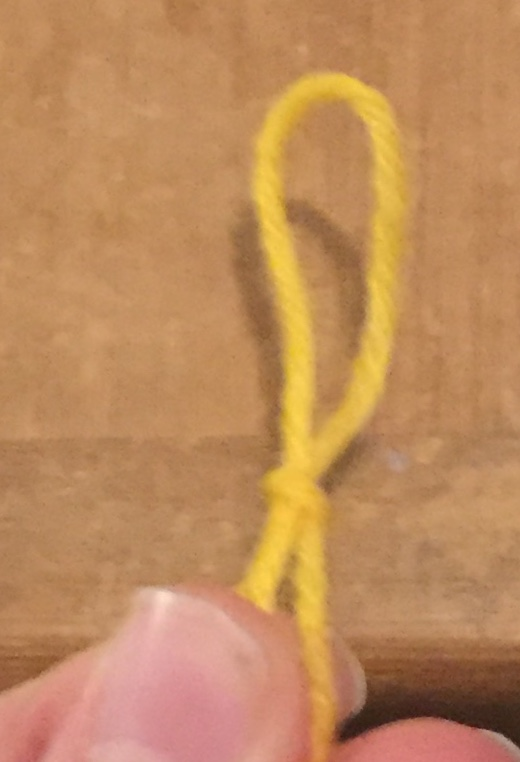
Until next time... … Happy knitting! Caiti A Variation to the Mitten Pattern (Part One)Happy Easter! I hope you are all enjoying yourselves. It may be a very different Easter, but I hope you still do get to talk to friends and family, albeit digitally, and that you are able to have a bit of a sense of "normal" where possible, whatever that means to you. A little while ago, I promised to do a knit along for those who do not own circular needles. Well, today, I will explain how to do the last knit along on straight needles. A lot of the steps are very similar; however, I will explain them again for those of you who could not do the last knit-along. Casting OnTo cast on, you start by making the first stitch as a slipknot. Firstly, make a loop around 30cm away from the beginning of the ball. 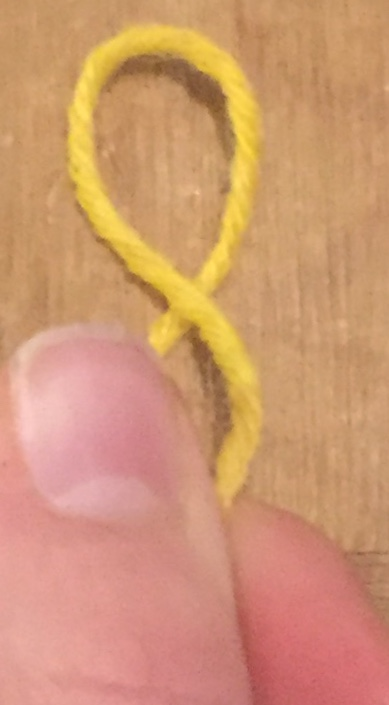 Then, pull the strand that is not attached to the ball through it in a looped shape. This is your first stitch. Now, put this on the needle an pull the two ends to secure it tightly on the needle (but not too tightly - make sure it can move along the needle).
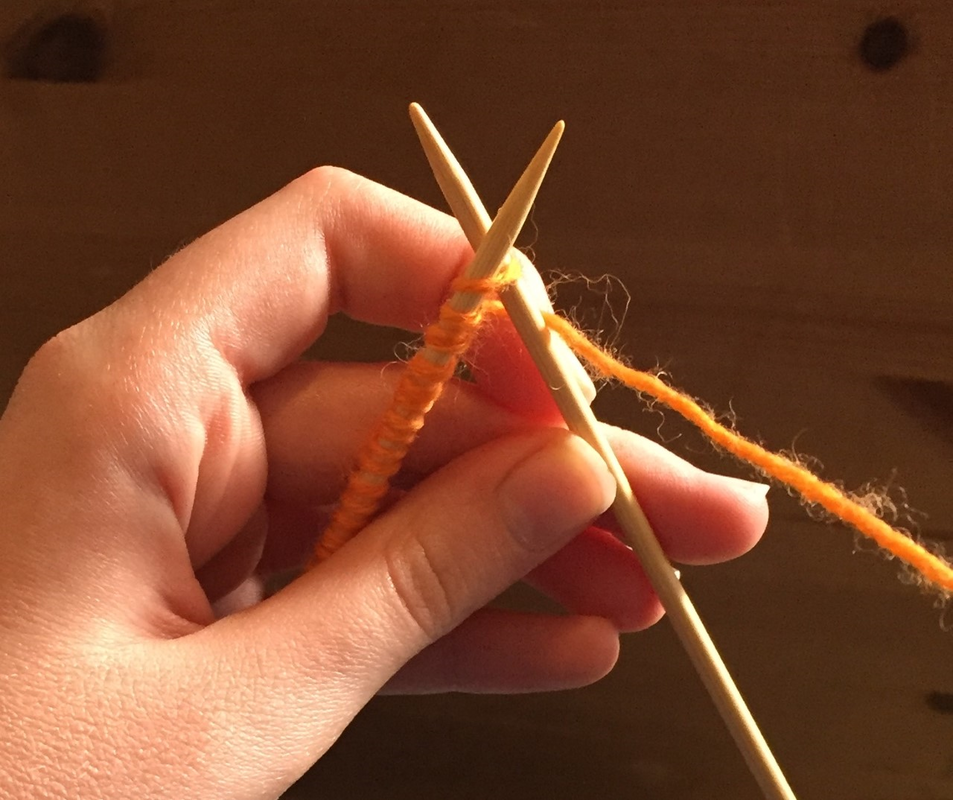
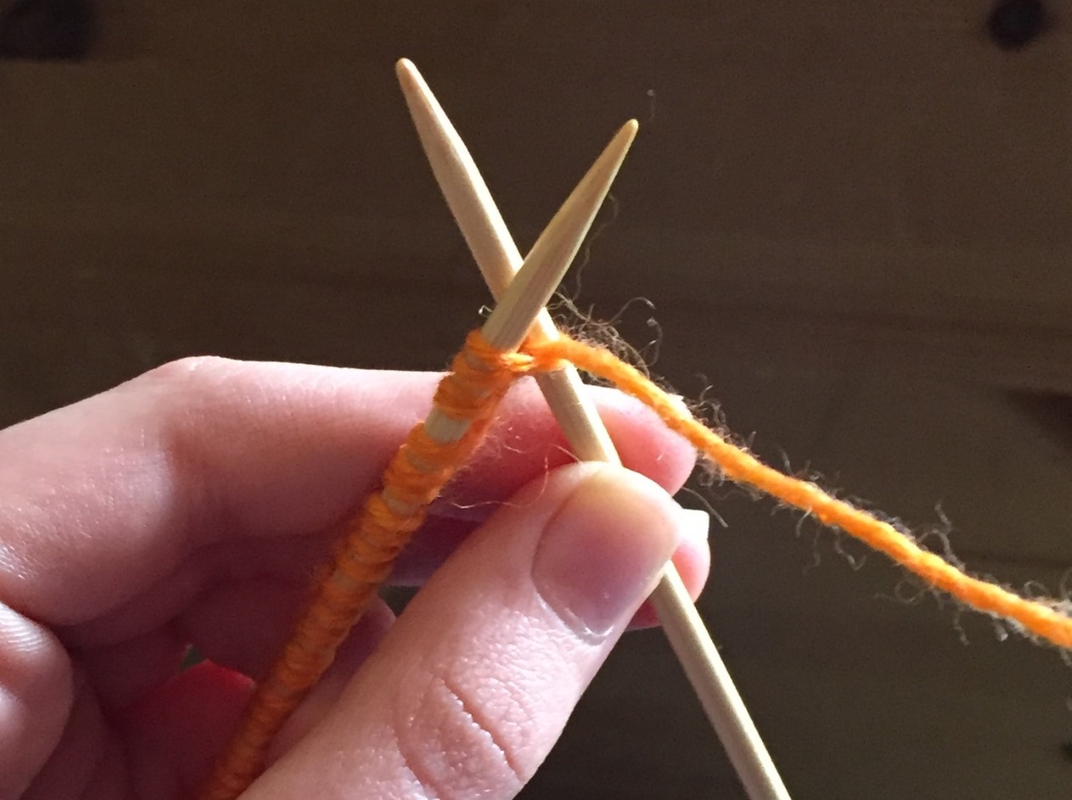
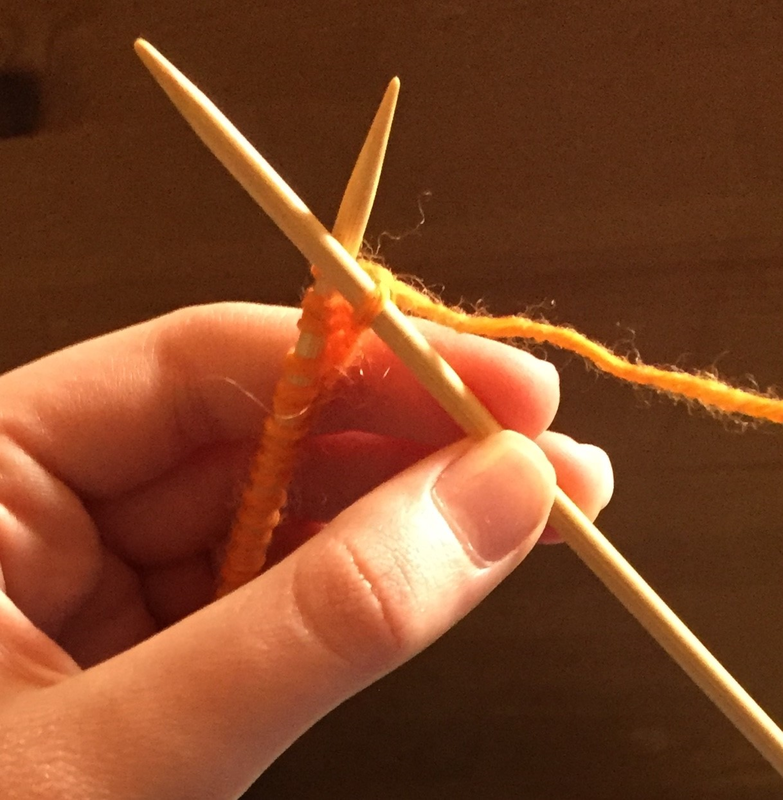
Then, put the needle with the stitch on into your left hand (or right hand if you are left handed) and the other needle in the other hand. Put this needle into the back of the stitch and make a loop around the back needle using the end of the wool that is attached to the ball. Then put the needle and the loop through the stitch, bringing the back needle to the front. Finally, put what is on the front needle onto the back needle, where the other stitch is. Repeat this until you have enough stitches to go around your wrist. I cast on 52, but you can have any even number, depending on the size of your hand. 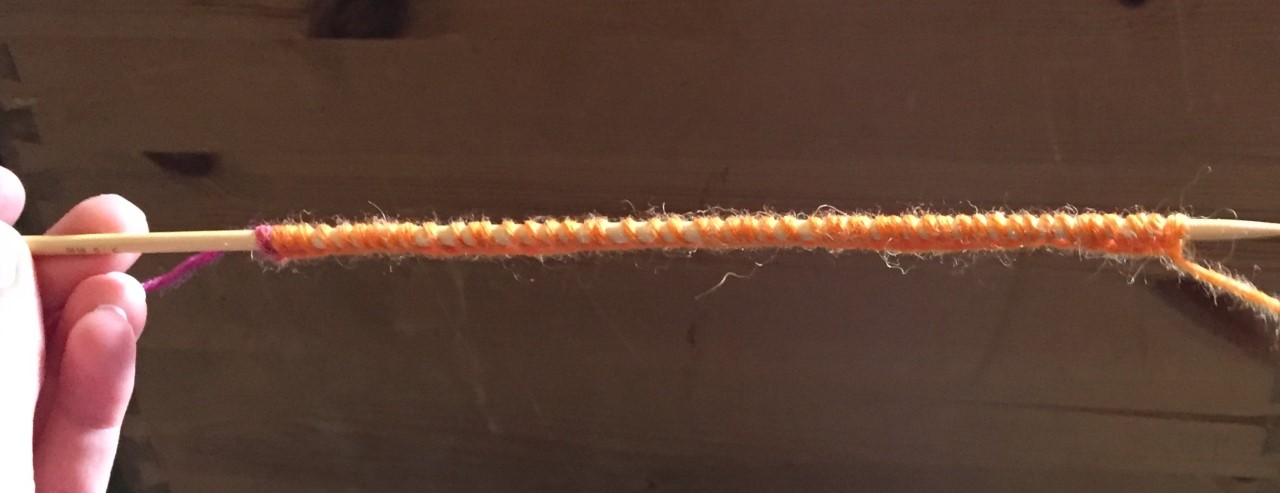 Rib StitchRib stitch consists of alternating knit and purl stitches. To do this, as with casting on, you hold the needle which does not have any stitches in your writing hand, and the one with the stitches on in the other. Similarly to casting on, you start the knit stitch by putting the needle without stitches into the back of the first stitch, winding the yarn that it attached to the ball around the back needle and pulling the loop and needle through the stitch and round to the front However, instead of putting what is on the front needle onto the back needle, you slide the first stitch on the back needle off.  Next, to purl, you put the yarn round to the front instead of the back. You then put the needle that is in your writing hand into the front of the stitch, wrap the yarn around this front needle, pull the needle and the loop through the stitch and to the back, and slide the stitch off of the other needle. Keep alternating the knit and purl stitches until you reach the end of the row. You should have ended on a purl stitch with the stitches on your writing hand. Then put the needles into the opposite hands and repeat. Do as many rows of rib as you like, but you do not need to do a lot as it is not going to make up the whole mitten. I recommend doing 8-10 rows, but it does not matter what amount you do, so long as you write it down somewhere so that you can make both mittens even. The rib pattern should look something like this. 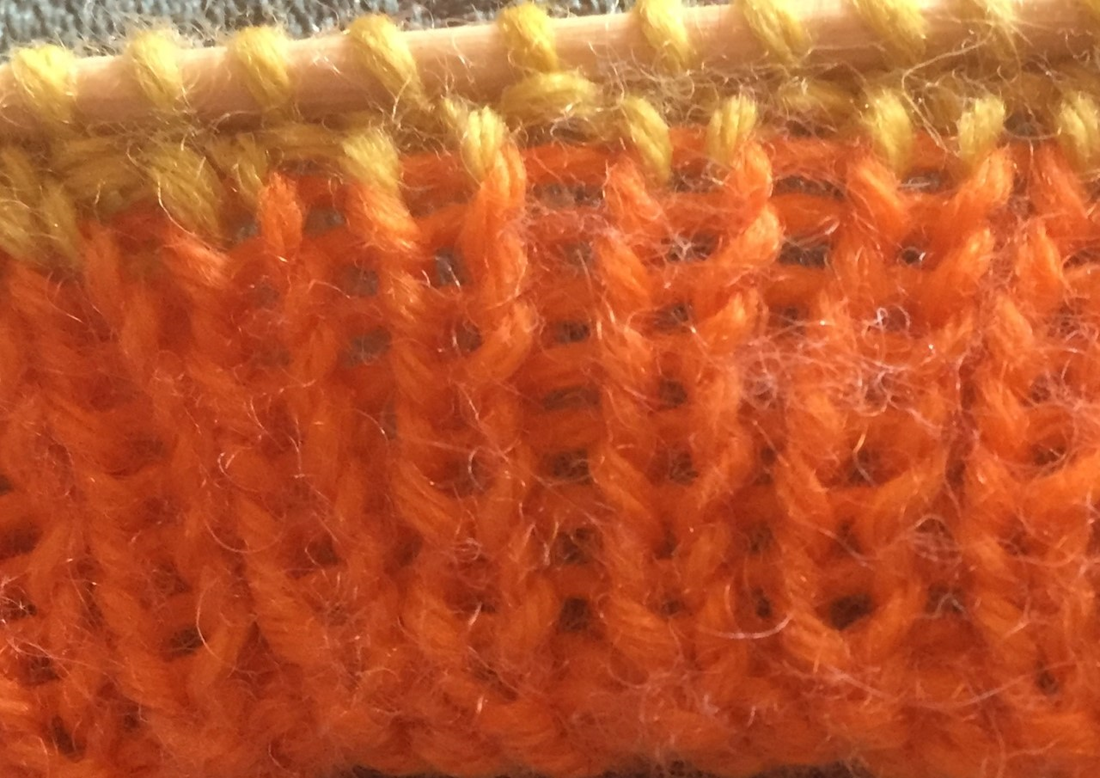 That's it for today. Remember, if you are having any problems, feel free to leave a comment. Also, there are loads of websites and YouTube videos out there if that is more suited to you.
Otherwise, happy knitting! Caiti Fingerless Mitten Knit-Along Part ThreeToday is the final day of the knit along, and we will be looking at how to shape the thumb hole and how to cast off. Shaping the Thumb HoleTo start with, you do the first row as normal, making sure that the end of the wool that is not attached to the ball is on the right side of the garment. When you have done that, turn it around but do not switch needles. Instead, do purls on the stitches you have just worked with (for instructions on how to purl, see the Fingerless Mitten Knit Along Part Two).  Then, after you have done that, switch the needles round and do purls on the inside of the unworked stitches, then turn the work and knit the stitches that you have just purled. Switch the needles and repeat this process 4-6 more times, depending on the size of you thumb. After you have done this, continue doing the stocking stitch as you were doing before for as long as you like, then a short rib to finish it off. Cast OffFirstly, you need to work two stitches in rib. Then, pull the one furthest from the end of the needle over the other stitch and off the needle. Then, do another stitch and pull the back stitch over and off. Repeat this process until there is only one stitch on the right needle and no stitches on the left. After this, slide the stitches that remain on the cable on the left needle and continue this process until you have one stitch left on the right needle. Then cut the end so that it is around 10cm long, then take the remaining stitch and pull the end through. 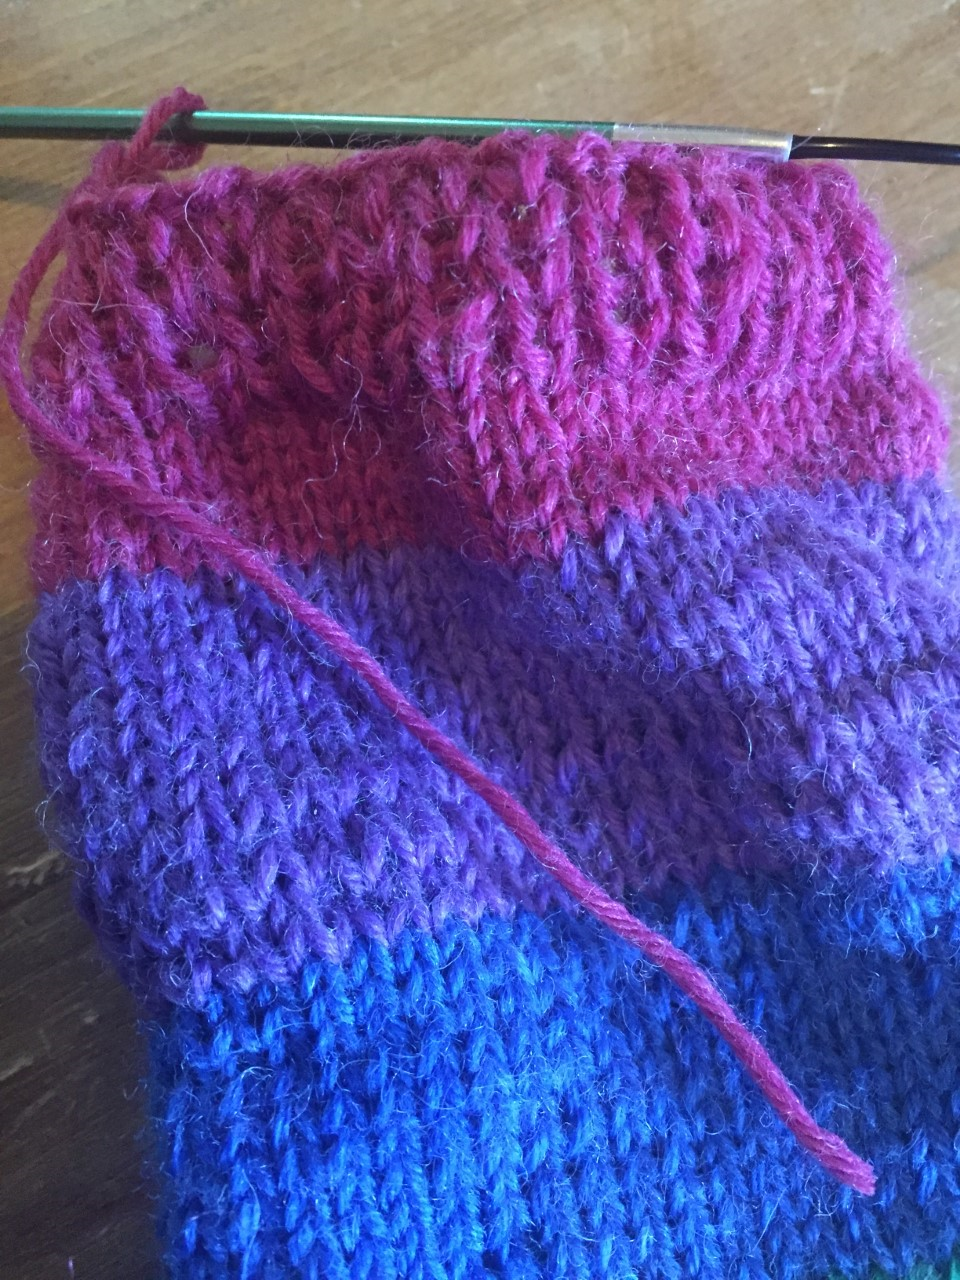 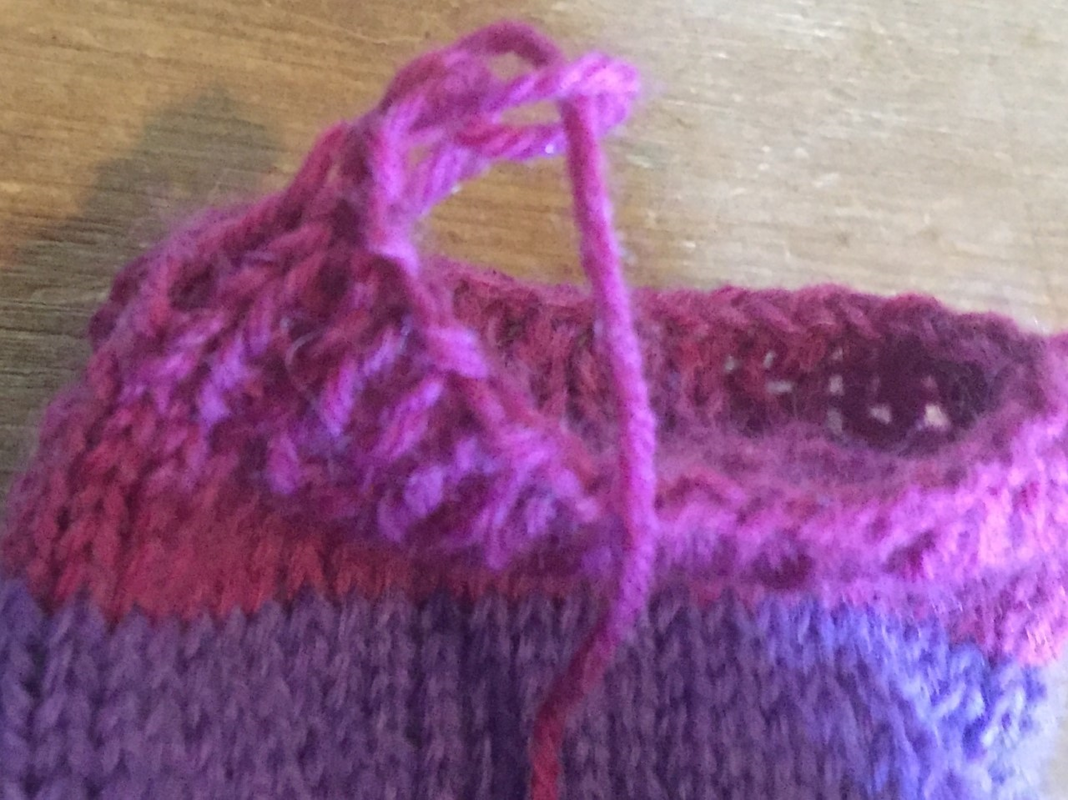 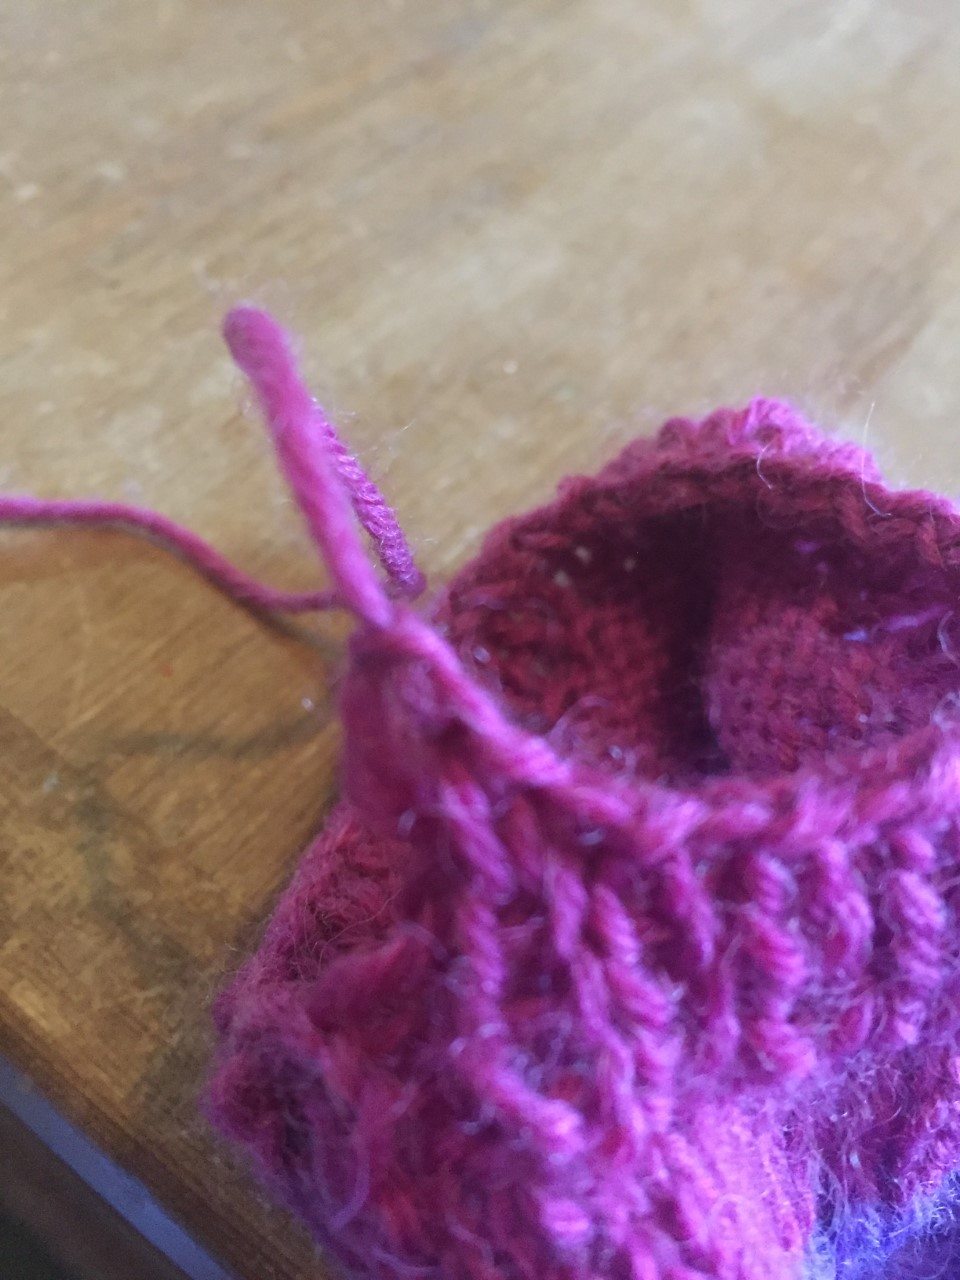 If you have any problems, let me know in the comments. Otherwise, well done! That's your first mitten completed. The second one follows the exact same pattern. Here is how mine went: 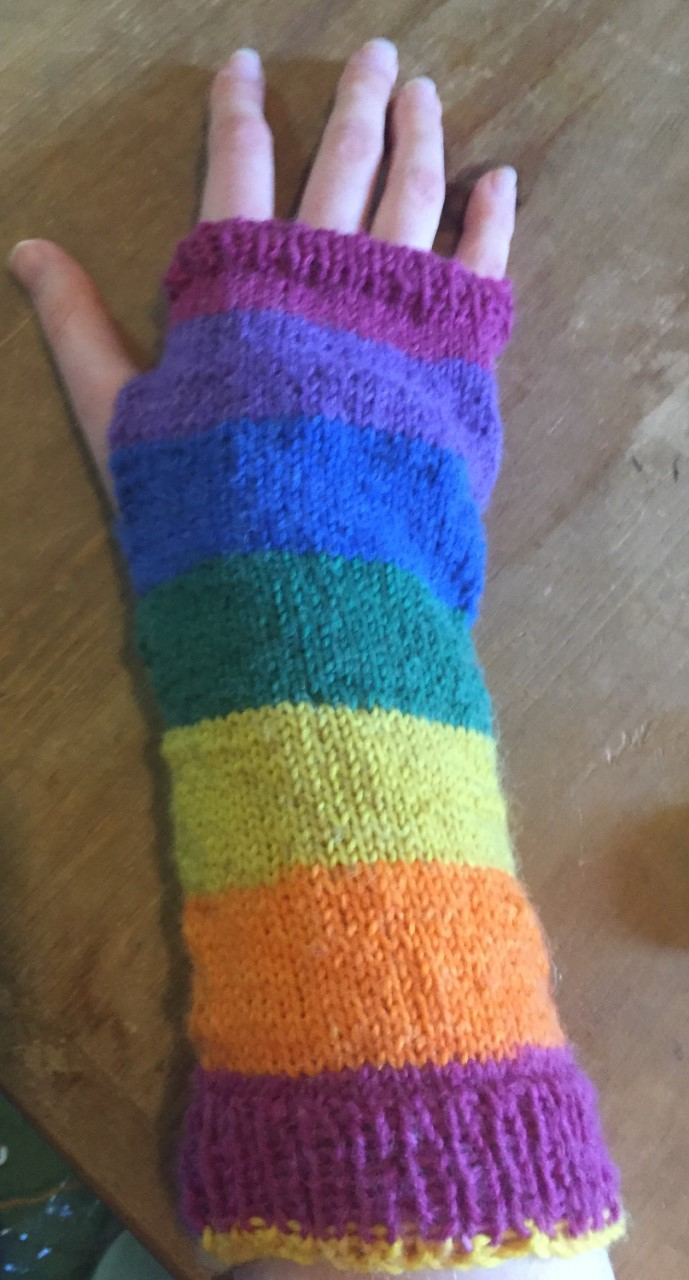 How did yours all go? Send them in via social media, using @avicraftwool for Instagram or @avicraftwoolbromley for FaceBook.
Happy knitting! Caiti Fingerless Mitten Knit-Along Part TwoWelcome back to the blog! Today we will be looking at how to do the basic stitches needed for the mitten. As you may remember, you had casted on your stitches and split them between the needles. For today, you will need to start by holding needles as shown below (or the opposite way if you are left-handed), with the yarn that is attached to the ball on the bottom needle. 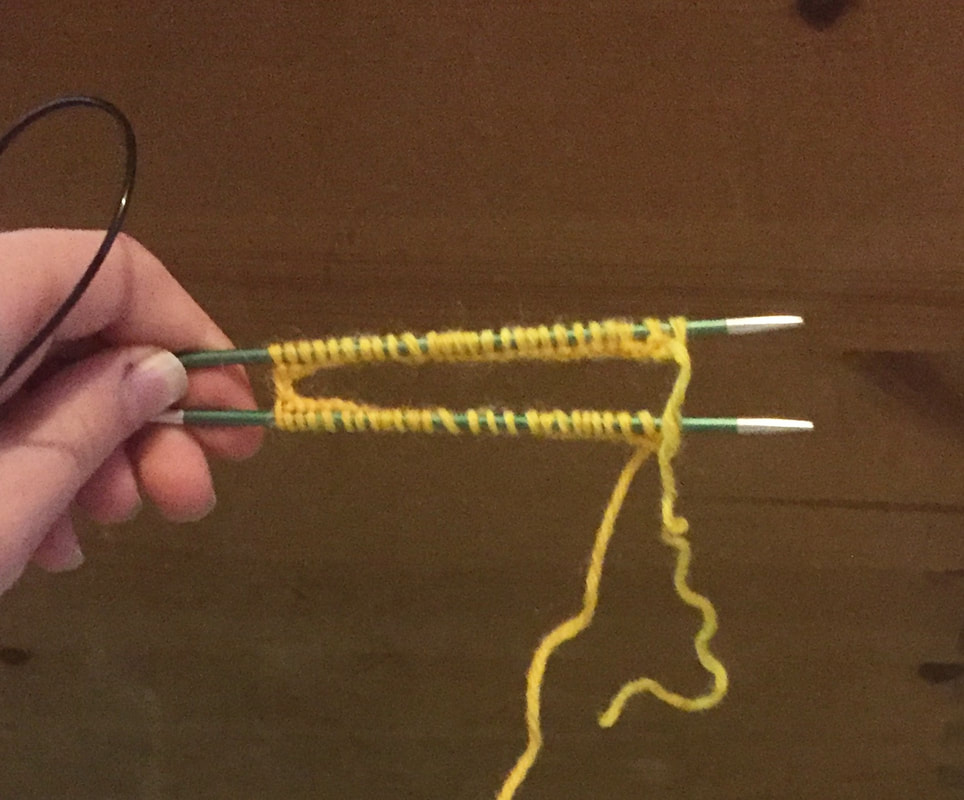 Then you need to pull the bottom needle so that the stitches go onto the cable but do not join with the stitches on the other side of the needle. 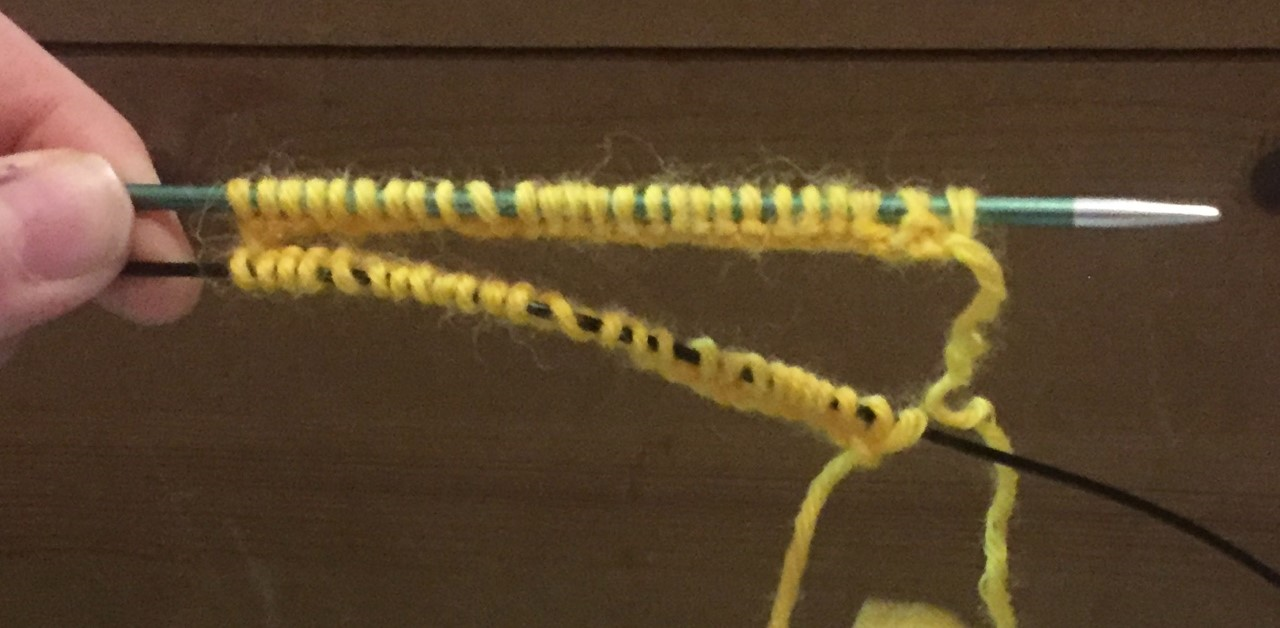 Now you are ready to start knitting! Firstly, we will look at a type of stitch pattern known as rib. RibRib consist of two main stitches, knit and purl, which are alternated across the row. The knit stitch is similar to casting on; you put the needle on the right into the back of the stitch on the left, then form a loop around the back needle and pull the stitch through it (for a more detailed description, see the blog entry for 31.03.2020). 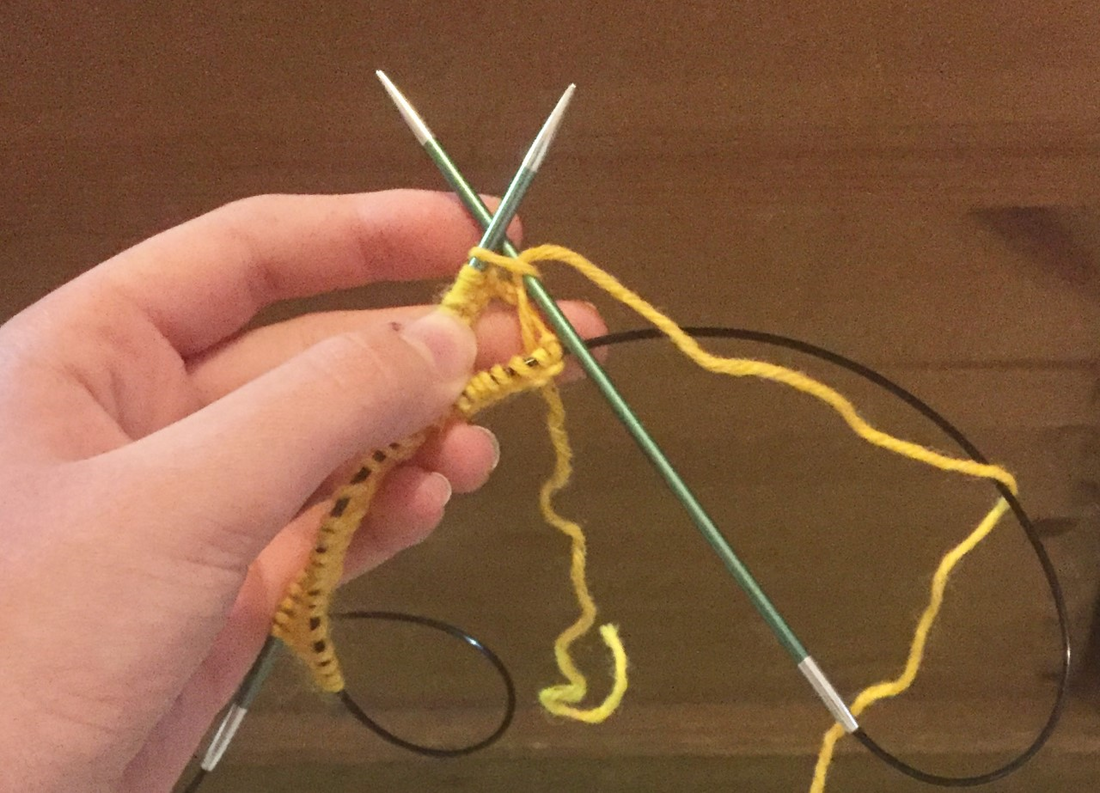 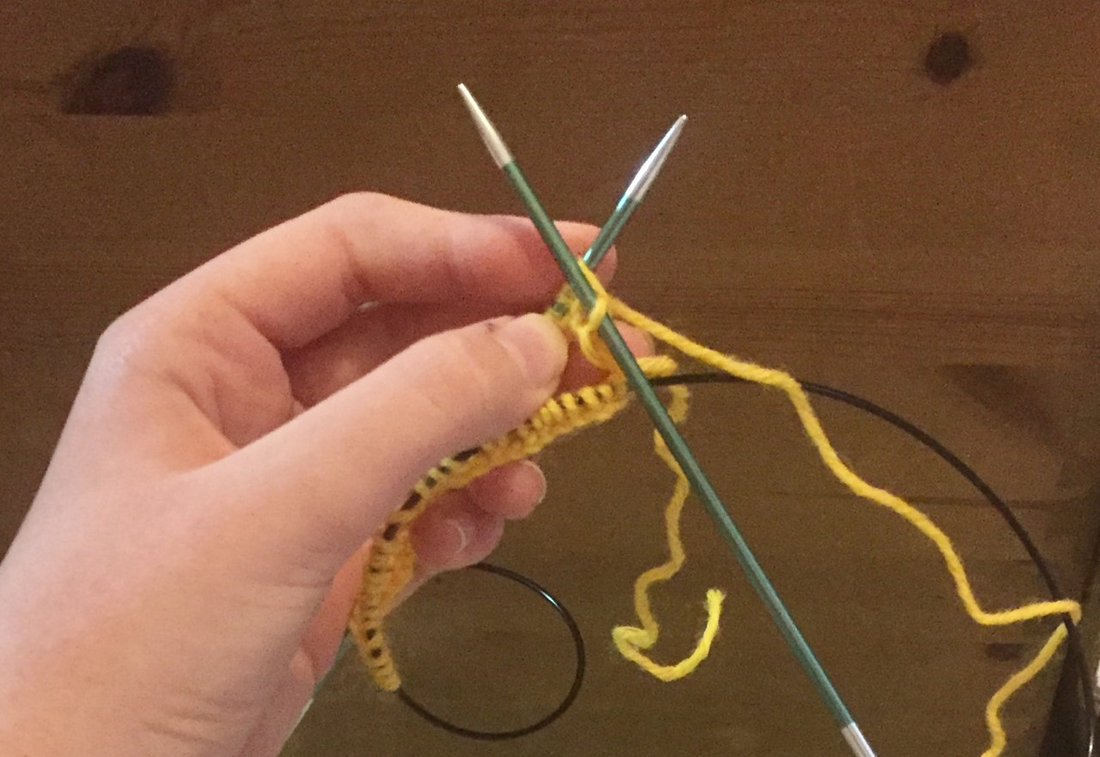 However, instead of putting what is on the top needle onto the bottom needles, you slip the stitch that you put the needle into off of the left needle and tighten it by pulling the yarn that is attached to the ball and the stitch 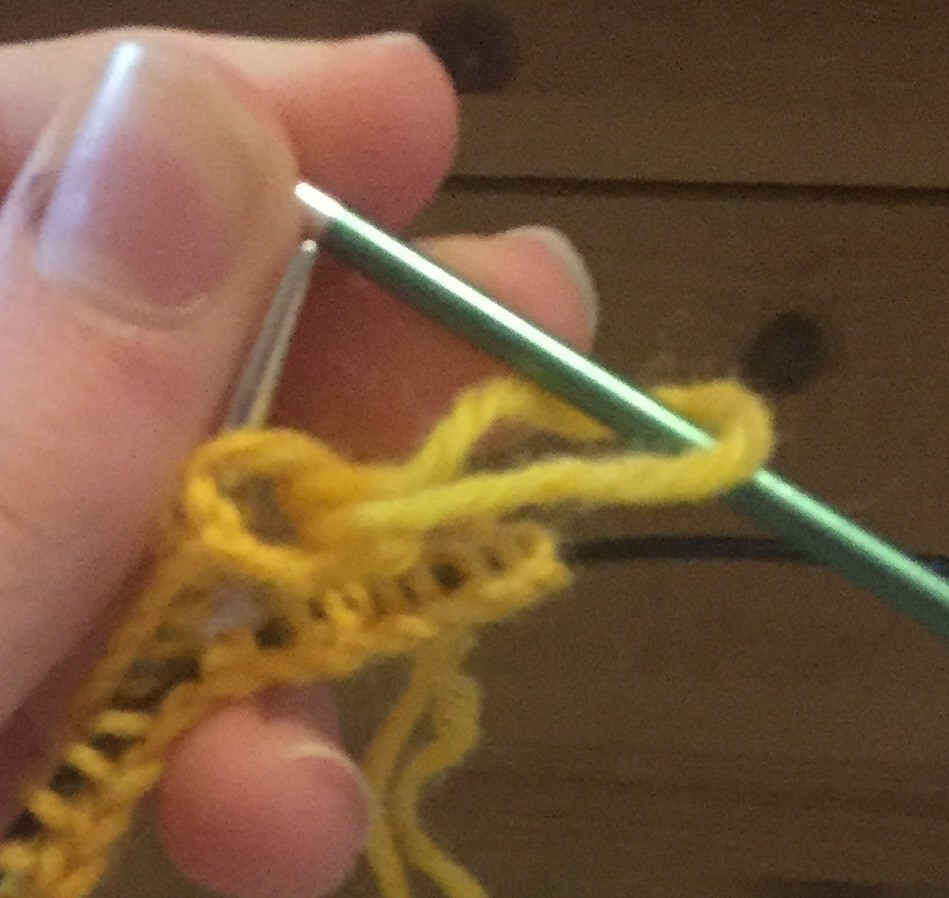 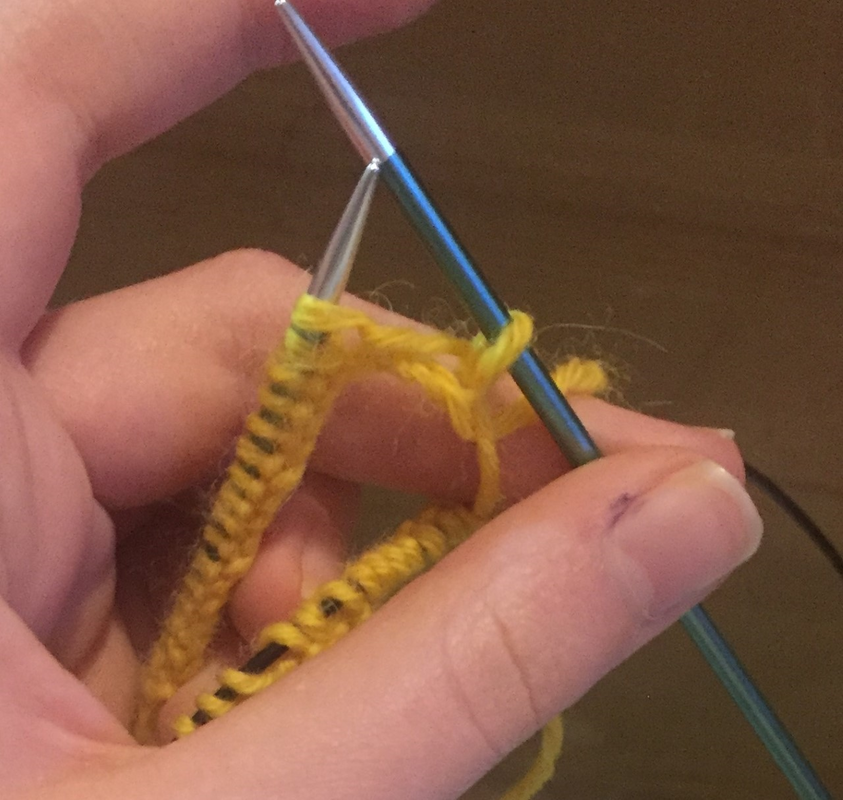 The purl stitch, on the other hand, is slightly different. When you do a knit stitch, you start with the yarn at the back; however, for purl, you need to start with the yarn at the front. 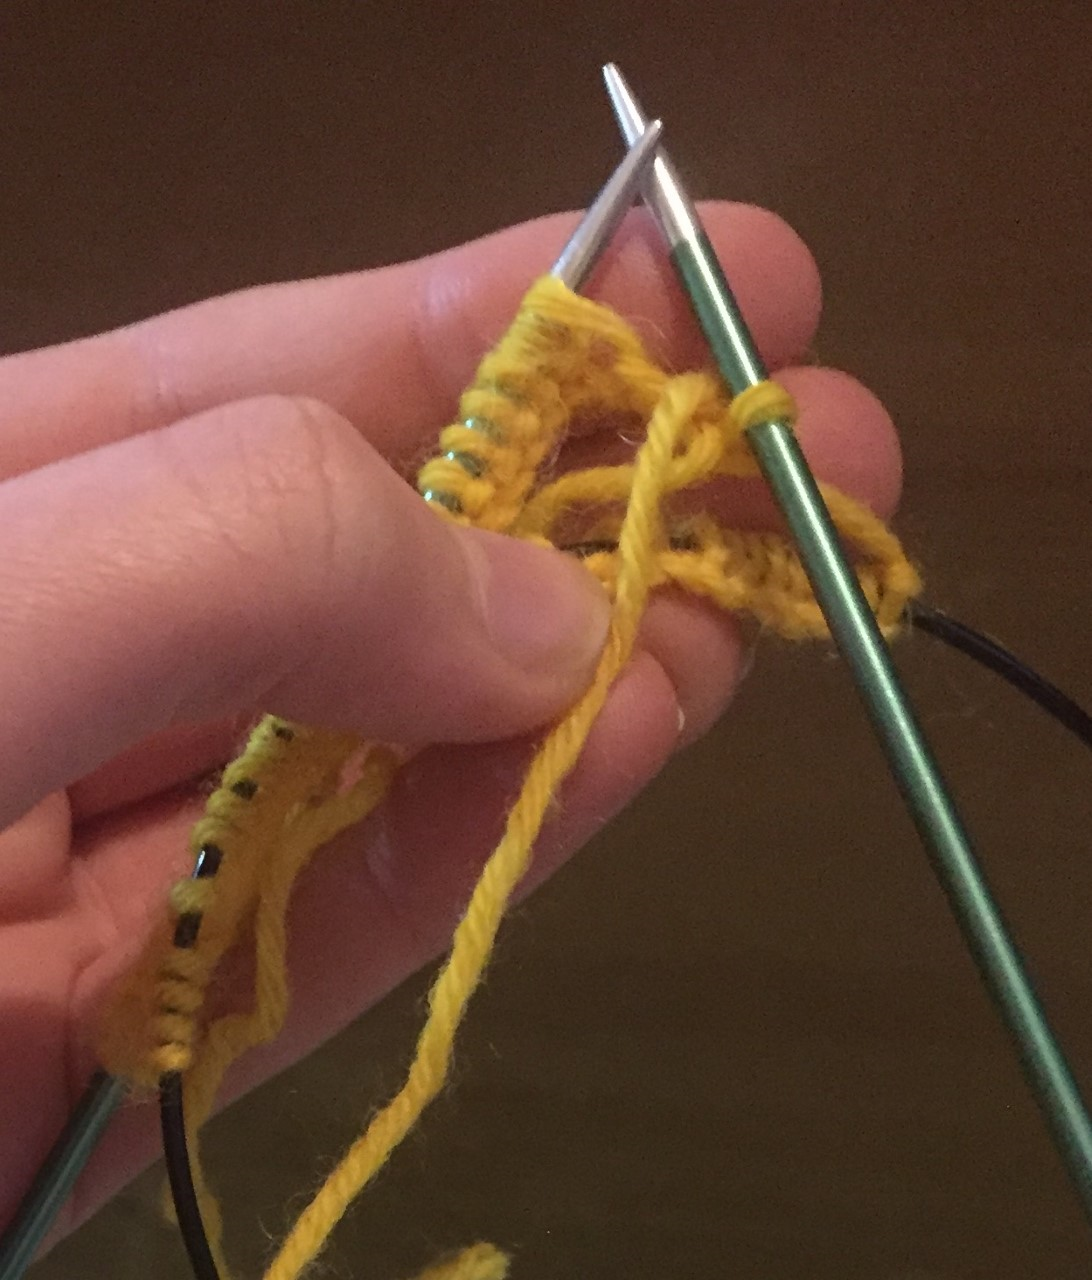 Then, when you put the right needle into the stitch, you put it into the front instead of the back. 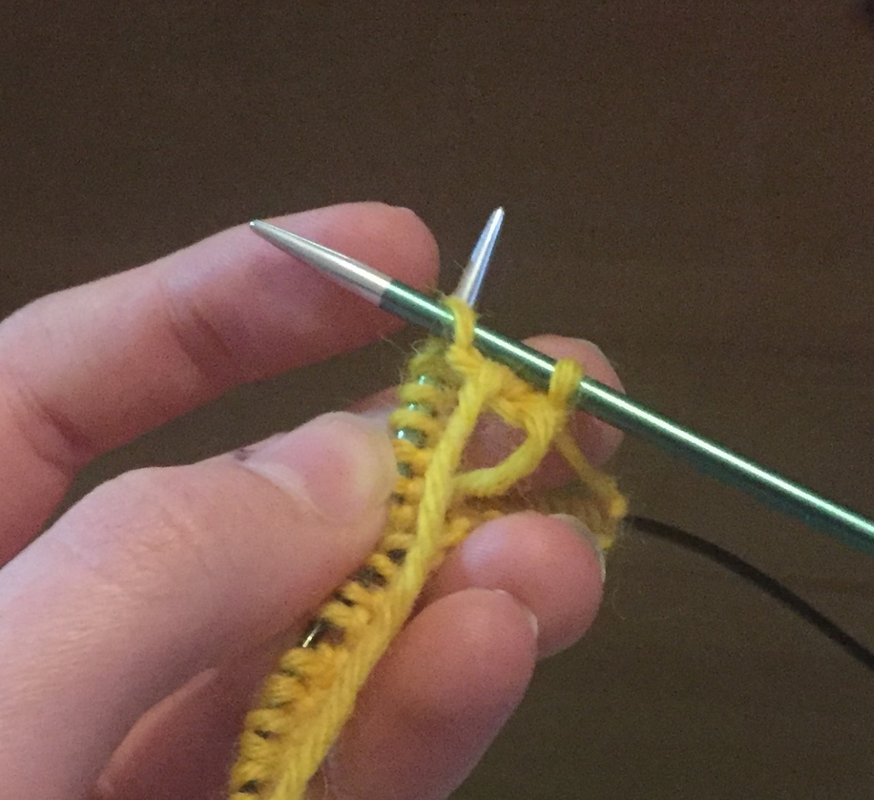 Then, as with the knit stitch, you form a loop around the needle that you are knitting on to (which, when purling, is the top needle). 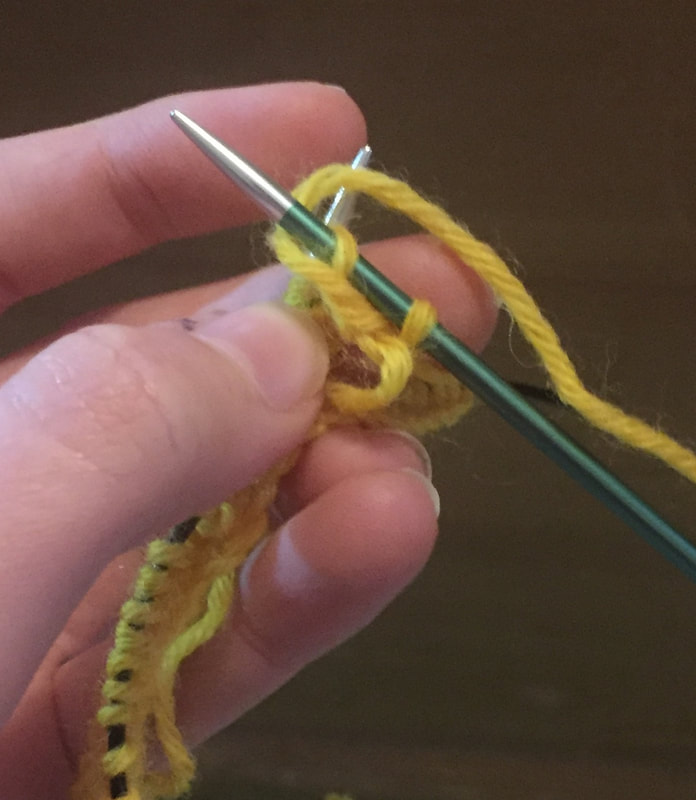 After this, as with the knit stitch, you pull the loop through the stitch and slide the original stitch that was on the left needle off before tightening the stitch if necessary. 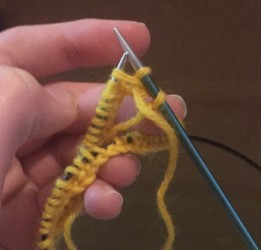 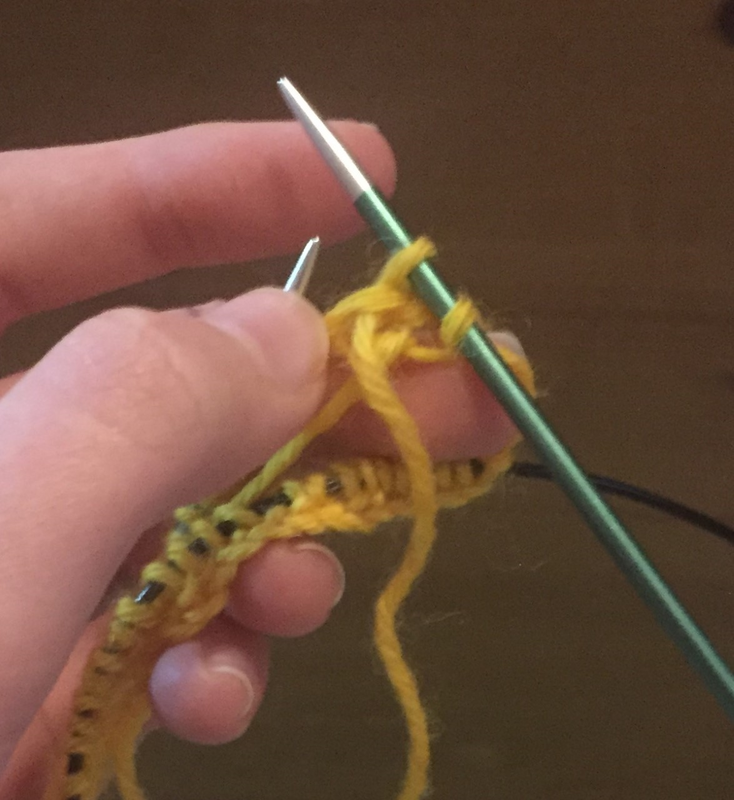 Now, repeat this alternating pattern of knits and purls until you have completed the row. The row should end on a purl and should look something like this (the line between the two sides is normal - so long as you tighten your stitches well this should disappear). 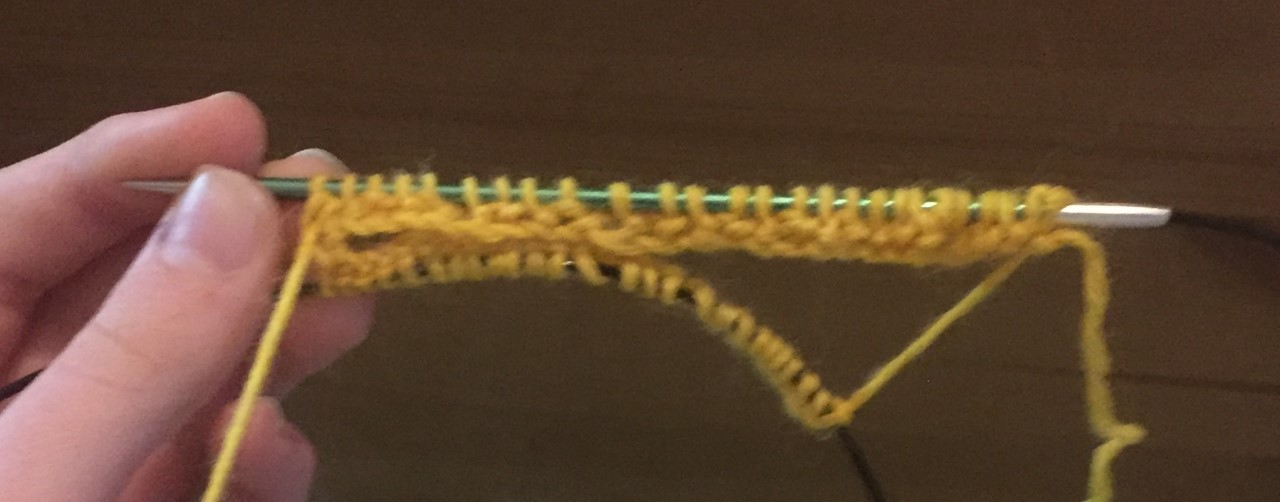 Well done! You have just completed half a round. Changing SidesThis part may seem complicated, but it actually is a lot simpler than it appears to be. First, you need to turn the knitting around so that the needles point in the direction that is your dominant side (i.e. if you are right handed, they should point to the right, or if you are left handed they should point to the left). After this, you slide the needles that are on the cable and have not been knitted on onto the needle and slide the other side onto the cable. 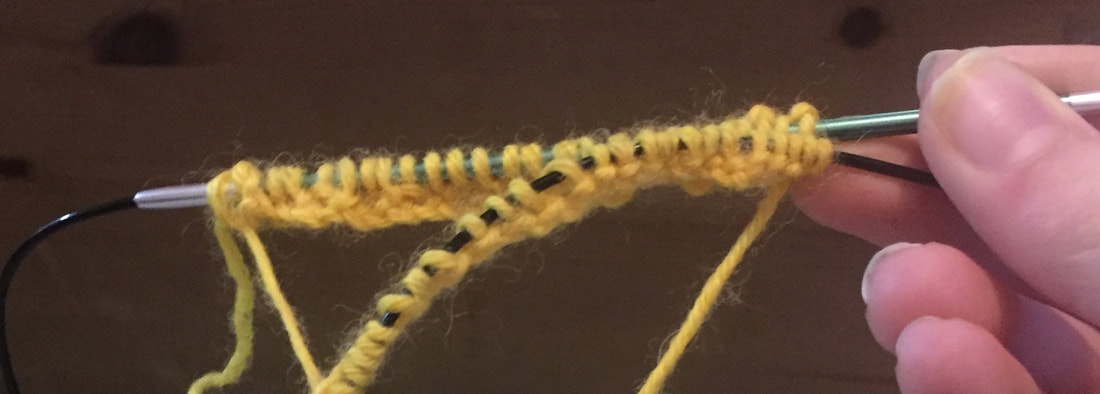 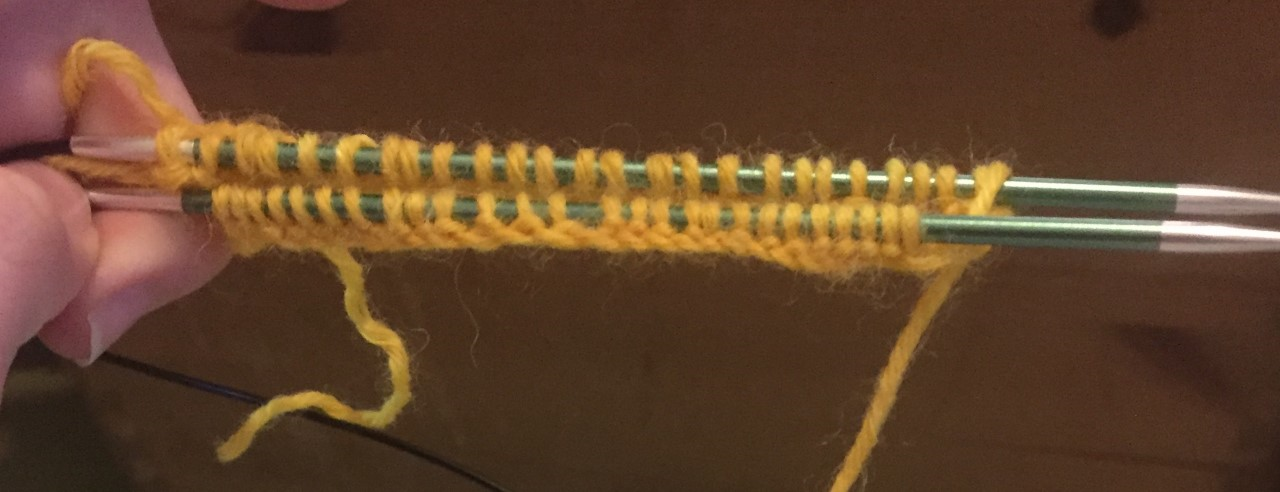 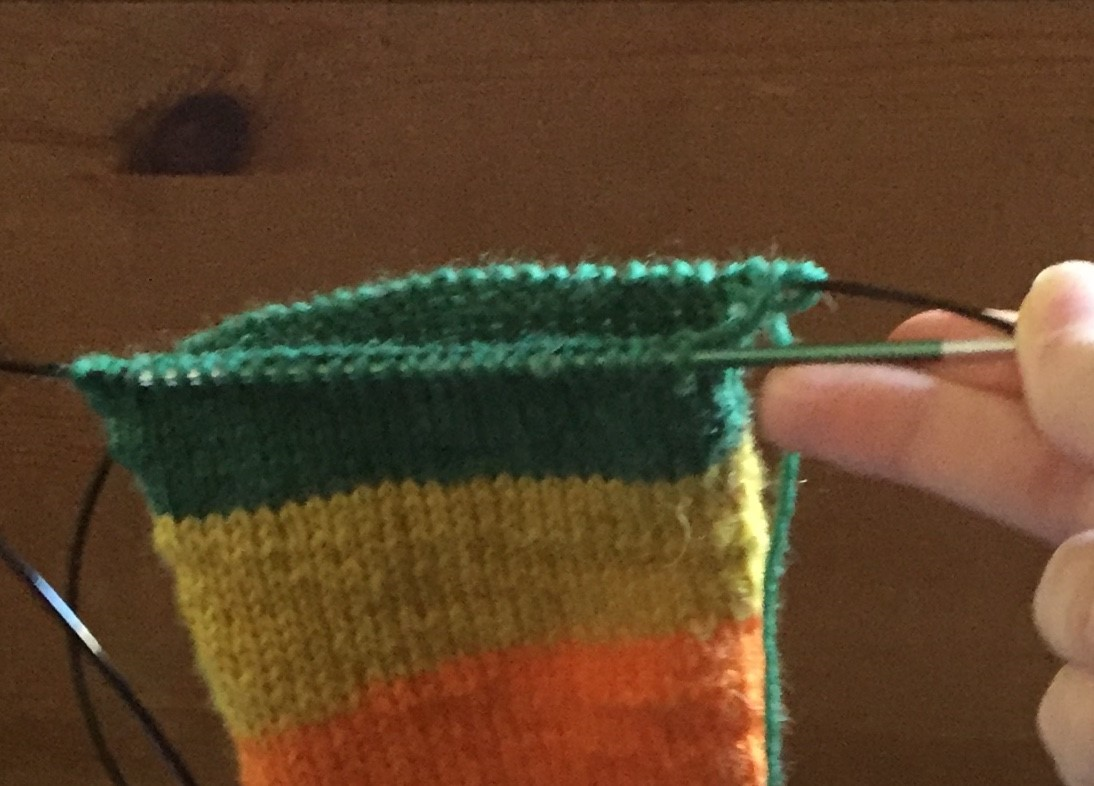 * I chose to take this photo further into the knit-along for clarity. On this side, repeat the rib pattern. Once you have done this, you have completed a round of rib. In total, you need to do ten rounds of rib. It should look something like this. 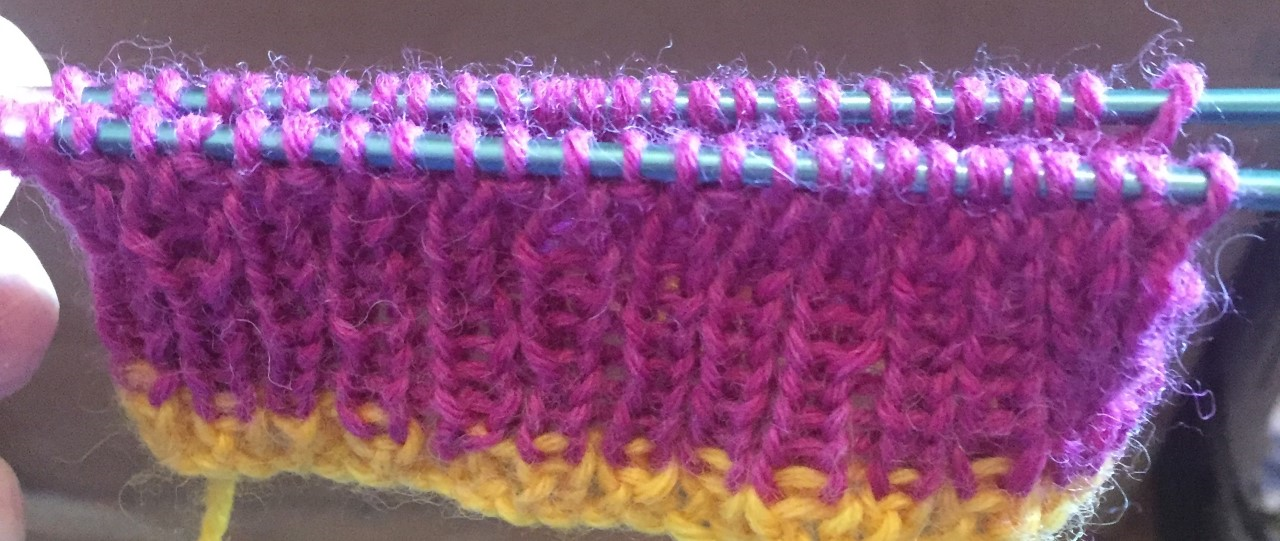 Stocking StitchAfter you have done this, you will be doing a type of stitch which is called stocking stitch, which is just knit stitches across the row. You can do as many rounds of this as you would like; however, I would not recommend any less than thirty rounds and it is also important to keep track of how many rounds you do so that you can make both gloves an equal length. Your stocking stitch should look something like this. 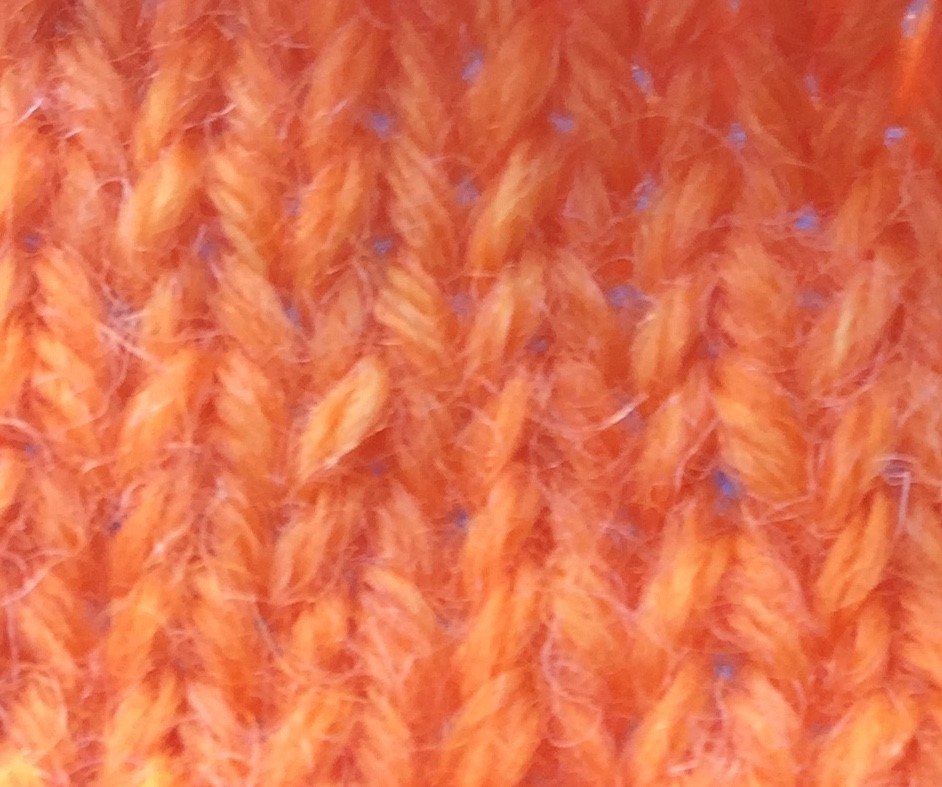 That's all for today. Hope you all are enjoying the knit-along, and for those who do not have circular needles at home, I will be doing a knit-along for you very soon!
Happy Knitting! Caiti |
AuthorMy name is Sharon the Sheep, the owner of Avicraft Wool Shop in Bromley Kent.. Archives
February 2022
Categories |


 RSS Feed