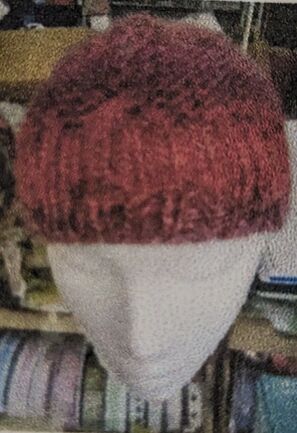
Passion Chunky Hat
Use 1 x 100g ball James C Brett Passion Chunky, 6mm double pointed needles and a cable needle
Abbreviations:
K = Knit
P = Purl
C6B = slip 3 stitches on to the cable needle at back of work, knit 3 stitches from left hand needle, knit the slipped stitches from the cable needle
Tog = together
dpns = double pointed needles
1X1 rib = Knit 1, Purl 1
Instructions
Cast on 70n stitches. Divide onto dpns. Working in the round, word 1X1 rib until work measures 5.5cm.
Next row, increase 2 stitches evenly.
Divide stitches onto 3 dpns, 24 stitches per needle.
Body of hat
Row 1: *P9, K6, P9*, repeat from * to * to end of row (three repeats on each dpn)
Row 2: Knit
Row 3: *P9, K6, P9*, repeat from * to * to end of row (three repeats on each dpn)
Row 4: *K9, C6B, K9*, repeat from * to * to end of row (three repeats on each dpn)
Repeat Rows 1 to 4 until hat measures 14cm ending with a Row 4(work more rows if necessary, but make sure you finish on a Row 4)
Crown Shaping
Row 1: *P6, P2tog, P1, K6, P1, P2tog, P6*, repeat to end of row (=66st)
Row 2: Knit
Row 3: *P8,K6, P8*, repeat from * to * to end of row
Row 4: *K8, C6B, K8* repeat from * to * to end of row
Row 5: *P5, P2tog, P1, K6, P1, P2tog, P5*, repeat from * to * to end of row (=60st)
Row 6: Knit
Row 7: *P2, P2tog, P2tog, P1, K6, P1, P2tog, P2tog, P2*, repeat from * to * to end of row
Row 8: *K5, C6B, K5*, repeat from * to * to end of row
Row 9: *P1, P2tog, P2tog, K6, P2tog, P2tog, P1*, repeat from * to * to end of row (36st)
Row 10: Knit
Row 11: *P1, P2tog, K6, P2tog, P1*, repeat from * to * to end of row
Row 12: *K2tog, C6B, K2tog*, repeat from * to * to end of row
Row 13: *K2tog*, repeat from * to * all stitches in round (= 12 stitches (4 left on each dpn))
Finishing
Thread yam through remaining stitches, draw up and sew in end.
Sew in yam end at cast on edge.
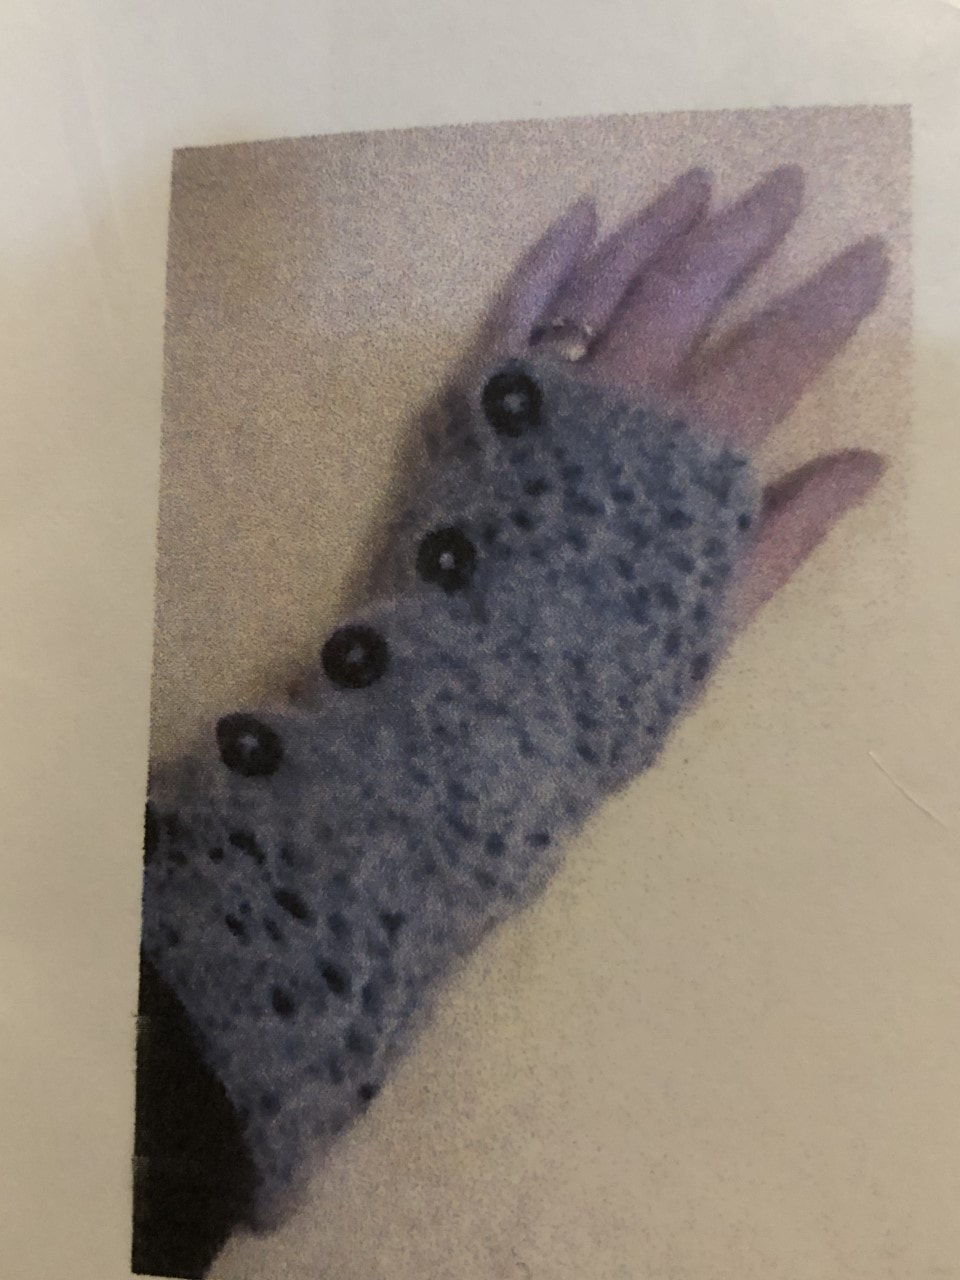
Easy Knitted Wristies (Double Knit)
Requirements
122m Double knit yarn
(we used 1 x 50g ball Diggle Dk by woolknit.com, a British pure wool)
Pair of 4mm needles
10 small buttons
Sewing up Needle
Abbreviations/special notes:
k= knit
p= purl
K2tog= knit two stitches together
YF= yarn foward
St(s)=stitch(es)
The wrists have a thumb hole not a thumb itself. They are knitted on straight needles, sewn up at the finish and have decorative buttons not buttonholes.
Left Hand
**Break off 1m of yarn and keep it same for further use. You will need this when making thumb hole later.
Working from the main ball of yarn cast on 52 sts.**
Pattern:
Row 1: Knit
Row 2: Purl
Row 3: K2, *k2tog x2, (yo, k1) x4, k2tog x2; repeat from * to last 2 sts, k2
Row 4: Knit
Work 27 rows of pattern, finishing on a Row 3.
Now you make the hole for the thumb. Knit 6 sts. Cast off 9 sts. Knit to end,
Next Row: Knit to cast off stitches. using spare yarn (first instruction for each wristie), cast on and knit 9 st. Knit to end of row.
Continue in pattern, starting with a row 2. Work 27 rows of pattern ending on a row 4. Work 6 rows in knit stitch. Cast off loosely.
Right Hand
**Break of 1m of yarn and keep it safe for future use. You will need this when making the thumb hole later**
Working from the main ball of the yarn, cast on 52sts.
Work 27 rows of patter as before, finishing on a row 3.
Now thumbhole row. Knit to last 15 st. Cast off 9st. Knit to end
Next row: Knit to cast off stitches. Using spare yarn, cast on and knit 9st. Knit to end of row.
Continue in pattern, starting with a row 3. Work 27 rows of pattern ending on a row 4. Work 6 rows in knit stitch. Cast off loosely.
Finishing
Fold each into a tube as in photo, cast on edge overlaps cast off edge (the 6 rows of knit are only on the underside, the scallops are on the top). Pin to help mark 5 button positions on each wristie. Sew a button on each scallop through both layers to hold the wristie together.
Easy-Peasy Poncho
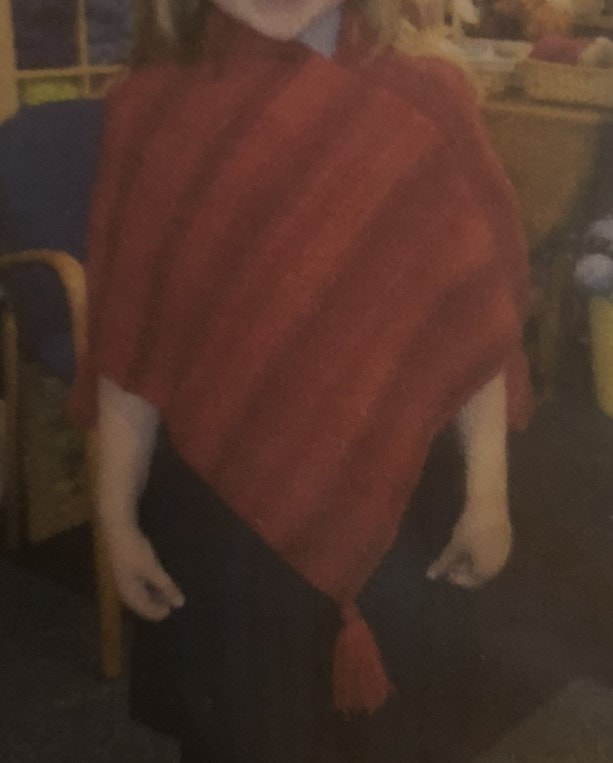
This is a very easy poncho to knit. It is knitted completely in garter stitch (knit stitch) on size 6mm needles. Two pieces are made and sewn together leaving a hole for the child's head.
Materials
To fit 5-6 year old - 360m of chunky yarn
To fit 7-8 year old - 450m of chunky yarn
To fit 9-10 year old - 450m of chunky yarn
ALL SIZES
Instructions:
Instructions are given for the first size with the second and third sizes following in brackets.
Cast on 52 (60,68) stitches. Knit 48(51,54)cm. Cast off. Make another piece exactly the same.
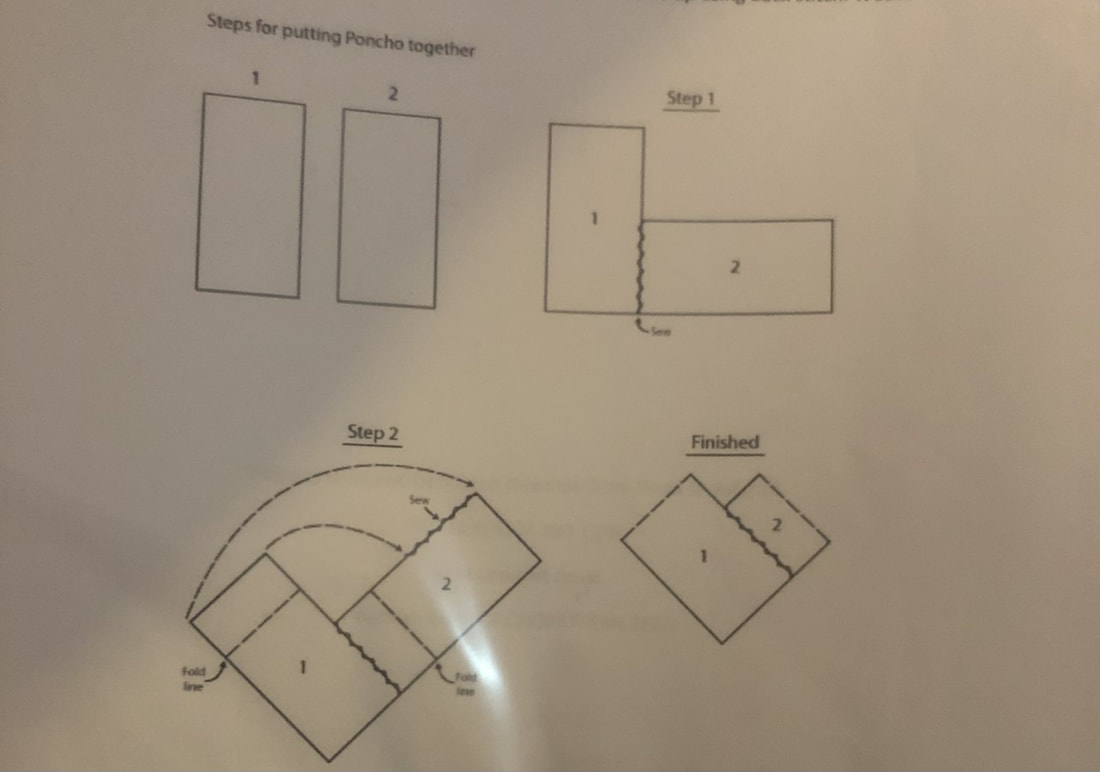
The diagrams below show how to piece the poncho together. Sew up using back stitch. Weave in ends.
Tassels
Make 4 tassels using 25 pieces of yarn 20cm long for each tassel.
Sewing on the tassels/finishing
Sew a tassel at each point of the poncho (mid back, mid front, one each side, refer to photo). Sew through the loop at the top of the tassel onto the point of the poncho. Knot and weave in ends.
Materials
To fit 5-6 year old - 360m of chunky yarn
To fit 7-8 year old - 450m of chunky yarn
To fit 9-10 year old - 450m of chunky yarn
ALL SIZES
- 1 pair 6mm knitting needles
- 1 sewing up needle
- piece of cardboard (one side of a cereal box will do
Instructions:
Instructions are given for the first size with the second and third sizes following in brackets.
Cast on 52 (60,68) stitches. Knit 48(51,54)cm. Cast off. Make another piece exactly the same.
The diagrams below show how to piece the poncho together. Sew up using back stitch. Weave in ends.
Tassels
Make 4 tassels using 25 pieces of yarn 20cm long for each tassel.
Sewing on the tassels/finishing
Sew a tassel at each point of the poncho (mid back, mid front, one each side, refer to photo). Sew through the loop at the top of the tassel onto the point of the poncho. Knot and weave in ends.
Simple Crochet Top Pattern
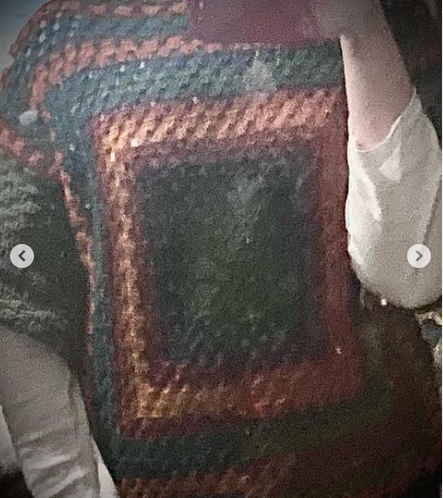
Here is my pattern for making a simple crochet top. It's made out of four granny squares - two larger ones for the back and front and two smaller ones for the sleeves. The pattern will walk you through how to make a granny square for those of you who are new to that then will explain how to join up your top.
Materials
DK wool - I (UK size 16) used 4 100g balls of multicoloured wool to make the front and back and 2 100g balls of wool in a solid colour to make the sleeves
4mm crochet hook
Abbreviations
Ch - chain
Dc - double crochet
Tr - treble crochet
Sl st - slip stitch
Front and Back (Alike)
Round 1 - Ch4, sl st into 1st ch, making a ring.
Round 2 - Dc3, tr2 into ring, ch2, tr3 into ring, ch2, tr3 into ring, ch2, tr3 into ring, ch2, sl st into first tr. Turn work.
Round 3 - Dc3, tr2 into gap below, ch2, tr3 into the same gap below, ch1, tr3 into the next gap, ch2, tr3 into the same gap, ch1, tr3 into the next gap, ch2, tr3 into the same gap, ch1, tr3 into the next gap, ch2, tr3 into the same gap, ch1, sl st into first treble, turn work
Round 4 - Dc3, tr2 into gap below, ch1, tr3 into next gap, ch2, tr3 into the same gap, ch1, tr3 into next gap, ch1, tr3 into next gap, ch2, tr3 into the same gap, ch1, tr3 into next gap, ch1, tr3 into next gap, ch2, tr3 into the same gap, ch1, tr3 into the next gap, ch1, tr3 into the next gap, ch2, tr3 into the same gap, ch1, sl st into first treble, turn work
You may have noticed a pattern - in the corners of the square, you always put 2 groups of three trebles separated by two chains, but in every other gap, you just put one group of 3 trebles and each is separated by one chain. I'll write out a few more rounds, but this time I'm going to put some sections in bold - these are the corners
Round 5 - Dc3, tr2 into gap below, ch1, tr3 into next gap, ch2, tr3 into the same gap, ch1, tr3 into next gap, ch1, tr3 into next gap, ch1, tr3 into next gap ch2, tr3 into the same gap, ch1, tr3 into next gap, ch1, tr3 into next gap, ch1, tr3 into next gap, ch2, tr3 into the same gap, ch1, tr3 into the next gap, ch1, tr3 into the next gap, ch1, tr3 into next gap, ch2, tr3 into the same gap, ch1, tr3 into next gap, ch1, sl st into first treble, turn work
Round 6 - Dc3, tr2 into gap below, ch1, tr3 into the next gap, ch1 tr3 into next gap, ch2, tr3 into the same gap, ch1, tr3 into next gap, ch1, tr3 into next gap, ch1, tr3 into next gap, ch1, tr3 into next gap ch2, tr3 into the same gap, ch1, tr3 into next gap, ch1, tr3 into next gap, ch1, tr3 into next gap, ch1, tr3 into next gap, ch2, tr3 into the same gap, ch1, tr3 into the next gap, ch1, tr3 into the next gap, ch1, tr3 into next gap, ch1, tr3 into next gap, ch2, tr3 into the same gap, ch1, tr3 into next gap, ch1, sl st into first treble, turn work
Keep going with the pattern until you feel the square it is a comfortable size for a front.
For those who are visual learners, we have a TikTok video on making granny squares! Unfortunately linking that video to here did not work but here is the link to our page where you can find the video.
avicraftwool (@avicraftwool) TikTok | Watch avicraftwool's Newest TikTok Videos
Sleeves
The sleeves follow the exact same pattern; make two smaller granny squares.
Making Up
Place the front and back on top of each other with the ends facing outwards. Fold one sleeve in half and sew it onto one side, with one half joining to the back and the other half joining the front. Repeat with the other sleeve on the other side then sew together the undersides of the sleeves, the side seams and parts of the top if you wish to have a smaller neck hole (I sewed just under quarter on each side).