Crochet: Basics and Tension SquaresHello and welcome back to the blog! Now, you may be thinking that the title of this post looks familiar; that's because I did something very similar just over a month ago on how to knit tension squares. Today, I will be looking at exactly the same, but for crochet (apologies if this is a little basic for any crocheters reading this!) and I will also be showing you some of the things that you do with tension squares instead of just undoing them or throwing them away. Step One: Setting UpAs I mentioned in my last post, the things you need for crochet are not that different to your knitting equipment, but here is a list of what you will need as a reminder:
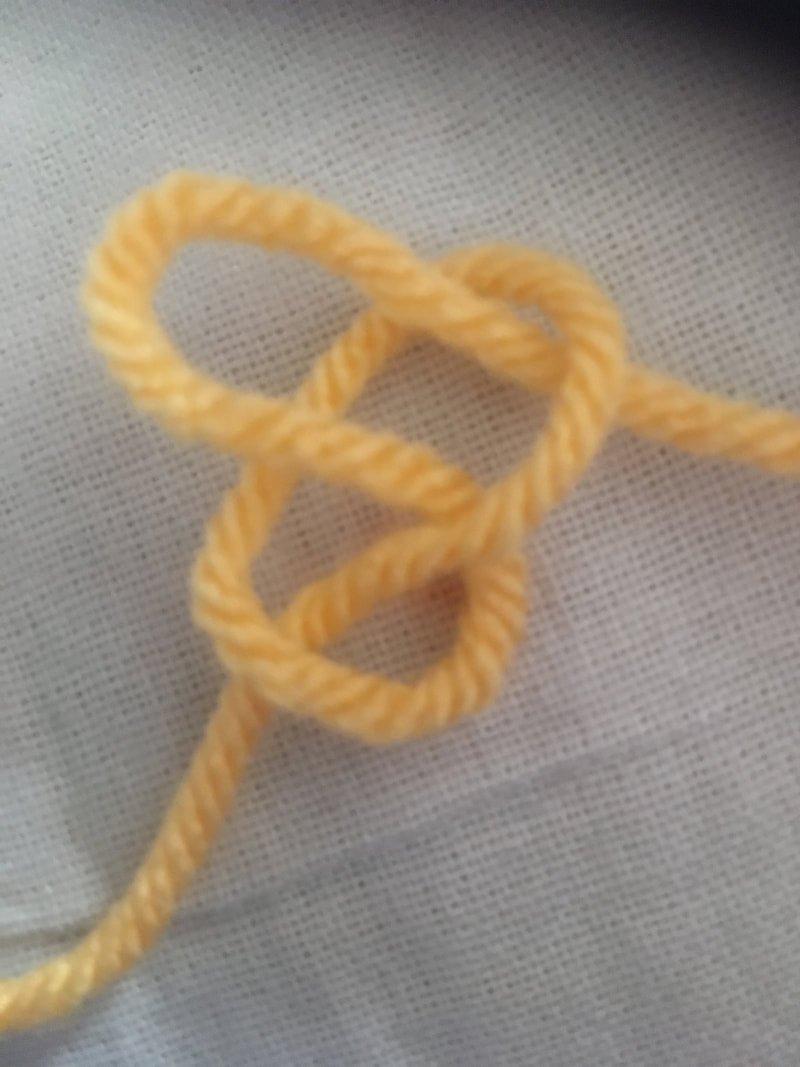
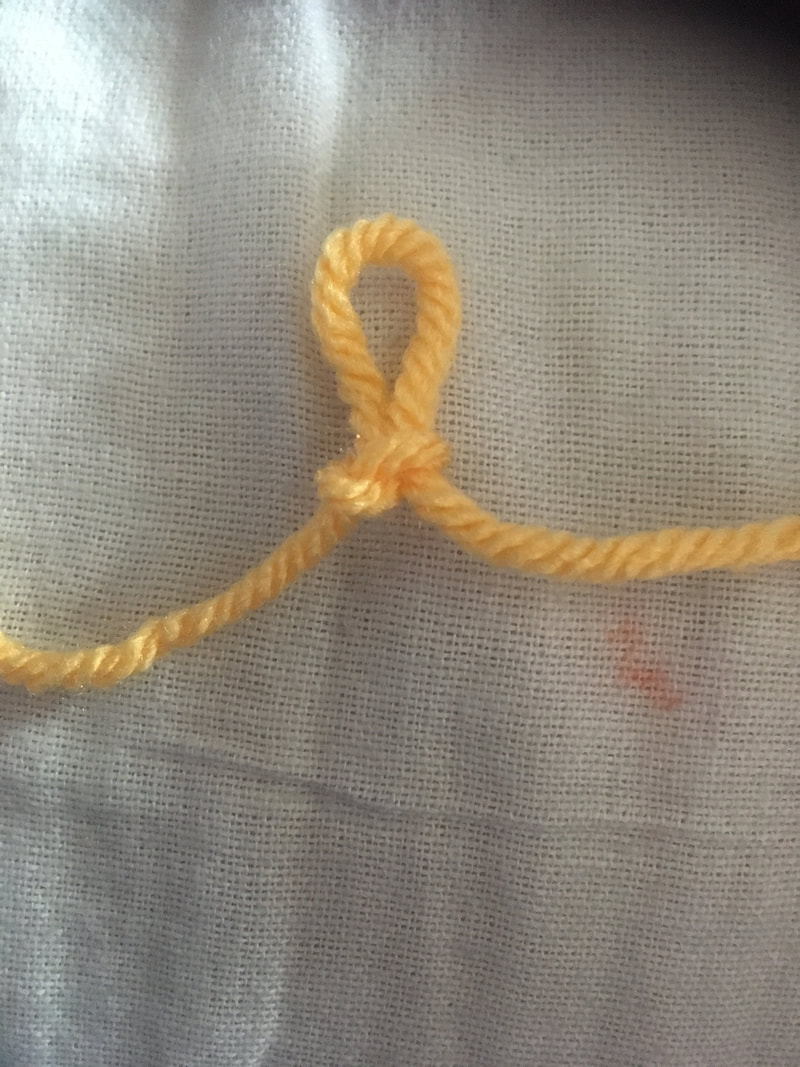
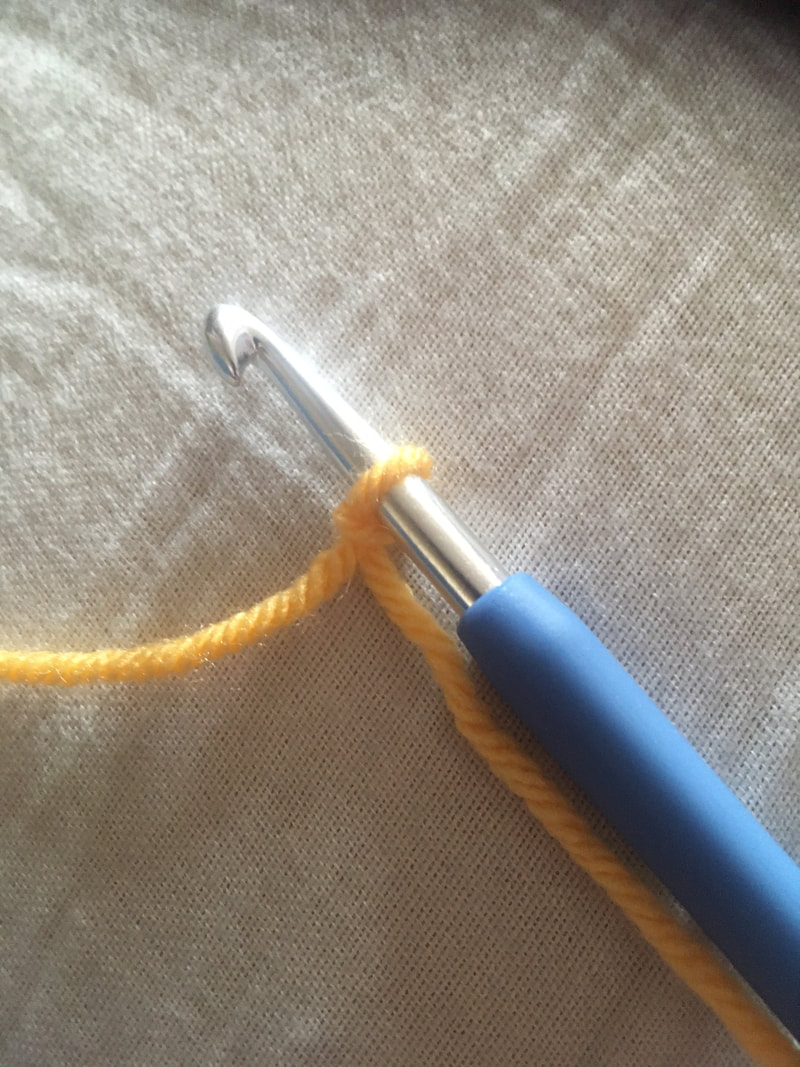
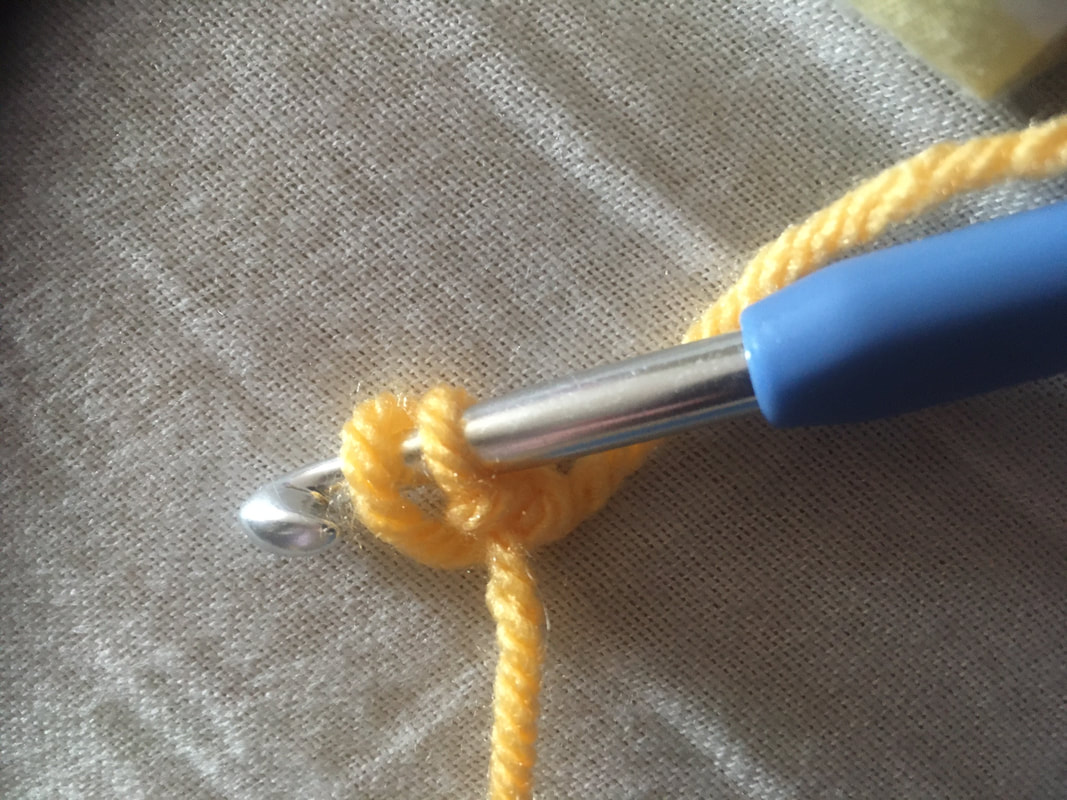
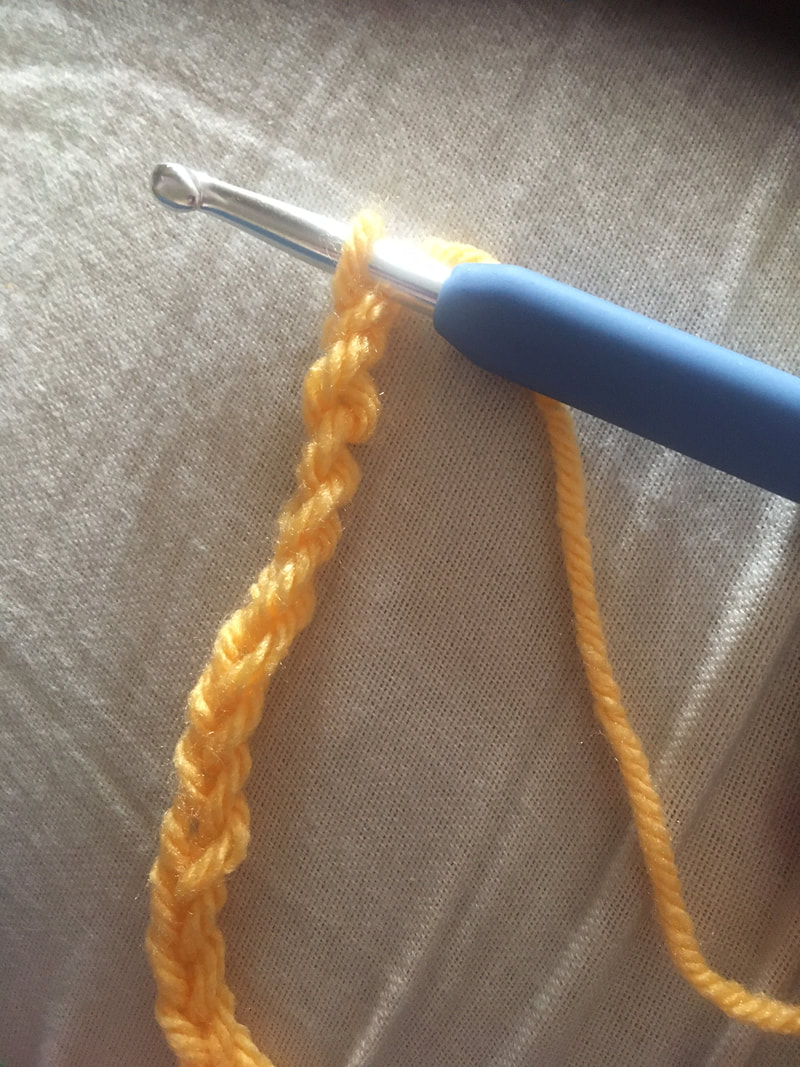
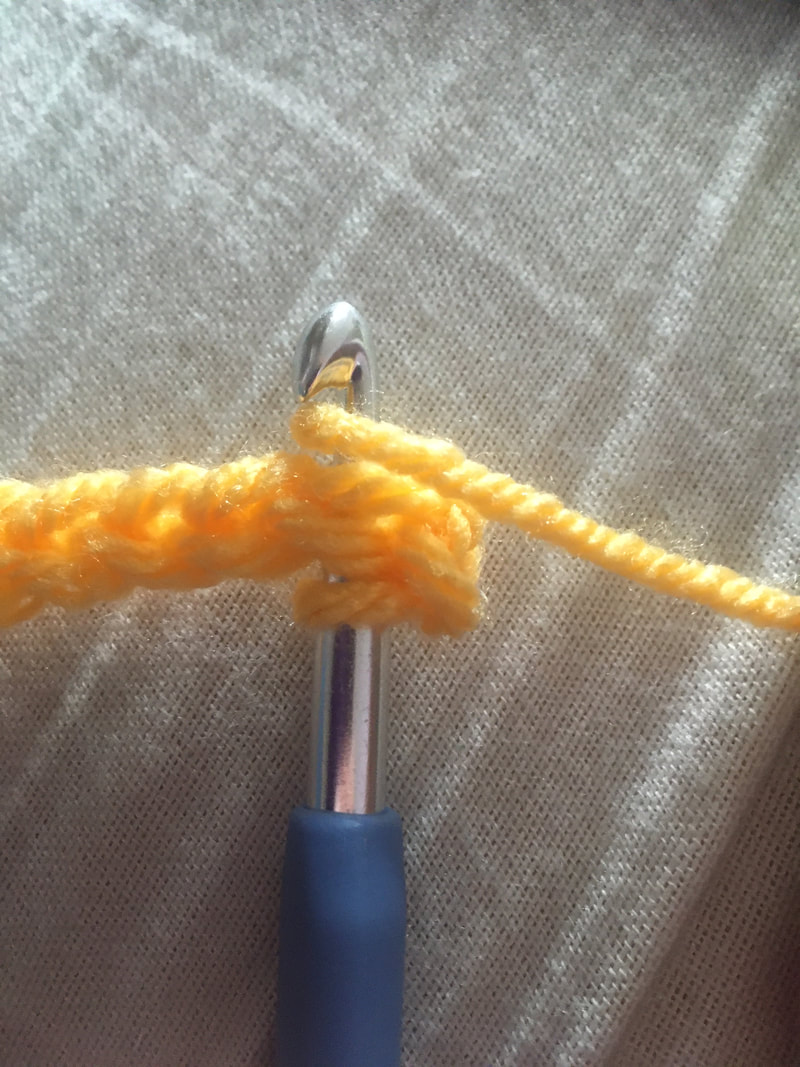
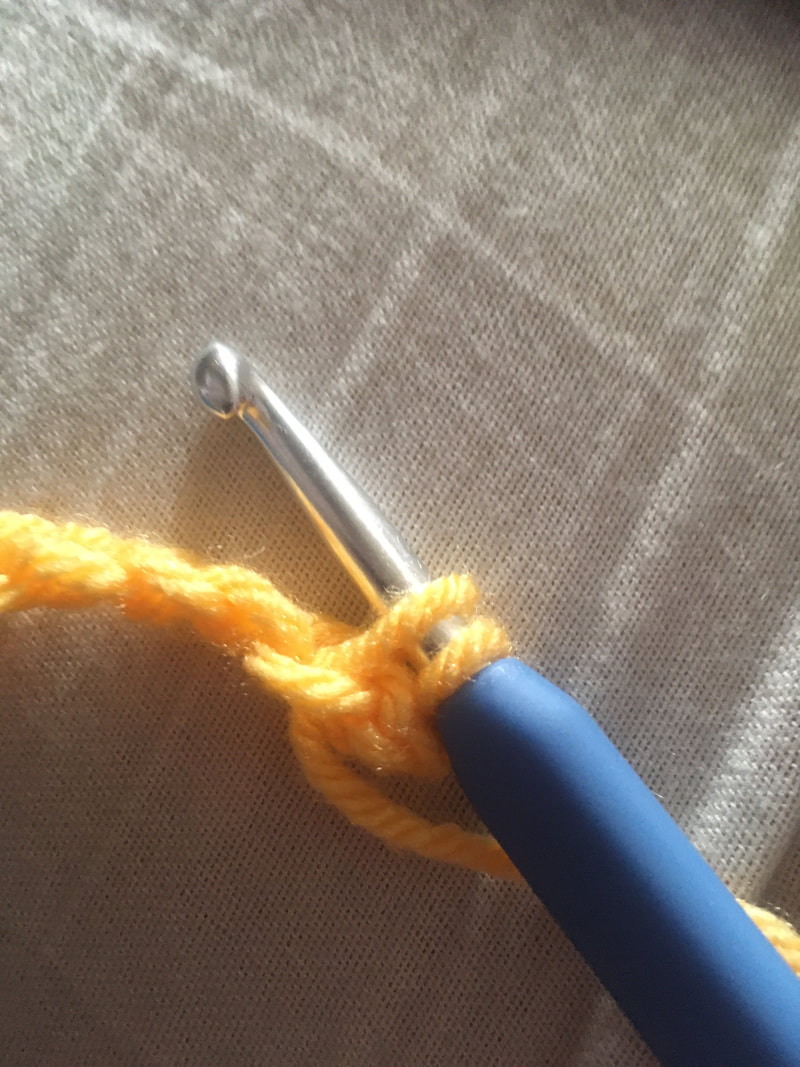
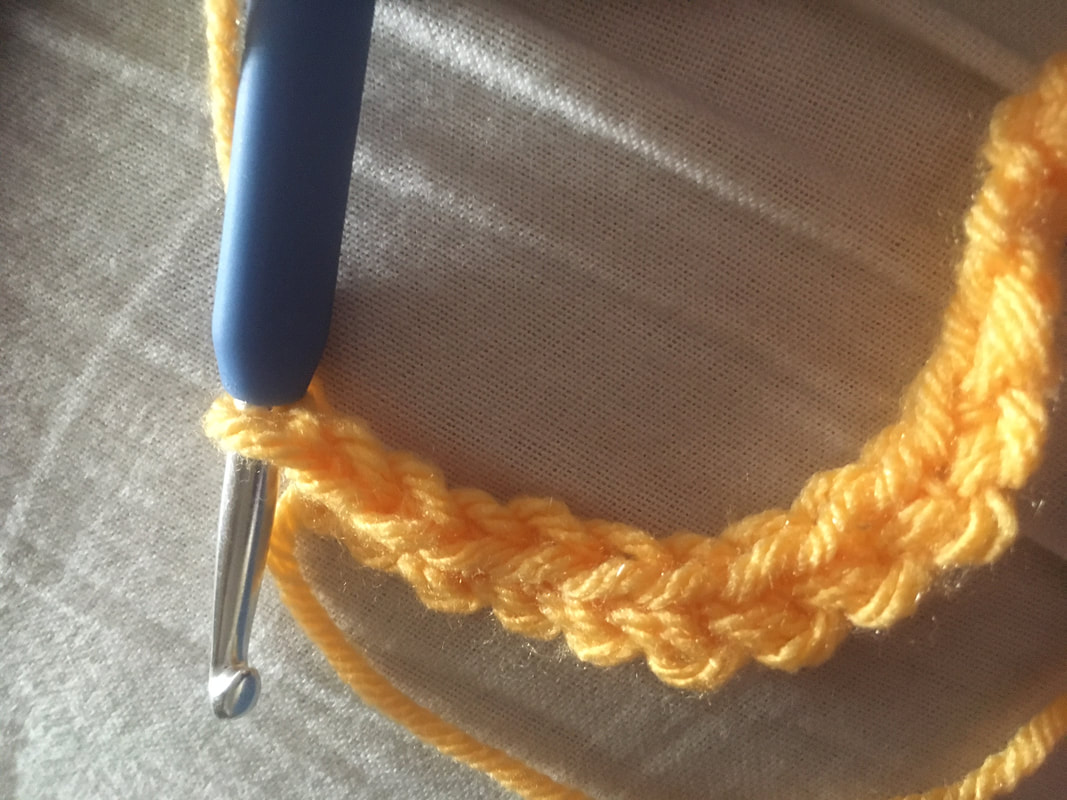
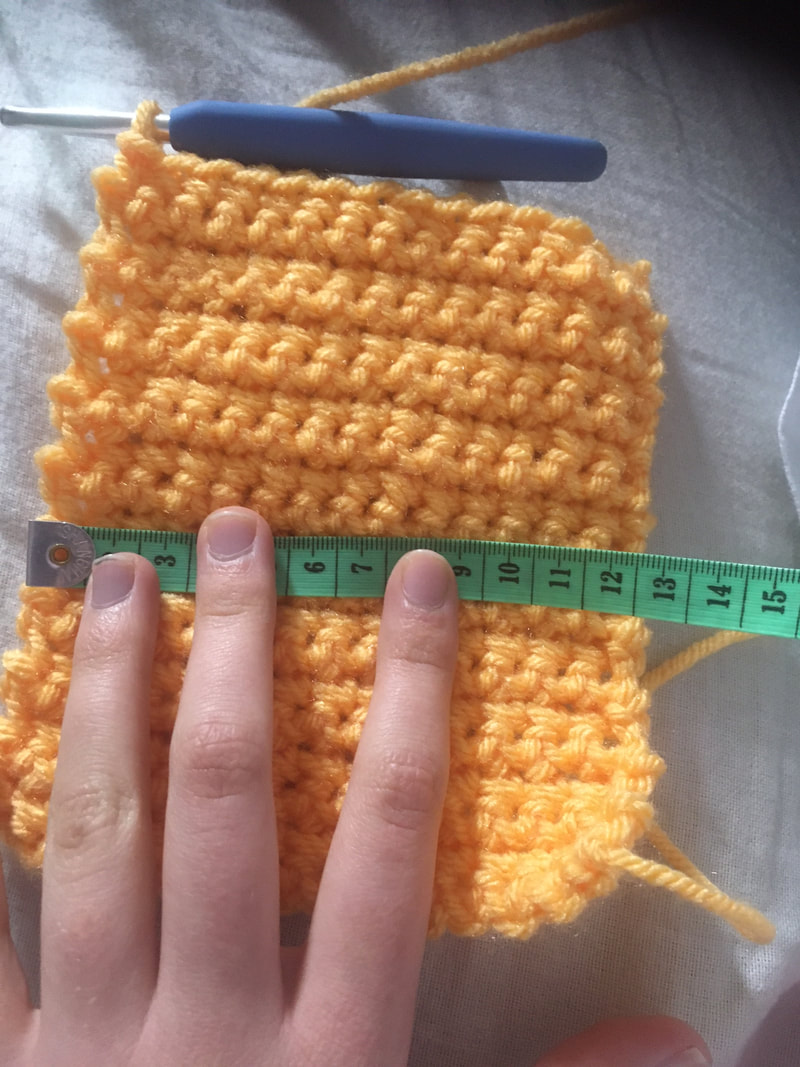
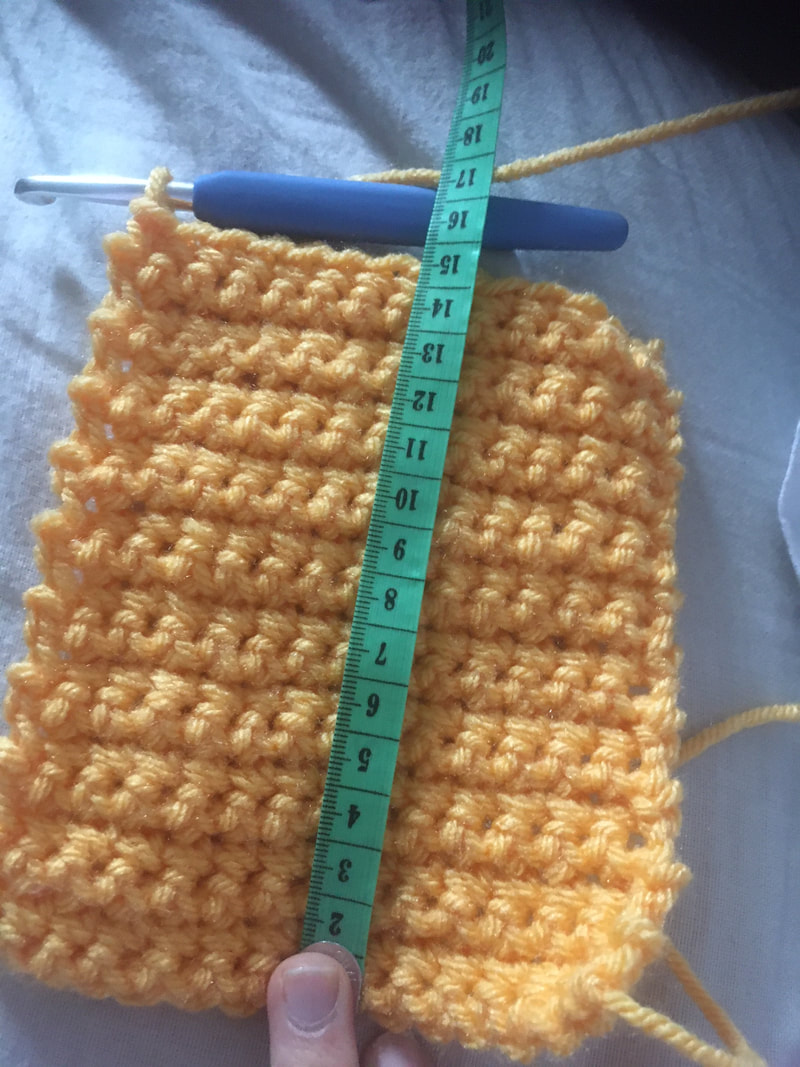
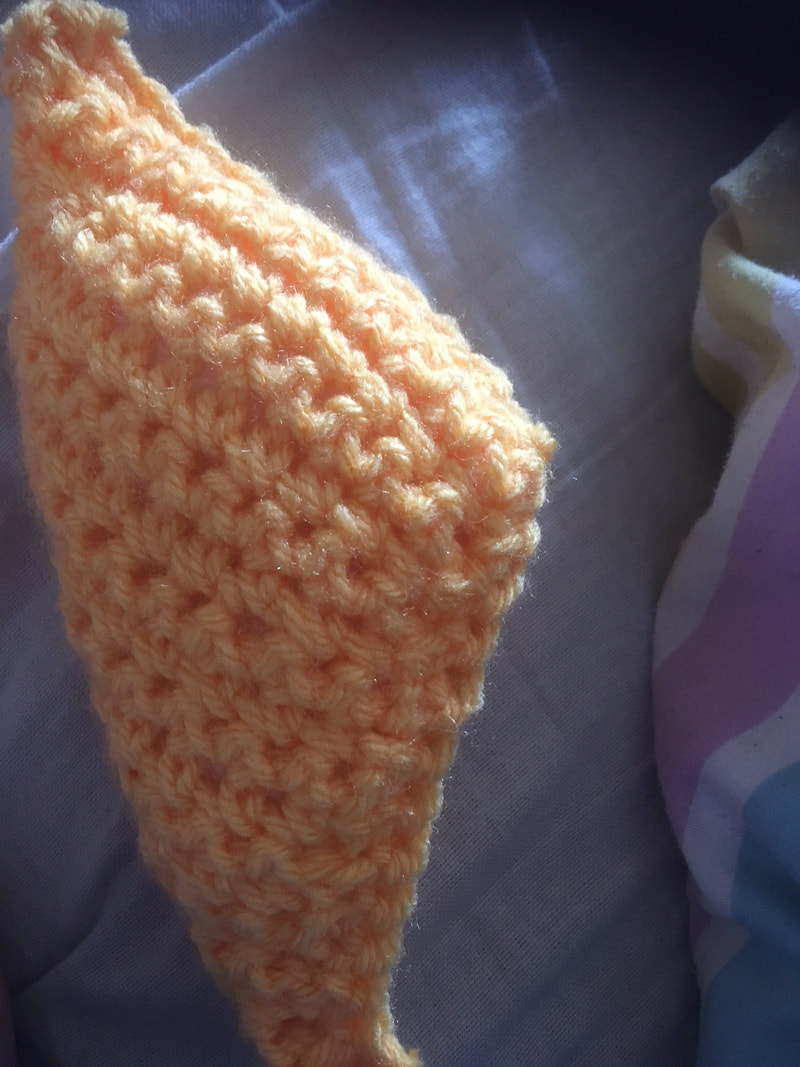
Reading a tension square is the exact same in knitting as it is in crochet. Below is a picture of the ball band I will be using (in my demonstration I am using Stylecraft Special Chunky in Saffron). This tells me that I will need a 6mm hook and will do 20 rows containing 14 stitches in order to create a 10cm by 10cm square, though yours may require to use a smaller hook and do more stitches and rows or a larger hook with fewer stitches and rows. First, I will be creating a chain of 14 "stitches." 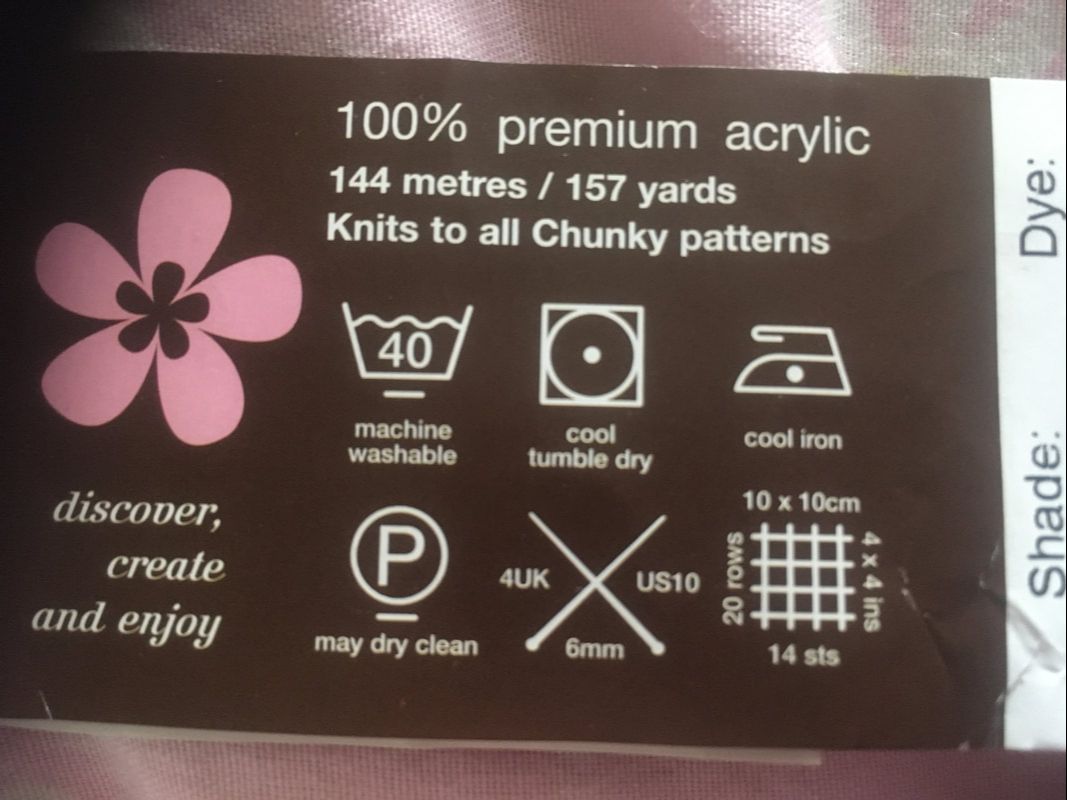 Step Two: The First ChainJust like in knitting, the first stitch in crochet is made by creating a slip knot. To do this, create a loop about 15-30cm away from the end of the yarn. Then, pull a loop through this and keep pulling until the knot is secure. Finally, place it on the hook and pull the two strands so that the loop fits around the hook securely but not too tightly. Then, to create the next stitch in your chain, hold the hook in your dominant hand (for me, this is my right), wrap a loop of yarn around it and pull the loop through your first stitch, allowing it to come off the hook and leaving just one new stitch on. Do this repeatedly until you have reach the number on the bottom of the tension square diagram of your ball band - in my case, that means repeating it 14 times in total. Once you have done that, you are ready to move on to the main rows. Step Three: The Main RowsUnlike in a knitted tension square, you only do one type of row, so once you have done this section once, go back to this heading and repeat again until you reach the number on the side of your tension square diagram (for me, that is 20 rows). First, do one extra chain. Then, put your hook through the chain closest to the hook (this can be a little fiddly at first and was very difficult to photograph but you should be going through two loops that are touching and that look a little bit like a section of a plait). Then, wrap a loop around the hook and pull this through the two loops you have just put on, leaving two stitches on your hook. After that, wrap another loop around your hook and pull it through the remaining two stitches. You should now just have one stitch on your hook again. Repeat this until you have got to the opposite end of the row, then turn it around, ready to repeat and start your next row. You may notice that at first, it is difficult as your chain my be curling quite a bit. This is normal but it should eventually straighten out a little after you have done a few more rows. Step Four: MeasuringMeasuring your crochet tension square works in the exact same way as measuring your knitted tension square; the measurements you need are the height and width. If both the height and width of the square are smaller than 10cm by about the same amount, it means your tension is tight. Experiment by making tension squares with a larger hook. Alternatively, having both measurements over 10cm by about the same amount indicates you have a loose tension, which can be resolved by reducing the hook size. However, it can sometimes be a little more complicated. If your width is fine but the height is too short or long, you may want to do more or less rows when you do the pattern. If the width is the problem, you could do a longer chain if it is too narrow or a shorter chain if it is too wide. In my case, both the measurements are too large but it is less wide than it is tall, so I would experiment by decreasing my hook size and possibly doing fewer rows. UsesIt is quite easy to make the mistake of thinking that tension squares are too small to be of any use; however, you can make some great things out of the tension squares that you make across your projects. As almost all tension squares are 10cm by 10cm, they are very versatile and can be used to make a range of things including:
Next time, I'll be going through some of the things you can learn to crochet once you get bored of joining squares - don't get me wrong, I absolutely love knitting and crochet but when you make things out of squares, you do end up sewing in a few billion ends!
Until then, happy crafting! Caiti
0 Comments
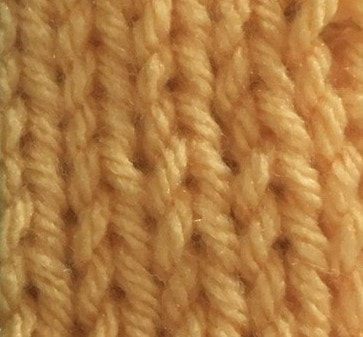
Crochet: What's New?Hello and welcome back to the blog! Today we are going to be starting our new section all about crochet. I know that crochet is on the rise right now - many of my friends are learning or want to learn how to crochet. However, there can be some misconceptions about it as sometimes, people get crochet and knitting confused - after all, both of them are yarn crafts with similar benefits and techniques. However, there are some key differences can help you differentiate between the two and deciding which one you prefer. So, I thought that I would start this section by looking at some of the key differences between knitting and crochet. 1: The AppearanceSometimes, people may look at something that I have knitted and call it crochet or vice versa. For some more experienced knitters and crocheters, the difference between knitting and crochet is very obvious, but for someone who has never done it before or is new to it, it can be a lot harder to tell. However, with crochet, there are usually more holes than in knitting. If you look at a crochet tension square, you will see lines of raised stitches with thin dips between each row, whereas with a knitted tension square, you will either see one side that is smooth and has a fishtail pattern and one side that is more bumpy (stocking stitch) or lines of flatter stitches with thinner lines of bumps in between (garter stitch). Here are a couple photos - the left photo is crochet and the right photo is knitted stocking stitch. 2: The EquipmentMost of the time, the equipment used for crochet is very similar to what you use for knitting; for example, you will always need yarn, scissors and a tape measure. However, instead of using two needles in both hands, you will need just one crochet hook, which you will hold in your dominant hand. The same sizing applies to hooks as to needles (apart from the fact that your natural crochet tension may be different to your knitting tension, meaning that you may have to increase or decrease your hook size slightly) and just like with knitting needles, you can also get crochet hooks in a range of materials. 3: The Number of StitchesIf you read the post explaining how to knit or you are a knitter, you will know that you keep all the stitches on the needle at all times and do not cast off a stitch until you have finished with it (most commonly at the end of a project. However, with crochet, you will only have one stitch (or two at most) on your hook at a time. Then you work with that stitch (I'll explain in more detail how to do this in the next post) and move on the next one. The action creates something that is a lot like casting off in knitting, but in crochet, you will keep going back into the stitch, working on it, moving on and "casting off" in every single row, not just the last row. 4: DirectionKnitting is always either back and forth (doing a row then turning the work to do another row) or in the round (using circular or double pointed needles to keep knitting without turning the work and going in another direction, forming a tube). In crochet, you can do both of these but in addition, you can go around edges of the project to form a bigger square, a 2D circle or other cool shapes which are much more difficult in knitting. I have also seen crocheted 3D mathematical models which I think are super cool - if you want to take a look, just search up "crochet curvature" online and look up images. For this reason, some people find that crochet is more versatile and therefore is better for them. 5: UsesThere are many exceptions and overlaps with this point but more often than not, crochet is more delicate and stiff, meaning that it is great for toys and blankets but because of its bulkiness, it isn't often used in jumpers or tops, particularly not ones that are meant to drape. Having said this, as more stitches and combinations of stitches have been discovered, there has been a rise in things such as crochet sock patterns (of which there never used to be any of before) and there are plenty of patterns for knitted toys on the market too. In my opinion, it is good to play around with both knitting and crochet to help you get an idea of texture, technique and personal preference.
That's all from me for today. Next time, I'm going to be explaining how to crochet a tension square and show you some of the ways to you can work old tension squares and scraps of yarn into projects. Until then, happy crafting! Caiti Casting Off: Final Knitting TipsHello and welcome back! Today is the last post on the knitting section of this blog series, so I thought I would share a few final tips on knitting as a little summary. Here are my top ten tips. 10: Rewind Your YarnThis one may sound a little strange but I often find that certain types of balls of wool come apart really easily then end up forming knots. So, I almost always rewind yarn before I start it. You can get yarn winders, which are essential for rewinding skeins, but as I don't use skeins a lot, hand winding works well enough for me. 9: Ensure You Have EverythingWhen I was new to knitting, I would often start things without any pattern, equipment or even a basic idea as to what I was doing. This wasn't a major problem but I did sometimes end up wasting wool that I could have used for something far better. That isn't to say that I don't experiment or make things up anymore but I recommend trying to get basic knowledge and quality equipment before starting any hobby. 8: Sew Ends In As You GoMost knitters hate sewing ends in with a passion, but I'm afraid it does have to be done. To make it a bit easier and less of an annoyance, it may be a good idea to sew in a loose end as soon as you create one, and alternate between sewing ends and knitting regularly. Also, if you have lots of long ends, they can get tied together and muddled, which is very confusing. It may not always be possible to sew in ends as you go with a jumper as you may want to leave some ends to sew the pieces together, but I would recommend sewing in any ends that are too short to come to any use later. 7: Leave Long Enough Ends to SewThis links to my last point. It's not only a good idea to sew ends in immediately but it's very important to have a long enough end to sew in as if you don't, your project could become unravelled! The length you want to leave will vary depending on the thickness of the yarn but 20cm is a good length in most cases. 6: Knit Regularly(ish)This is not to say that you need to knit every single day - after all, knitting is meant to be a hobby, not a chore - but if you start a project, it is best to do it on a regular basis and avoid leaving it for a long period of time as it can be easy to get out of rhythm and lose track on it. If you are actively avoiding a project, the chances are that leaving it and doing it months later will make you like it less, not more (trust me, I have tried that more than once). Alternatively, if you are busy, it might be good to work through smaller and easier projects at that time as things that are harder will only add to your stress. 5: Connect with OthersThere have been plenty of times where I have had a pattern and had no idea what to do or I have made a mistake somewhere and can't work out why. In times of doubt, it can be great to talk to a fellow knitter - for example, I always go straight to my mum if I am confused or need help with a project. Connecting online can be a good way to learn but if possible, it is good to have a few people who you know personally to help you too ,as they will know the best way to explain something to you. Be warned though, once you become a part of the knitter community, you may have to do this for many, many knitters in return! 4: Listen to Your BodyI feel as if the title of this point makes it sound a little more deep and profound than it actually is, so apologies if this tip is a little anti-climatic! However, it's good to know how you are feeling when you knit as your emotions, your energy levels and other factors of your life can impact your abilities and may lead to you making mistakes. For example, I sometimes try to knit in the evening to wind down before bed, but if it is too late and I am too tired, I will find myself making tons of mistakes! If you don't realise you are tired or stressed and you make mistakes it can be incredibly frustrating, so do your best to listen to yourself when you are knitting. 3: Find Homes for Your ProjectsI don't know if I really should be saying this as I currently have projects and yarn all across my floor, but personally, I find the few projects that I do have organised easier and more enjoyable to work with. The projects that I currently working on will have their own little box, bag or shelf and that way, it is always on hand and I can take it wherever I need. I would really recommend doing this even it you only do it for one project. 2: Read CarefullyAs I said earlier, it is very easy to get confused by or make mistakes with patterns, so always read them carefully! One thing that I was recommended by Sharon is that whenever you have a series of complicated rows, such as increase rows, you should write out all of them and what you do on each one. For example, I may write all the numbers from 1 to 50 if I have to do 50 rows and write increase rows in a separate colour so I know when they are. This is very useful and allows me to make sure I fully know what I am doing! 1: Enjoy It!You have chosen to do knitting, so make sure it always feels like a choice and a fun thing to do. If you aren't enjoying a project, stop and start something you will enjoy as there is no point in spending your free time in a way that will make you feel miserable! For example, I learnt how to knit socks a little while back. I thought that I would love it but in all honesty, it wasn't my thing at all, so I haven't made any since. If I get the urge to retry in the future, I may but until then, I will be sticking to my chunky cardigans! Don't feel pressured to move onto a new project for a challenge, as not everything you do in life has to make you learn or grow - you can just enjoy things too!
Next week, I will be starting the crochet section. I am super excited for this one as whilst I am more experienced in knitting, I have got into crochet more over the lockdown and really love it. But until then, happy crafting! Caiti Knitting and MeditationHello and welcome back to the blog! I wonder, how many of you have tried meditation? I have tried it a few times (I can particularly remember doing a few sessions at school) but there's something about it that doesn't really work for me. Often, the breathing exercises can feel a little forced and I really hate sitting still. However, life can be stressful and having an outlet or taking time out of your day to relax can really help. Recently, I have discovered the world of knitting meditation, where people knit and do meditation exercises at the same time. Today, I thought I would look at some of the things you can do to make your knitting even more soothing and meditative. Picking your Meditation ProjectFirst of all, you need to find a project that you enjoy, ideally one that takes little thought and is simple or familiar. For me, that's something like a chunky blanket, scarf or even a jumper if I have done one like it before, whereas Sharon prefers to knit socks while meditating. Also, the colour and texture are important too - personally, I like to work with pastel colours (I find colour-changing pastel yarns particularly soothing) and I like slightly fluffy yarn, such as chenille, but nothing too fluffy as that can be tricky to work with, which is not ideal for meditating! Your SurroundingsYour surroundings play a key role in all types of meditation. A great way to ensure that your space is perfect for meditating in is by focusing in on the five senses and how you would like those to be whilst you meditate. Here is what I like to have for each of the senses when I am relaxing, as some alternative options: Sight: In the videos that I have seen of knitting meditation, people will often knit in very tidy areas, but for me, that is not too important. Also many people like to surround themselves with their favourite things, such as pebbles or stationary, but again this is not too important for me either; so long as I have everything that I need to knit, I am good to go. What does matter to me is the lighting. My room is pretty dark, as I have a blackout curtain and very few lights. However, for the sake of being able to see my project, I may open the curtain and window if knitting during the day or turn on my small lamp and colour changing bulb and set it to either a shade of green, blue or purple when knitting at night. Smell: Some people love candles, though as my house is made of wood and I am a very clumsy person, I could not trust myself with that. Instead, I like to use perfumes or pillow sprays, particularly if they have lavender in. Also, it's pretty important for me that the wool doesn't smell too strong, though I know that many knitters love the smell of pure wool. Sound: On my phone, I have a playlist full of calming music. I love to plug in my headphones and listen to that as even at lower volumes, it manages to block out the rest of my surroundings pretty well. Some people prefer background noise and ASMR, which is when people record the sounds of tasks, such as eating, cutting hair, doing makeup and many other things. Personally, I'm not a big fan of this and I particularly dislike the eating sounds but some ASMR videos can be very soothing. On the other hand, knitting in silence can be really relaxing and the clicking of the needles could be its own form of ASMR Taste: This one is less important, though it can be nice to have a snack whilst knitting. Personally, I think chocolates, cake or shortbread are the best knitting snacks. Touch: This is more to do with the garment itself, though touch can also link to other things such as where you are sitting. Make sure you are really comfortable, ideally with a supported back and perhaps some soft cushions too. The Type of MeditationWhat type will you do? Will it be centred around breathing, visualisation or something else? Will you incorporate your knitting or will you just use your knitting to allow you to keep still? Here are some classic types of meditation that you can either do with your knitting or just whilst you knit.
With Knitting
That's all from me this week. Relaxing can sometimes feel like a chore but taking just ten minutes out of your day to do something for you can be really beneficial. Next week, I will be sharing some final knitting tips but until then, happy crafting. Caiti |
AuthorMy name is Sharon the Sheep, the owner of Avicraft Wool Shop in Bromley Kent.. Archives
February 2022
Categories |


 RSS Feed