When It Feels Like All Has Failed...Crafters, I'm quite sure you all know how it can feel when a project goes wrong. A forgotten increase, a purl where there should be a knit or even a dropped stitch can make you feel down in the dumps for the rest of the day if you let it. However, there are ways that we can make things a little bit better when they do go wrong. For today's post, I have compiled just a few of these. Starting Something NewStarting a new project might seem like the last thing you would want to after something has just gone wrong. You may be worried that the new project will go wrong too and that they will pile up or alternatively, you may just not feel up for it. However, if you do something simple and quick it can take your mind off of the mistake. Also, you may feel more motivated if you make something for a friend or family member. Here's a present I made for a friend recently. It was relatively simple, but making it felt really good and my friend liked it too. It was made using a kit from a company called Diamond Dotz. 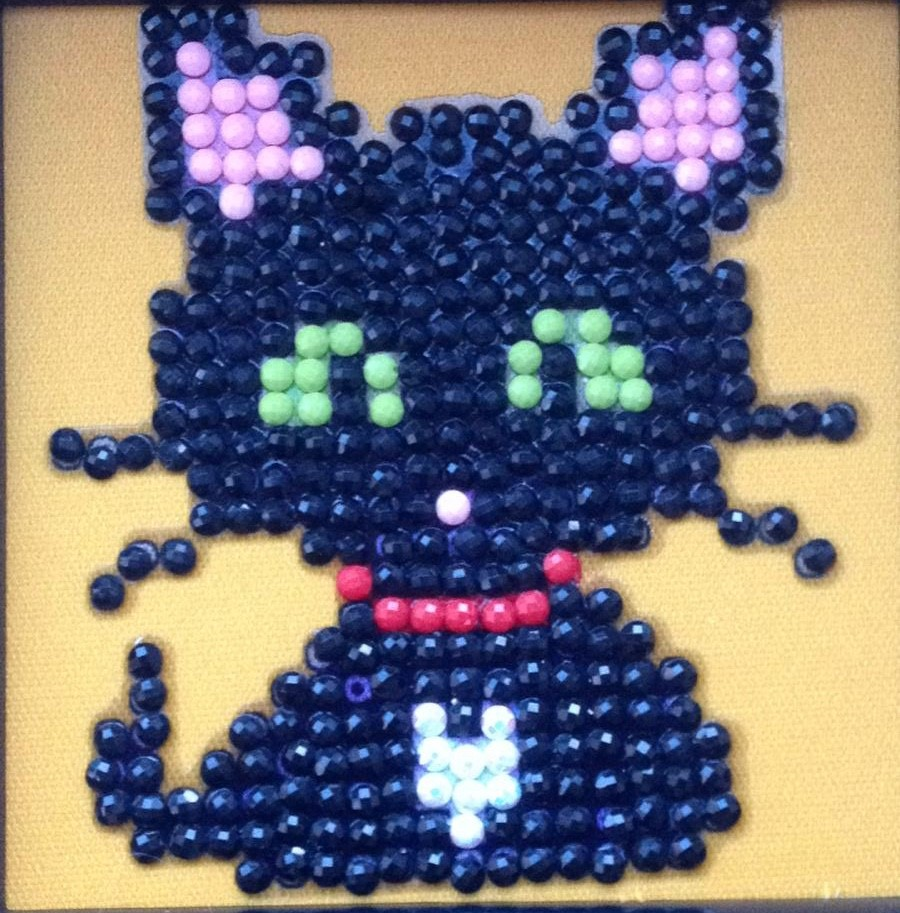 Organise and Bag Up Your CraftsUnless you are naturally organised, this may not be a great one to do straight after a craft has gone wrong. However, every once in a while, you may make a mistake on a long-term project, which may make you feel down in the dumps and not in the crafting spirit for a few weeks. This is when organising your crafts can be a perfect way to spend the time and possible persuade yourself to fall back in love with your project. Organisation means different things for different people but personally, I like to have projects that I take out of the house in knitting bags (ideally ones that have compartments for the other things I need) and projects that don't leave the house on shelves, in cardboard boxes, etc. Though, to be honest, I am not the best and getting round to organising them! Watch a Craft TV ShowRight now, there are loads of TV shows about craft at the moment, with The Great British Sewing Bee (BBC1, Wednesdays, 9:00pm or on iPlayer), The Repair Shop (BBC iPlayer) and Grayson's Art Club (Channel 4, Mondays, 8:00pm or on All 4) amongst them. Notice that, with the competitive craft shows, almost everyone makes a mistake at some point - it's completely normal, even if you are an expert! You may be tempted to watch the show thinking that they are only making mistakes because of the pressure and that you have no excuse for your flaws. Instead, think about what you are going through - perhaps you are feeling a lot of pressure yourself at the moment, particularly with the lockdown. Even if it is a different type of pressure to competitive pressure, it will still impact you in a similar way. Alternatively, if you were not feeling pressure until before the mistake, it is not your fault either! Mistakes are healthy - if you did not make them, you would make no progress. Often, the competitors that make mistakes are able to turn them around or if not, it is usually due to a lack of time. In real life, their are a lot less time constraints, so that is less of a worry On the contrast, when watching craft shows of any kind, pay attention to the amazing things that can be created through crafts. The possibilities are endless; you can be as colourful or as plain as you like, it can be as quick or as slow as you like, and you can use pretty much anything. Surround Yourself With FriendsIf the other tips do not work for you, this one should. Talking about how you feel is great and if you have any friends that love craft, then that's a bonus. If not, don't worry. If you explain to your friend why you are frustrated, they will probably be able to empathise; we all know how it feels to work on something for a long time, put lots of effort and energy into it, then notice that we have made a mistake. Your friends can uplift you by reminding you that things will get better soon and can distract you in the meantime. A Final Word...Of course, different things will work for different people, so be not be disheartened if not all this advice works for you. However, I hope that trying some of the tips or even just reading this and knowing that you are not alone helps. Also, perhaps this doesn't just apply to craft. Right now, it can be hard to feel motivated to do a lot of everyday things. Therefore it is important that we care for ourselves. Hope that you had a good mental health awareness week and are feeling OK at the moment.
Happy crafting, Caiti
0 Comments
UpcyclingA couple weeks ago, I talked a little bit about upcycling and its importance. You can make almost anything using old clothes, plastic rubbish and even furniture, and by doing so you are helping to improve the environment and also your mood! Today I will go into a bit more detail about it, giving a few ideas of things you can make in the comfort of your own home. Button JewelleryDo any of you have lots of spare buttons around the house? I know I certainly do - I was doing a small clear out a little while ago and found loads of them. If you are a particularly avid crafter, chances are you come across buttons every day and sometimes in the weirdest of places! So, if you are looking for something to do with surplus buttons, then look no further. Here are the instructions for how to make some button bracelets and necklaces. This craft is perfect for all ages and abilities. 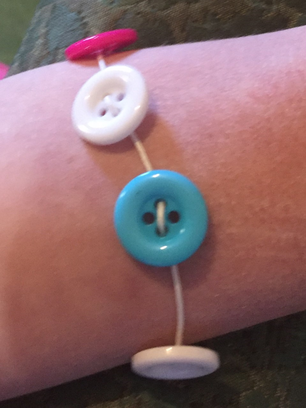 You Will Need:
Instructions
Phone Socks 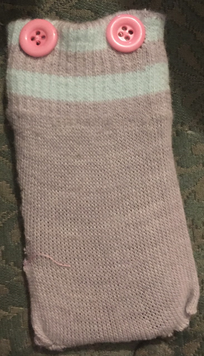 I made this phone sock out of an old glove. This craft is a little more complicated than the previous one, but it still is relatively quick and straightforward. You Will Need:
Instructions
Other IdeasHere are a few other ideas of things you can make through upcycling:
That's all from me today. I hope you have fun trying a few of these. Until next time, happy crafting! Caiti How To Make Mini Yarn StarsHappy Saturday and happy Yarn Shop Day! It is a shame that we cannot have the shops open to celebrate, but it is so important that we keep social distancing. Also, if you need any wool, you can order some by clicking "contact us" on this website. I don't know about you but whilst on walks, I have seen lots of rainbows in people's windows. Perhaps you have one in your window yourself? If not and if you are unable to go out, you can find loads online by searching "NHS rainbows in windows." I also decided to make my own rainbows with a difference: they are made of wool and lolly sticks. 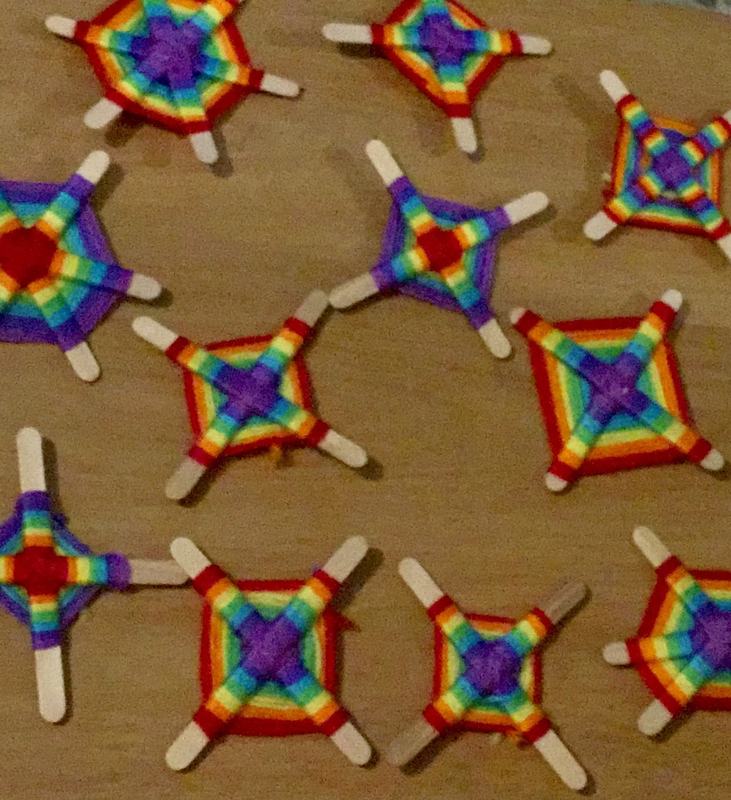 Here are the instructions for how to make your own. You Will Need:
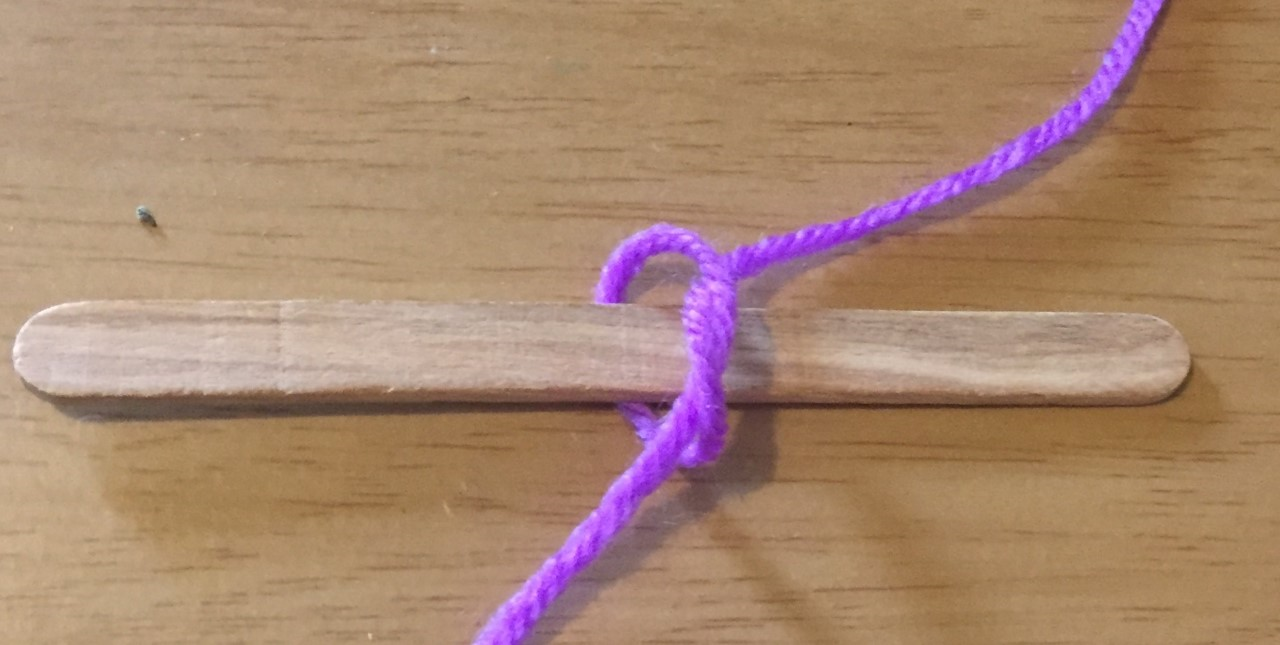
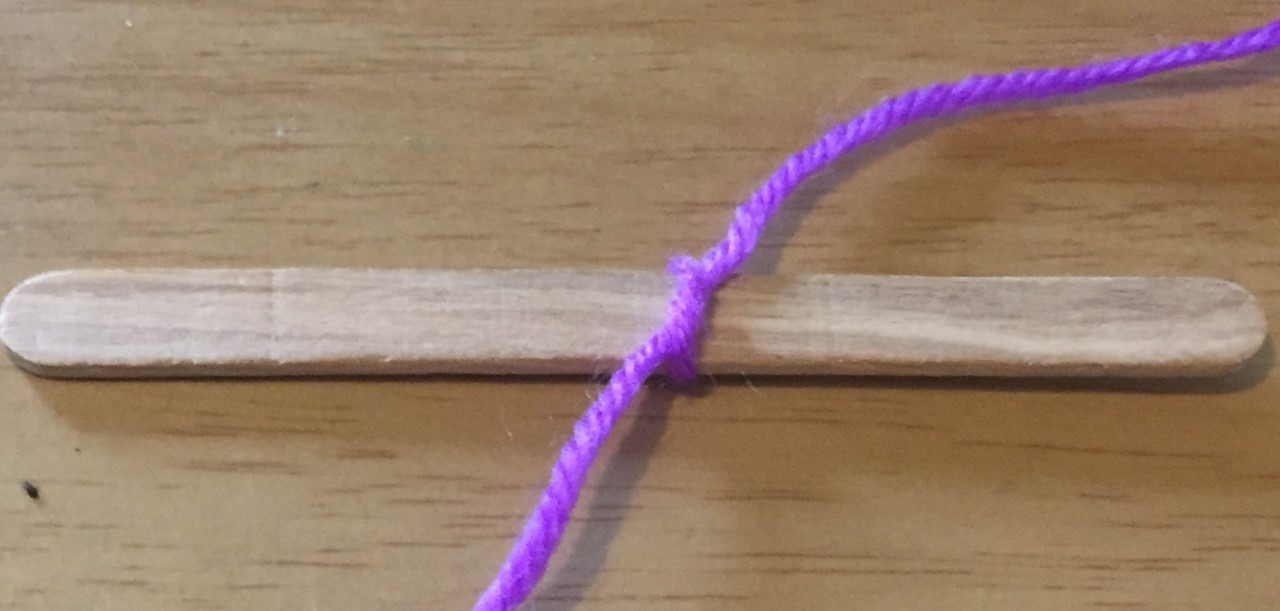
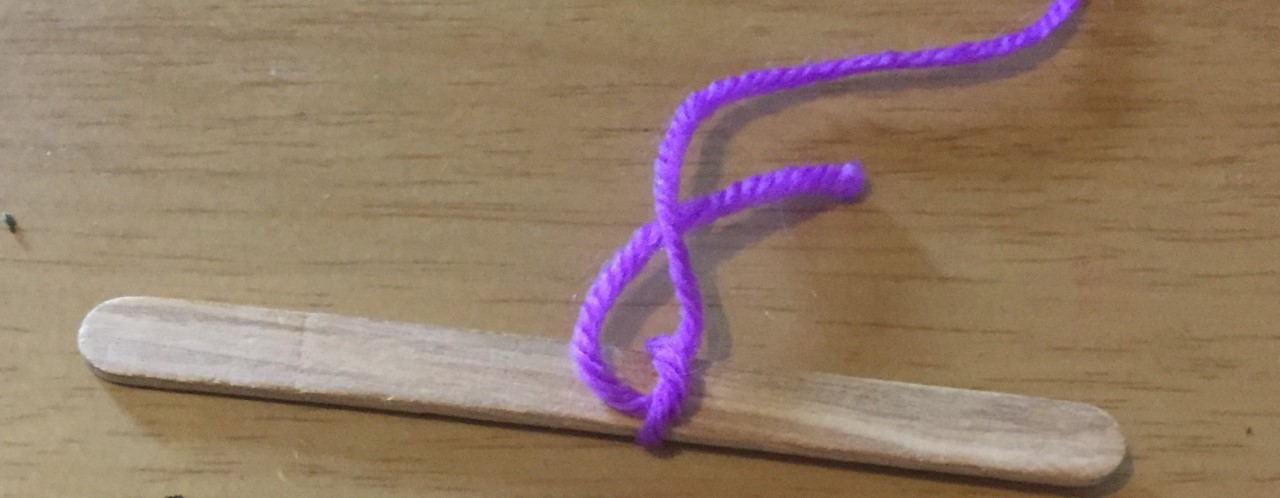
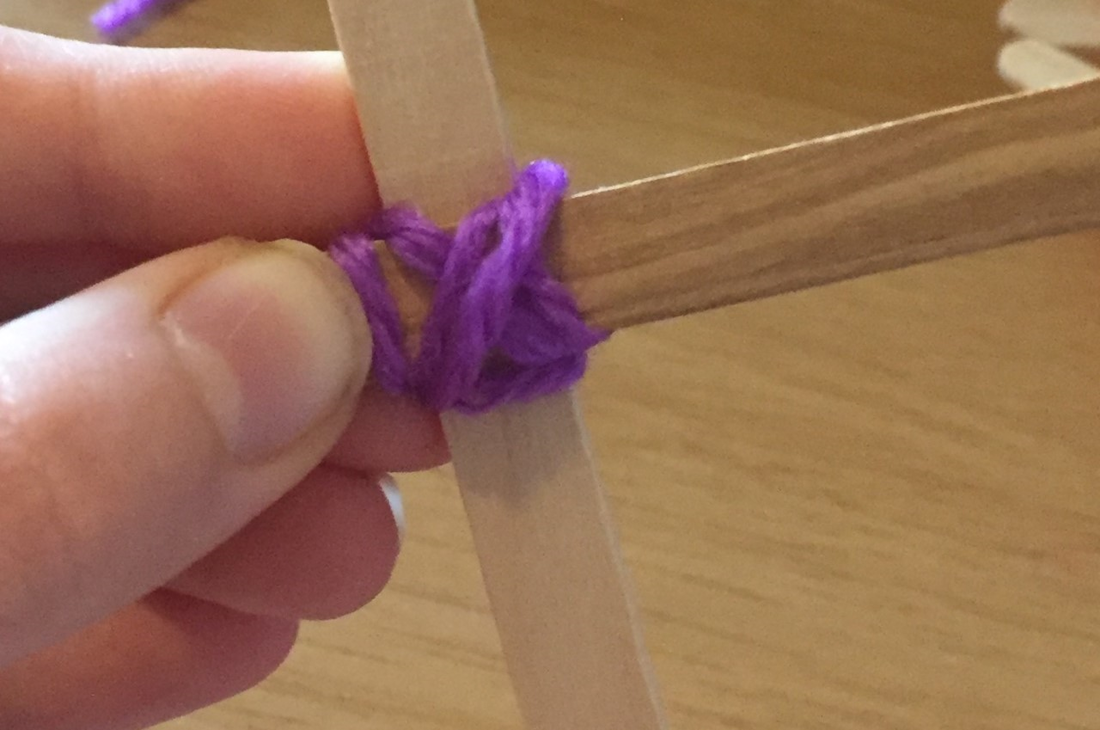
InstructionsTo start, tie a knot around one of the lolly sticks with the violet wool. Double knot it for extra security then trim the short end. Then hold the stick with the knot vertically and put a second stick in the middle of it, leaving the loop at the top. After you have done that, wrap the wool round the stick on the right, turn the sticks anticlockwise then do it again. Do this until you have one loop on each part of the cross. 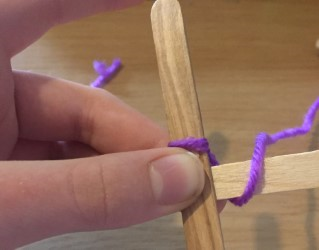 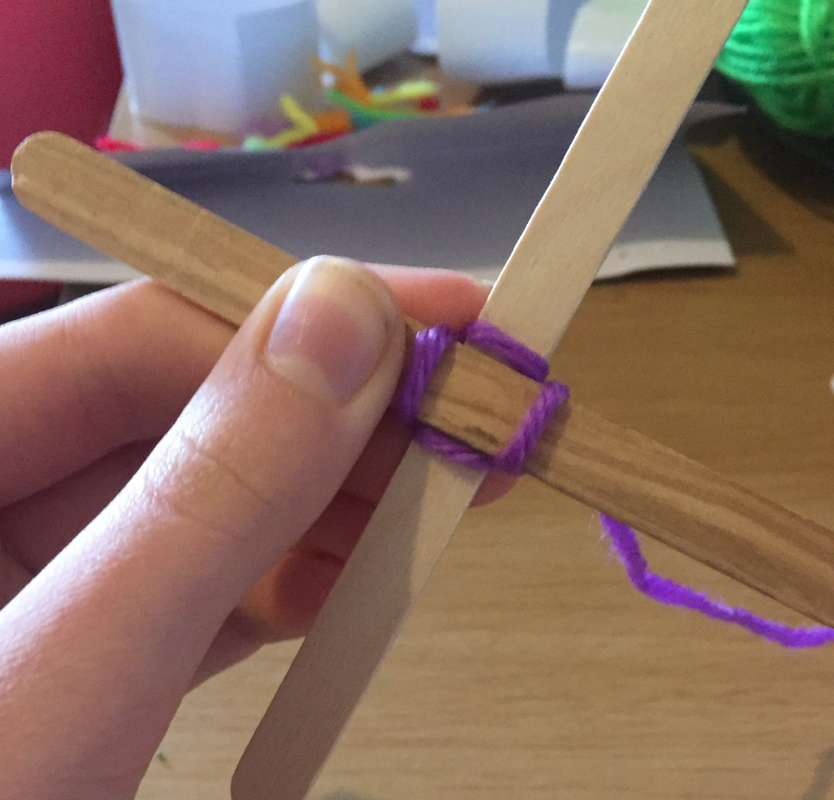 To fill the middle and secure it, loop diagonally between the two sticks a few times. Then, go back to looping round as you were before until each stick has three or four loops. It should look something like this. 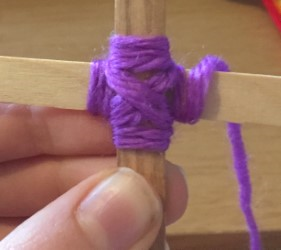 To change colour, tie the next colour around the first one. 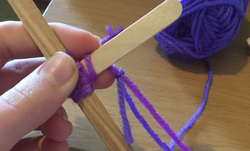 Then tie the short end of the new colour, which in this picture is on the left, to the first colour, which is on the right, and trim the two ends (but don't trim the end you are about to use!). Then continue to loop and change colours until you have done the last loop of the final colour, which should be no closer to the end of the sticks than 1cm. Once you have finished the loops, cut the ball off, leaving an end which is a similar length to the lolly stick. Thread this through the back of the star, where the knots from other colour changes should be, and double knot it. This is what the back should look like. 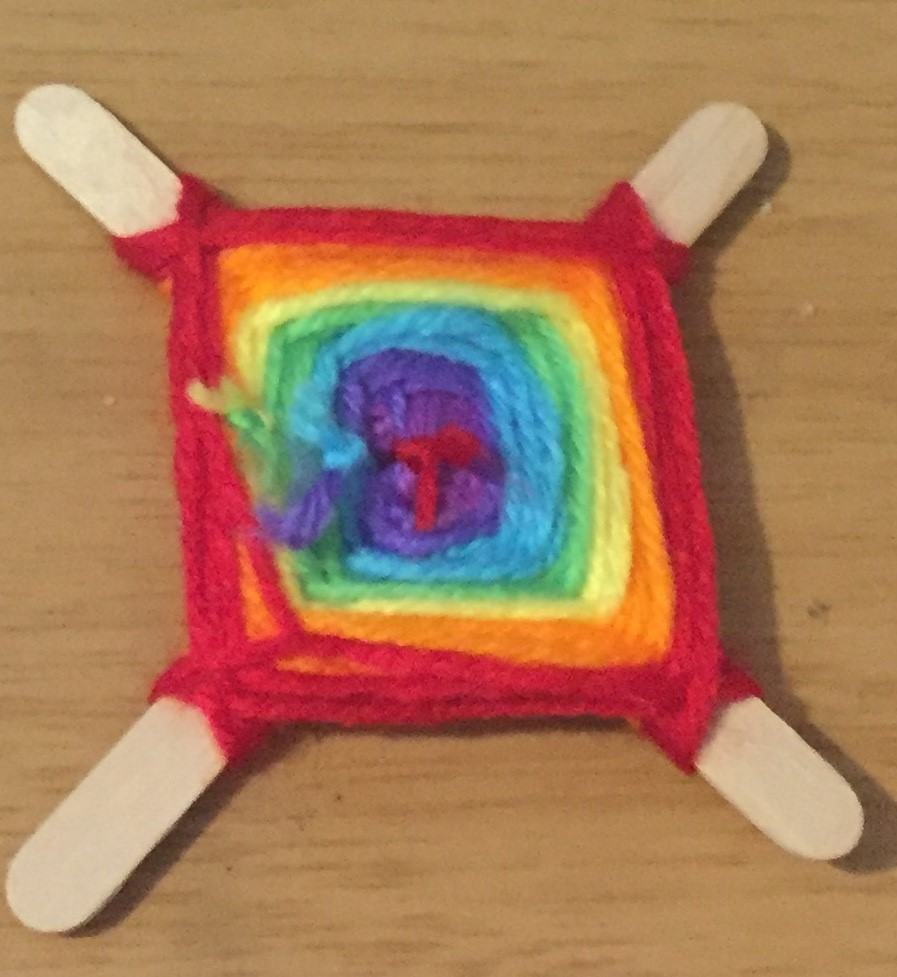 And here is what the front should look like. 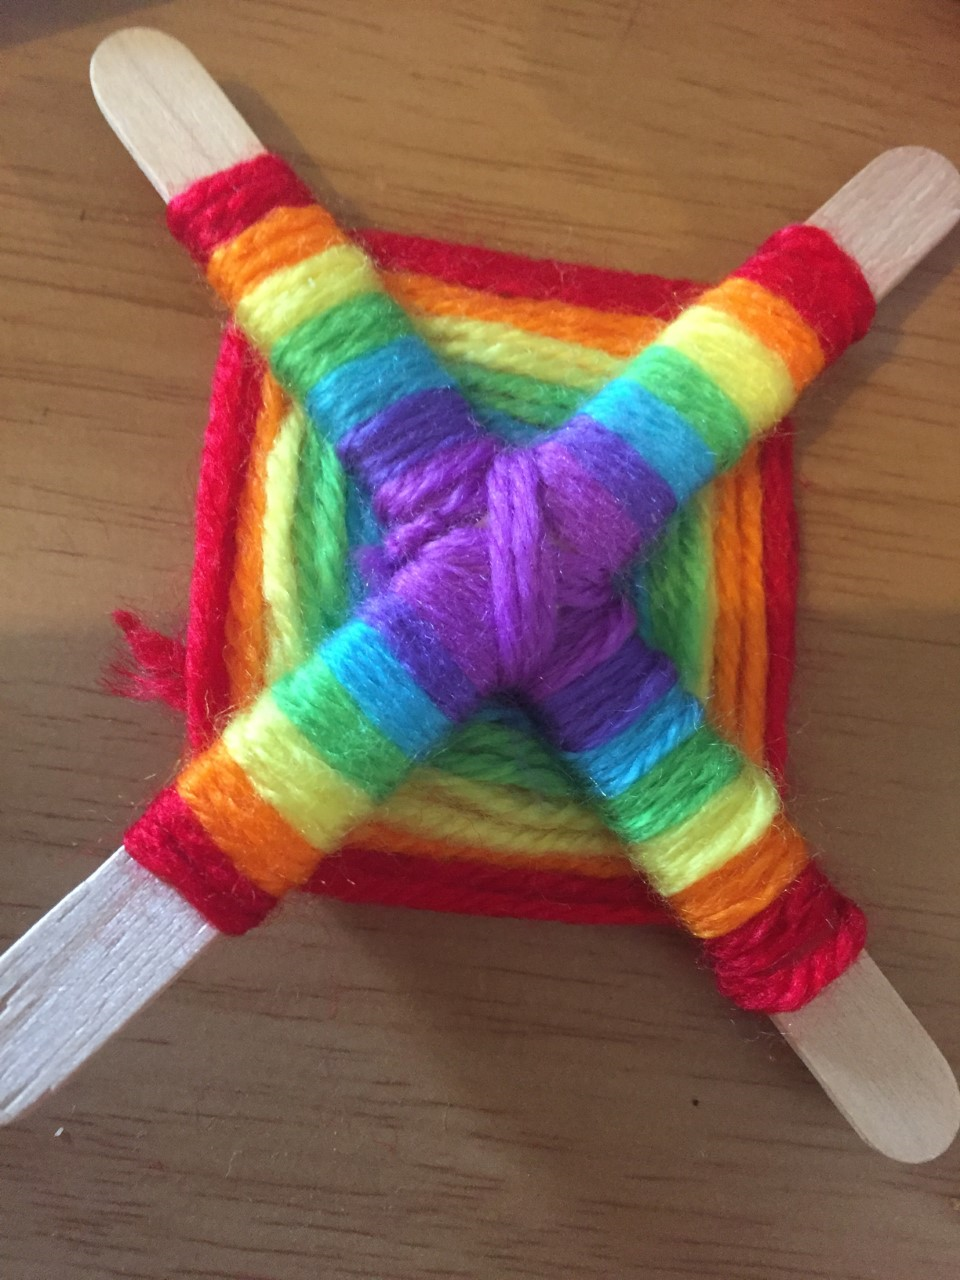 VariationsYou may have noticed that in the first photo of the post, not all of the stars look the same. This is because I varied them in a range of ways. Here are just a few ideas of how to make it look a bit different.
If you can, display them in your window or post them on social media (don't forget to tag @avicraftwool on Instagram and FaceBook!). Hope you enjoyed this post and happy crafting! Caiti |
AuthorMy name is Sharon the Sheep, the owner of Avicraft Wool Shop in Bromley Kent.. Archives
February 2022
Categories |


 RSS Feed