Fingerless Mitten Knit-AlongHello all! Hope that everything is okay for you all during this tough time and that none of you are starting to go a little insane from being indoors! If you are, fear not, as today we will be starting a fingerless mitten knit-along. This project is super-stylish, quick and perfect for beginners as well, so let's get started. You Will Need:
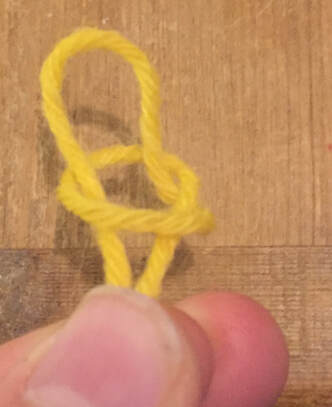
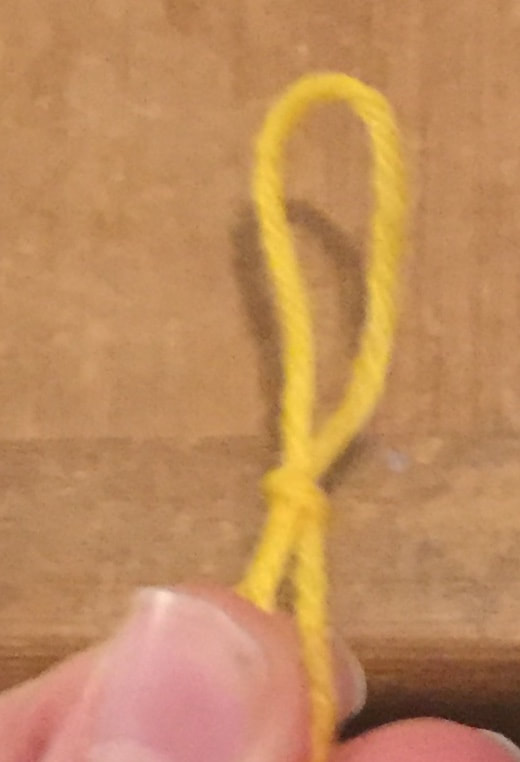
Step One: Creating the first stitchYou will be creating your first stitch using a type of knot called a slipknot. To do this, you will need to start by making a loop near, but not right next to, the beginning of the wool.  Then, pull the strand that is not attached to the ball through it in a looped shape and pull it tight. This is your first stitch.
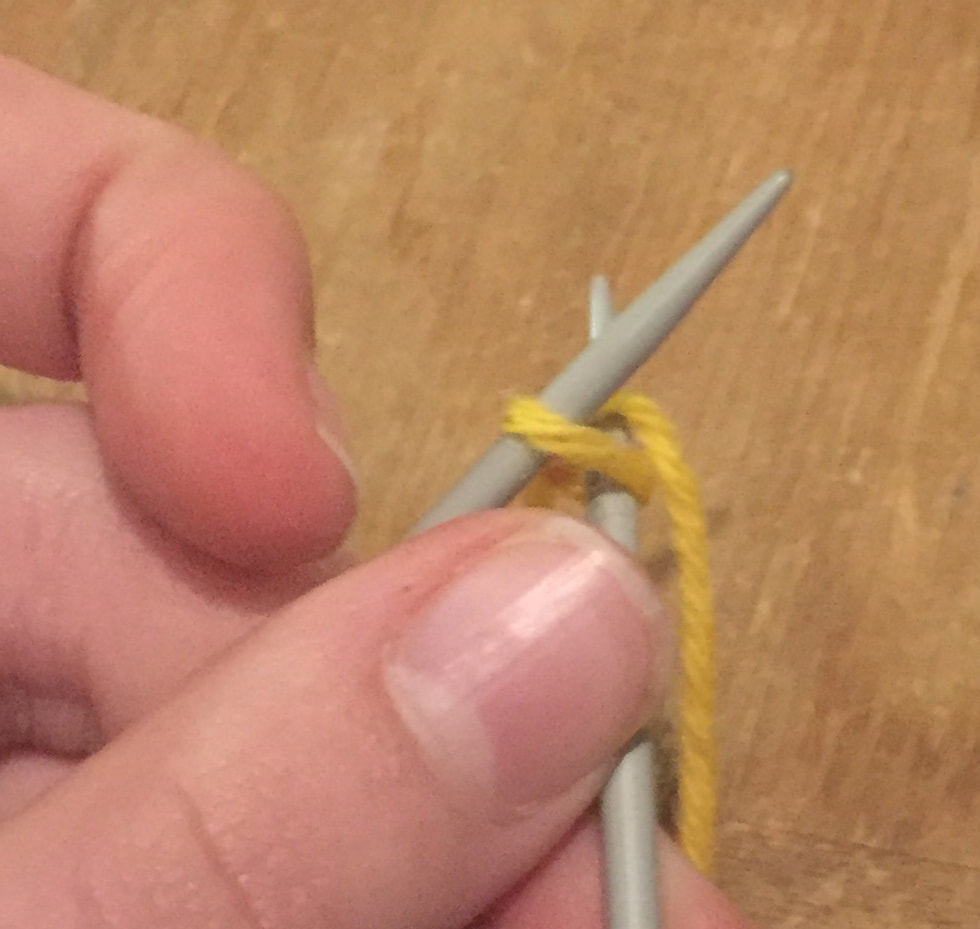
You can now put this onto the needle and use the two ends to tighten it so that it does fall off of the needle (but not to the point where it cannot move or slide along the needle fairly easily). 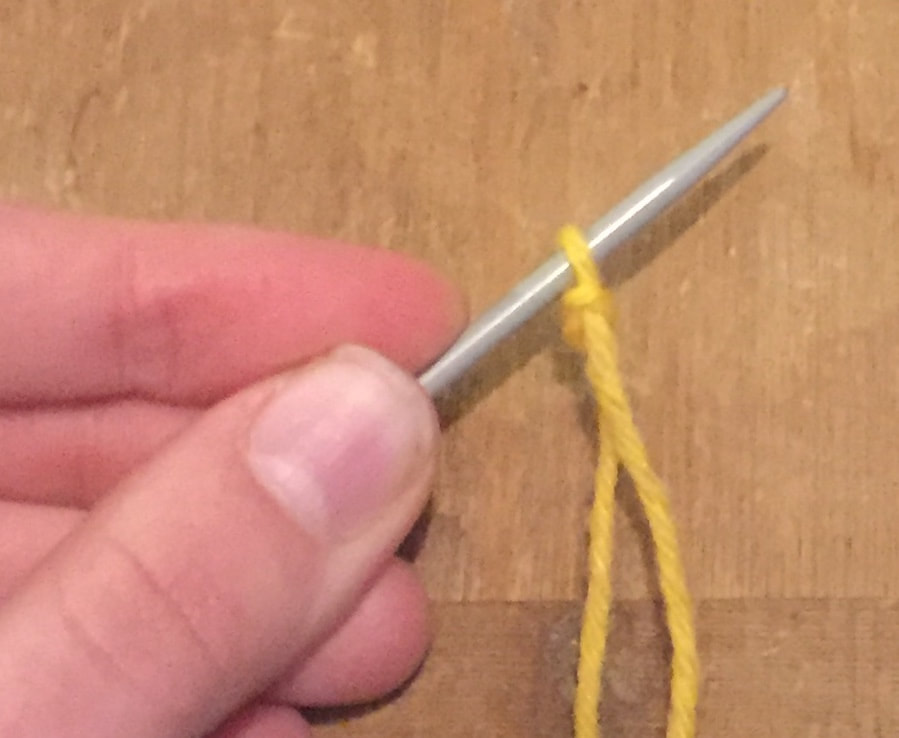 Step Two: Creating the Other StitchesNow, we need to create the other stitches. Firstly, you need to hold the needle with the stitch in your left hand if you are right handed or your right if you are left handed. If you are left handed, you will need to do each step using the opposite hands to what is shown in the pictures from this point onwards. Next, you put the other needle in the opposite hand and put it through the back of the stitch. 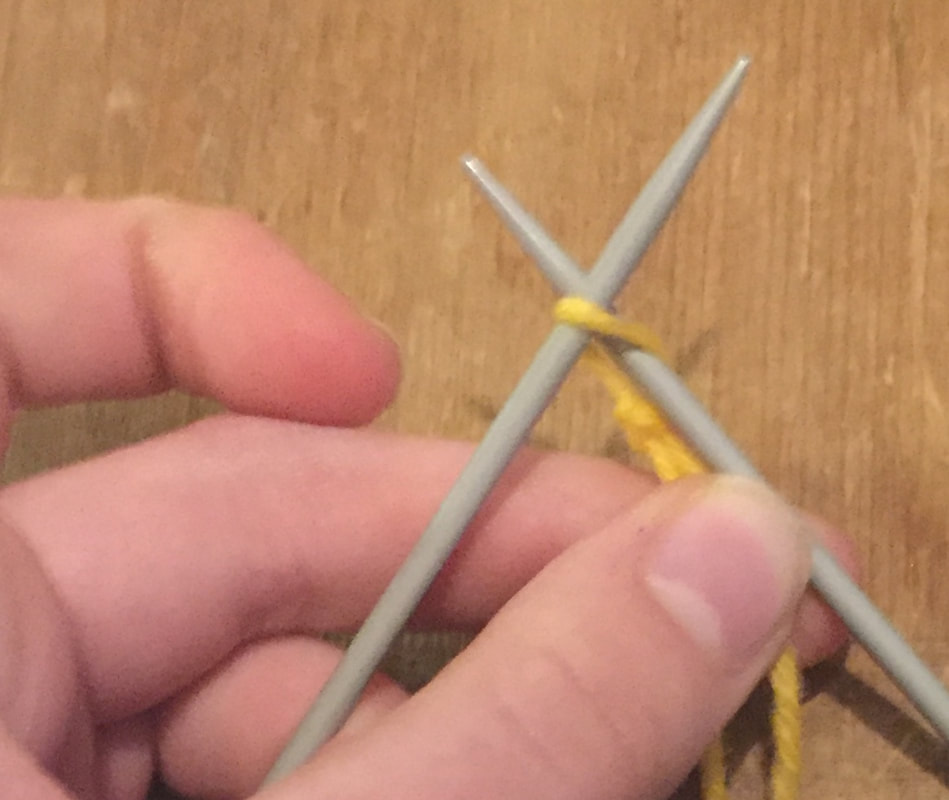 Using the strand of yarn that is attached to the ball of wool, form a loop around the back needle and pull it through the stitch, moving the back needle to the front.
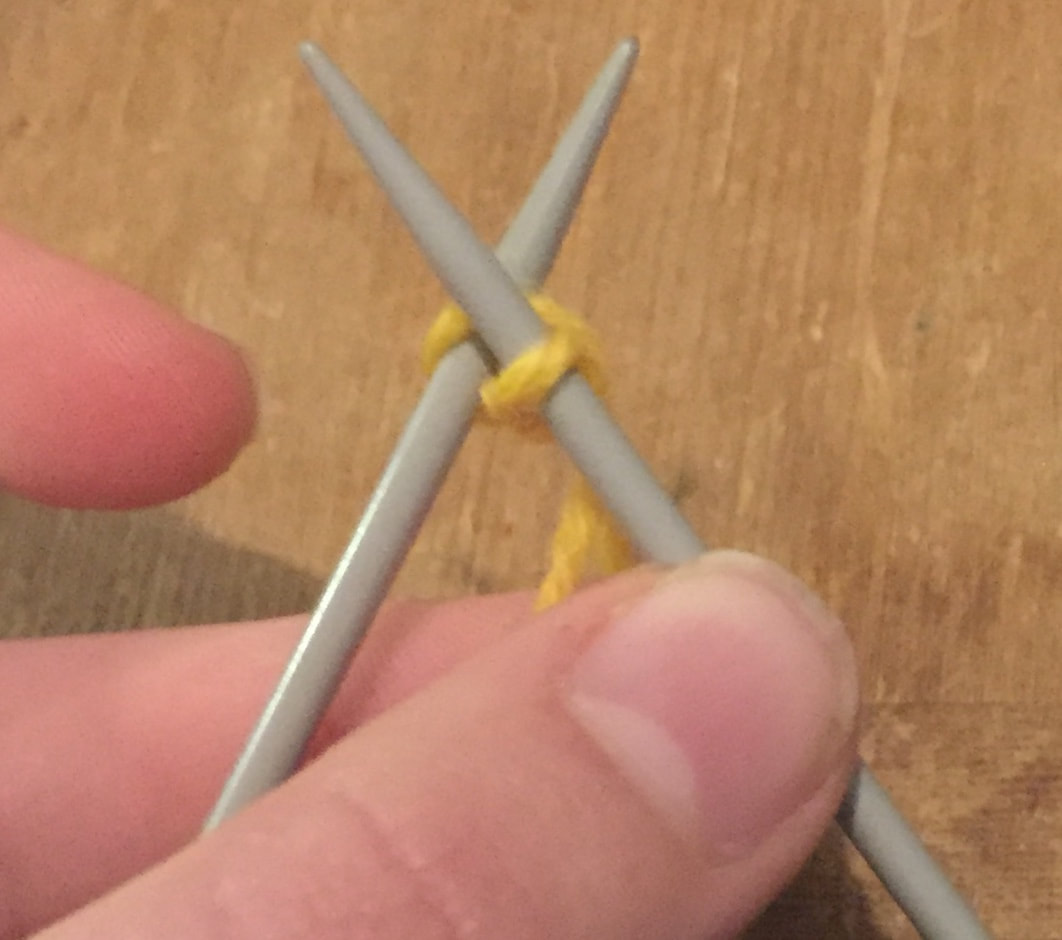
Now, put what is on the front needle on to the back needle. This is your second stitch. Repeat this process to form around 52 stitches adjusting the number to suit the size of your wrist. The only rule when choosing your stitch number is that it must be divisible by four. Organising The StitchesFinally, for today, you need to split the stitches between the two needles. To do this, you need to slide the stitches onto the cable that connects the two needles, find the middle of the stitches and pull the cable between the two halves to split the stitches. It should look like this: 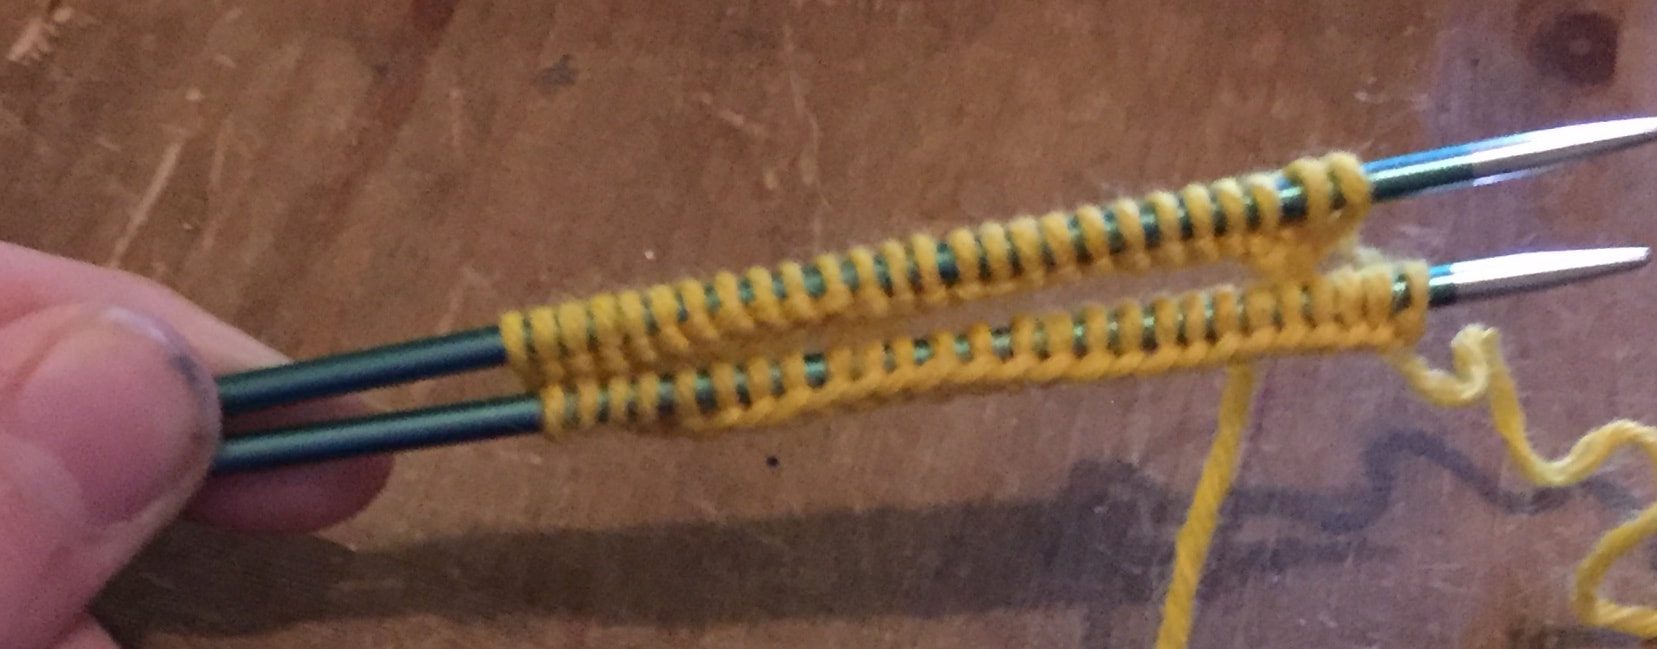 That's all for today! If you have any problems, let me know in the comments and I'll do my best to get back to you and help you out.
Happy knitting! Caiti
0 Comments
Leave a Reply. |
AuthorMy name is Sharon the Sheep, the owner of Avicraft Wool Shop in Bromley Kent.. Archives
February 2022
Categories |
 RSS Feed