Knitting and MeditationHello and welcome back to the blog! I wonder, how many of you have tried meditation? I have tried it a few times (I can particularly remember doing a few sessions at school) but there's something about it that doesn't really work for me. Often, the breathing exercises can feel a little forced and I really hate sitting still. However, life can be stressful and having an outlet or taking time out of your day to relax can really help. Recently, I have discovered the world of knitting meditation, where people knit and do meditation exercises at the same time. Today, I thought I would look at some of the things you can do to make your knitting even more soothing and meditative. Picking your Meditation ProjectFirst of all, you need to find a project that you enjoy, ideally one that takes little thought and is simple or familiar. For me, that's something like a chunky blanket, scarf or even a jumper if I have done one like it before, whereas Sharon prefers to knit socks while meditating. Also, the colour and texture are important too - personally, I like to work with pastel colours (I find colour-changing pastel yarns particularly soothing) and I like slightly fluffy yarn, such as chenille, but nothing too fluffy as that can be tricky to work with, which is not ideal for meditating! Your SurroundingsYour surroundings play a key role in all types of meditation. A great way to ensure that your space is perfect for meditating in is by focusing in on the five senses and how you would like those to be whilst you meditate. Here is what I like to have for each of the senses when I am relaxing, as some alternative options: Sight: In the videos that I have seen of knitting meditation, people will often knit in very tidy areas, but for me, that is not too important. Also many people like to surround themselves with their favourite things, such as pebbles or stationary, but again this is not too important for me either; so long as I have everything that I need to knit, I am good to go. What does matter to me is the lighting. My room is pretty dark, as I have a blackout curtain and very few lights. However, for the sake of being able to see my project, I may open the curtain and window if knitting during the day or turn on my small lamp and colour changing bulb and set it to either a shade of green, blue or purple when knitting at night. Smell: Some people love candles, though as my house is made of wood and I am a very clumsy person, I could not trust myself with that. Instead, I like to use perfumes or pillow sprays, particularly if they have lavender in. Also, it's pretty important for me that the wool doesn't smell too strong, though I know that many knitters love the smell of pure wool. Sound: On my phone, I have a playlist full of calming music. I love to plug in my headphones and listen to that as even at lower volumes, it manages to block out the rest of my surroundings pretty well. Some people prefer background noise and ASMR, which is when people record the sounds of tasks, such as eating, cutting hair, doing makeup and many other things. Personally, I'm not a big fan of this and I particularly dislike the eating sounds but some ASMR videos can be very soothing. On the other hand, knitting in silence can be really relaxing and the clicking of the needles could be its own form of ASMR Taste: This one is less important, though it can be nice to have a snack whilst knitting. Personally, I think chocolates, cake or shortbread are the best knitting snacks. Touch: This is more to do with the garment itself, though touch can also link to other things such as where you are sitting. Make sure you are really comfortable, ideally with a supported back and perhaps some soft cushions too. The Type of MeditationWhat type will you do? Will it be centred around breathing, visualisation or something else? Will you incorporate your knitting or will you just use your knitting to allow you to keep still? Here are some classic types of meditation that you can either do with your knitting or just whilst you knit.
With Knitting
That's all from me this week. Relaxing can sometimes feel like a chore but taking just ten minutes out of your day to do something for you can be really beneficial. Next week, I will be sharing some final knitting tips but until then, happy crafting. Caiti
0 Comments
Knitting: What Next?Hello and welcome back to the blog! Last week, we looked at the basic steps of knitting and learnt how to make tension squares. Whilst squares are useful and versatile, they can get a little boring after while! So today, I am going o talk about some projects or garments that you may want to start once you have learnt the knit and purl stitches. 1. ScarvesMy first ever project was a scarf, which I made using just knit stitches (meaning that it was even easier to make than the squares from last week!). I then started using scarves as ways of learning other stitch patterns such as rib stitch, cable and lace. Scarves are great projects for anyone, whether you want something simple and quick or something more intricate. What's more, they make great presents too; I remember making scarves for some of my family as Christmas presents when I was about eight years old, and I also taught a friend how to make them when I started secondary school so that we could make ourselves matching scarves. 2. Blankets and PillowsThe great thing about knitting a blanket is that it is no more difficult than a square so it does not require too much concentration, but it is on a much larger scale, so it's something that can keep you going for much longer. When I was in primary school, I made a striped baby blanket in chunky pastels. It was a great way to relax and learn new skills, such as changing colour midway through a garment. Pillows and pillowcases are similar but once you are done, you fold it in half and sew it up. It's a good way to get into sewing, which is important when making more difficult garments such as clothing. Some knitters are not a big fan of the sewing up but for me, it's really satisfying to sew something up and finish it. 3. Hats and SocksI decided to group these for two reasons. Firstly, I put them together because they can both be made in the round using circular needles, which is a useful skill and is much less difficult than you may think. Secondly, I must confess that I combined these two together as they are projects that I have less experience of, though I am often told that I should give them a go as many people love making them! I did make a sock a couple years ago but personally, I didn't find it particularly satisfying as I prefer working on larger projects. I had to give socks and hats a mention though as many people love the fact that hat and sock knitting is very quick and easy, making it perfect for gifts. 4. Jumpers and CardigansThis may seem like a big jump from squares but in reality, it isn't that different. The 80s jumper I made earlier in the lockdown was made up of two squares for the front and the back and the sleeves were very similar, with only a little basic shaping which involved casting on extra stitches after a certain amount of rows. This type of jumper is called a dropped sleeve jumper. Other styles may contain a little more shaping - for example, I am making a jumper at the moment where on the fronts and the back, you will do increases for a period of time then some decreases. This may sound a little complicated but it is often explained in the pattern and you can find online instructions and tutorials for shaping too. Sometimes you have to play around and try lots of different patterns as some are explained slightly differently, so different people may find them easier or harder to understand. For example, I recently tried to make a waistcoat and it was going well at first but I started to make lots of mistakes as I kept misreading the pattern and having to try and remember errors I had made so that I could do them on the other side. Eventually, I decided to undo that project and make a different cardigan instead which, despite the fact that the structure was similar to the waistcoat, I understood far better. 5. ToysAgain, because I love big and bulky projects, I haven't made that many toys but I would love to make some in the future once I have finished a couple of the jumpers and cardigans that I have planned. Some toys can be quite fiddly to make as they are often made on very small needles so that the stuffing doesn't fall out. In addition, they often involve a lot of shaping (e.g. to create circular or rounded shapes) so that they look more realistic. However, you can make toys out of squares or shapes with minimal shaping. Also, because toys can be quite popular and quick to make, there are many tutorials available online, particularly on YouTube.
So those are just a few of my recommendations on some projects to start next. Got any other suggestions? Leave a comment down below! Until next time, happy knitting. Caiti Knitting: Basics and Tension SquaresHello and welcome back to the blog! Yesterday was our first day back in the shop and it was great to see some fellow crafters again. From now, we will be open from 10am until 4pm on Wednesday to Saturday. In today's post, we will look at the basics of knitting and learn how to make a tension square. A tension square is a square that you knit before you start a project or pattern to make sure that you have the right needles and you are knitting tightly/loosely enough. I have covered some of these steps on previous posts so some of you may find this a little basic; however, there are some new things in here that you may find useful, such as how to adjust a pattern according to your tension. So, let's start Step One: Setting UpIn order to knit a tension square, you need the right equipment. You will need
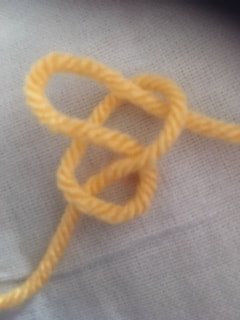
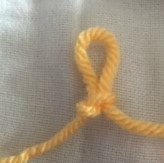
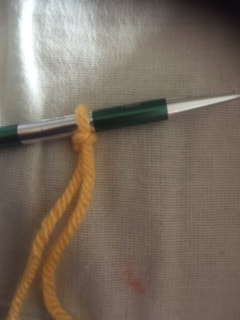
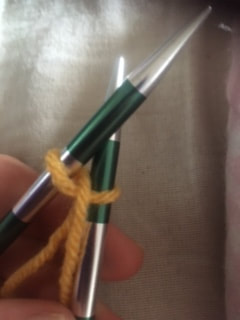
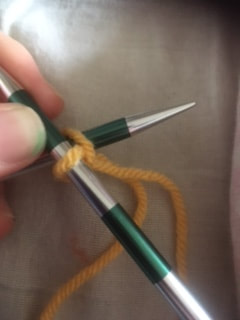
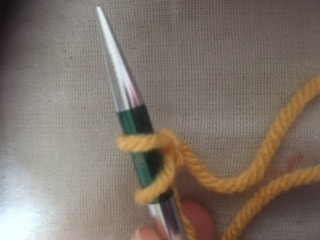
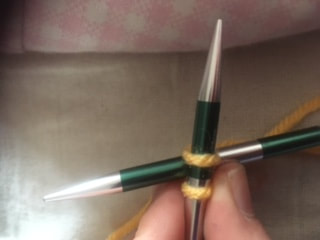
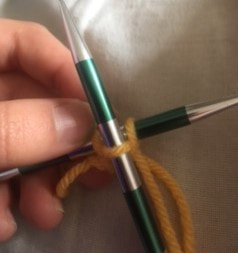
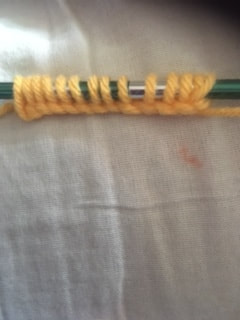
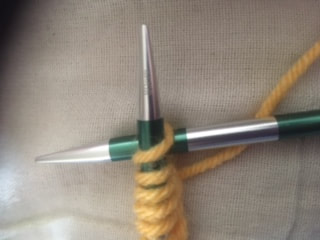
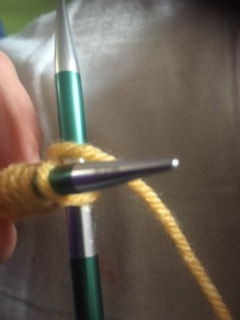
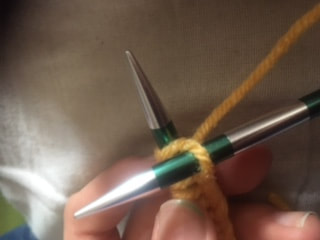
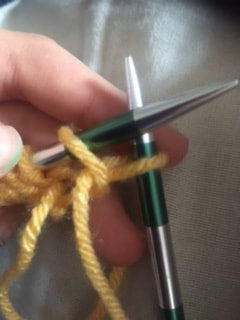
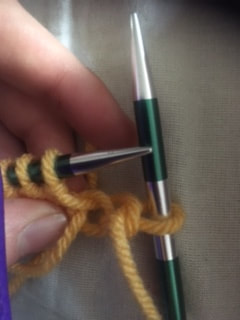
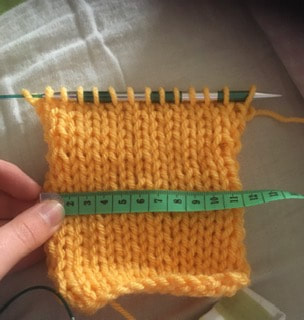
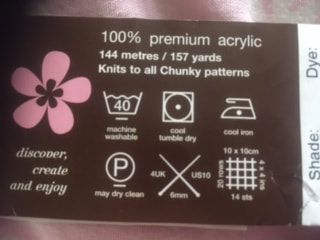 In the bottom right-hand corner of this image, it tells us to use 6mm needles, cast on 14 stitches and do 20 rows in order to make a 10cm by 10cm square. If yours requires a smaller needle size you will do more rows and stitches and vice versa. First, we need to cast on 14 stitches or however many stitches your tension square states. Step Two: Casting OnThe very first stitch will be made by creating a slip knot. To do this, create a loop about 15-30cm away from the end of the yarn. Then, pull a loop through this and keep pulling until the knot is secure. Finally, place it on the needle and pull the two strands so that the loop fits around the needle securely but not too tightly. Then, to create the second stitch, hold the needle with the stitch in your non-dominant hand (for me this is my left) and the needle without in your dominant hand (i.e. my right hand) Put the empty needle into the first stitch, wrap a loop of yarn around this needle, pull the loop through the stitch and place it on the needle. To create the rest of the stitches, we will repeat this but instead of starting by putting our needle into the most recent stitch, we will put it between the two most recent stitches. The last photo shows how it should look once you have created all of your stitches in this way. Step Three: Knit and Purl RowsNow that we have all the stitches we need, we can start doing the rows. For the first row we will do all knit stitches. These are very similar to the casting on stitches as you put the needle in the stitch in the same way, wrap a loop around this in the same way and pull the loop through in the same way. However, instead of putting this onto the needle in the non-dominant hand, you slip it off of the other needle, leaving you with a stitch on the needle in your dominant hand and a stitch less on the other needle. Keep doing this until you have knitted all the stitches. Well done - you have completed your first row! Make sure you keep track of this so that you do the correct amount for your tension square. Next, swap the needles so that all the stitches are in your non dominant hand and your empty needle is in your dominant hand. We are now going to do a purl row. With the knit stitches, we would put our needle in from the front to the back but with purl, it is the opposite. Put the empty needle into the stitch from the back of the stitch to the front. Then, wrap a loop around this, pull this back and slip the stitch off of the other needle. This creates a purl stitch and moves your strand of yarn to the front - make sure you keep it this way for the rest of the purl row. Keep repeating until your purl row is complete. Well done - another row completed! Keep alternating between these rows until you have done the amount stated on the ball band (for me, this meant doing 20 rows - 10 knit and 10 purl). This technique is called stocking stitch. If your forget what type of row you need to do, you can work it out from the side of it that you can see. The side you see when you are on a knit row looks like this (a sort of fishtail pattern). This is called the right side. 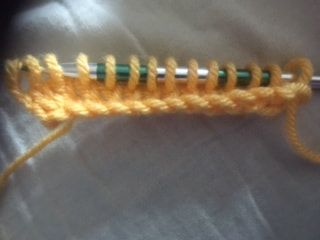 The side you see when you are on a purl row looks like this. This is called the wrong side. 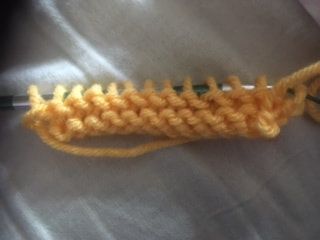 Once you have done all of the rows, it is time to measure up and see if your tension matches the ball band. Step Four: MeasuringThe measurements you need to take are the height and width. Here are my measurements. If both the height and width of the square are smaller than 10cm by about the same amount, it means your tension is tight. Experiment by making tension squares with larger needles. Alternatively, having both measurements over 10cm by about the same amount indicates you have a loose tension, which can be resolved by reducing the needle size. However, it can sometimes be a little more complicated. If your width is fine but the height is too short or long, you may want to do more or less rows when you do the pattern. If the width is the problem, you could do more stitches if it is too narrow or fewer stitches if it is too wide. For me, as my square is pretty much the right width but a little over and quite a few centimetres too long, I would probably do less rows and would possibly consider a smaller needle size too.
After you have done it, you could undo your square and use this yarn in your project, but you may wish to keep your tension squares and make them into something. Once I have gone through crochet tension squares, I will show you a few things that you can make with tension squares, but for now I will leave it there. Next week, I will look at some things that you could try making after you have learnt these basics, but until then, happy knitting! Caiti Knitting: The BenefitsHello and welcome back to the blog! We are now halfway through this series of posts on mental health and craft, and today we are starting a new section all about knitting. To start, we will look at the physical and mental benefits of knitting. However, before I start, I want to clarify that am not speaking for everyone; you may find that knitting has a totally different impact for you or that it does not help in some the ways I mention. That is absolutely okay and normal - everyone is different! Now, let's get to the list. 10: It Can Be Used For "Cognitive Anchoring"This is a term that I only came across recently when doing research, but I feel that it describes one of the reasons that I love knitting really well. Cognitive anchoring is when you learn by doing other things at the same time, and is the reason why some students doodle, organise or do hand crafts during lessons and still manage to focus on what they are being told. However, one of the problems with doodling is that it is not too productive and can be seen in a negative light. Therefore, knitting is a great alternative. For example, some students will knit whilst reading their notes or listening to a revision video. Even if you are not a student and are not trying to learn anything new anymore, you may find that when you knit, you are able to concentrate on things such as the TV, conversations or other things that are going on around you. These are also examples of cognitive anchoring. 9: Knitting Can Help You Learn Life SkillsYou may not realise, but there are a great deal of life skills involved in knitting. At the start of your project, you have to decide what you will make a set a goal. You have to be organised and make sure that you have all the materials you need to do your project. Then you need patience and perseverance as whilst knitting is fun, it can take a little while to progress. Finally, after you have finished your project, you come away not only with a new gift but also with a series of transferable skills. Because of this, knitting classes have been started up in some prisons. Inmates of all races, ages and genders are taught to knit and make presents for family members as well as comfort dolls for traumatised children. If you want to watch something uplifting, I would definitely recommend looking this up on YouTube. 8: Knitting Can Prevent Memory LossIt's true! Memorising sections of patterns, word shortenings and key steps really help sharpen your mind. This is because learning new things creates more connections between brain cells. Knitting is believed to help decrease dementia risk, though this has not been fully proven yet. 7: Physical BenefitsKnitting can improve fine motor skills (coordination of hands and fingers) as to knit, you need to move your hands and wrists a lot, possibly at quite a fast pace. This increases strength and dexterity. Therefore, it is often used to prevent or alleviate symptoms of arthritis or help people recovering from injuries. As someone who is hypermobile and struggles with fine motor skills, I have found knitting to be really helpful and I now experience few problems in my hands and fingers. 6: Knitting Can Help With Addiction and ImpulsesKnitting itself has been proven to be an addictive hobby. Therefore if you are suffering with addiction, such as to smoking or alcohol, or just experiencing mild impulses (such as that impulse to eat a whole tub of Pringles in a day - been there, done that!) knitting can help some people as even if you are experiencing a craving, you may be too occupied by your knitting to act upon it. If not, you may at least want to finish the row you are on first, giving you extra time to consider and decide. 5: Knitting Can Help With PerfectionismWhilst being observant and perfecting fine details can be an asset at times, it can also be incredibly draining when you try to do perfectly in everything because being perfect just is not possible! I definitely am a perfectionist and find myself getting stressed over making mistakes or doing "poorly" in things such as exams and pieces of homework. I find that knitting really helps with this as I do make mistakes frequently enough in knitting but I know that they do not often have a great impact on my garment and if they are that major, I can always undo and rectify them. Doing this in knitting reminds me that in all areas of life, it is okay to make mistakes as I can always learn from them and only some will have a major impact on my life, whereas others will not matter in a few months' or years' time. 4: Knitting Encourages CreativityKnitting is great if you struggle with creativity or if you want to become more creative. Knitting patterns have a great deal of structure, meaning that you can definitely enjoy knitting if you do not feel that you are creative. However, you get to be creative by making decisions on colours and textures then later, once you are familiar with a pattern or technique, you can incorporate new things into the pattern and add a bit of your personality and style to it. Often, as I am obsessed with baggy things and colourful garments, I will add stripes and extra length to the things I make. I really love playing around with this and found it has sparked my creativity generally. 3: Knitting Can Reduce StressOnce you have got the hang of knitting, it is quite a repetitive thing, using the same actions again and again to form garments. Personally, I find repetition incredibly soothing and familiar, which can help me feel considerably less stressed or anxious in times of uncertainty. For this reason, knitting is also used as a form of art therapy or meditation, which I will be looking at in more detail in a few weeks. 2: The CommunityWhen you become a knitter, you become part of a community of crafters. You can connect with other crafters online, through websites and chatrooms which allow knitters across the world to share advice and experiences, as well as in shops, where you can meet other customers and staff members who knit. Next week, the shop will be opening up again and we are so excited to see our customers and crafting friends. 1: The Sense of PurposeWhen we are at our lowest, it is easy to forget our importance and feel as if we are worthless to those around us. However, when you pick up a pair of needles and make something such as scarf to keep a family member warm, a toy to entertain a child or even a pouch to save an endangered animal like a bat or kangaroo (yes, you read that right), you can really feel a sense of achievement and purpose.
For me, the best thing about knitting is the power that it has. It can improve your life in a range of ways, both physically and mentally. Next time, I will be showing you the basics of knitting, but until then, happy crafting! Caiti Learning and Inspiration: Social MediaHello and Happy Easter! I hope you are all having a good week and taking the time to relax. Today, we will be looking at social media sites and a couple of accounts for learning and inspiration. Personally, I think this is the method of learning that I prefer as I am a very visual learner who likes to see things played out in front of me. Also, as a young person, social media very accessible for me and I love the fact that with the Internet, I can learn from both individuals who enjoy craft and shops that have an online presence (most shops and manufacturers do). Here are just a few of my favourites. I have to be honest, I don't use Instagram a lot for learning but I do follow a couple of accounts that give me inspiration and tips. For example, it's good to follow yarn brands such as Stylecraft or Lion Brand as these update you on the new wool, show you it in use and some also share tutorials on different yarn crafts. On Lion Brand's Instagram page, you can learn macramé, punch needling and finger knitting as well as basic knitting and crochet. We also have an Instagram account run by Sharon, which is @avicraftwool. Here, we share what we are making, yarns that we love, updates on the shop and lots more. Here are some photos of my favourite posts from it. A couple months ago, I mentioned Pinterest on this blog; however, I had only just got it so I didn't have tons to say. Now, I have many boards, so I'll put the links below for you have a look at. I'll also add a link to the Avicraft Pinterest account. knitting inspiration - this board has a range of knitted items that inspire me, particularly jumpers and cardigans. crochet inspiration - this board is similar but has a lot more blankets. One of the pins also shows how to plan a project and arrange it, which I found very useful! macramé inspiration - as part of my Duke of Edinburgh award, I am learning macramé and my most recent pin is of what I am learning to make at the moment. One of the great things about Pinterest is that some pins, including the one I have mentioned, will take you to a website explaining the instructions which is so useful! aesthetic - I use this board to help me deciding on colour schemes. Some of the pins at the bottom have all the colours in the photo matched up with yarn shades next to it, often in Stylecraft Special DK. fashion - remember a couple weeks ago when I recommended looking up non-knitted clothes for inspiration so that you can make your garments look modern and work with the rest of your wardrobe? This is exactly what I use this board for. Avicraft Pinterest account - this has so many pins and boards to inspire to do a range of craft types, so there was no way I could pick between my favourites. This also includes some photos of things Sharon has made, so I definitely recommend that you take a look and give it a follow too! YouTubeAlthough I don't use YouTube for knitting and crochet a lot, I have used it for other crafts and some non-craft hobbies (particularly music and computer programming) and cannot recommend it enough! As I said earlier, I am a very visual learner and I find it a lot easier when I see instructions being played out. Also, I love that I am able to rewind or slow down the speed it plays at if I need. However, different countries use different craft terms, so I would recommend that you find accounts from the country you live in.
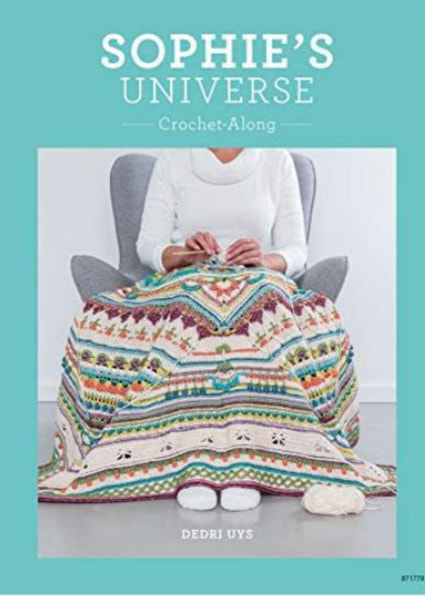
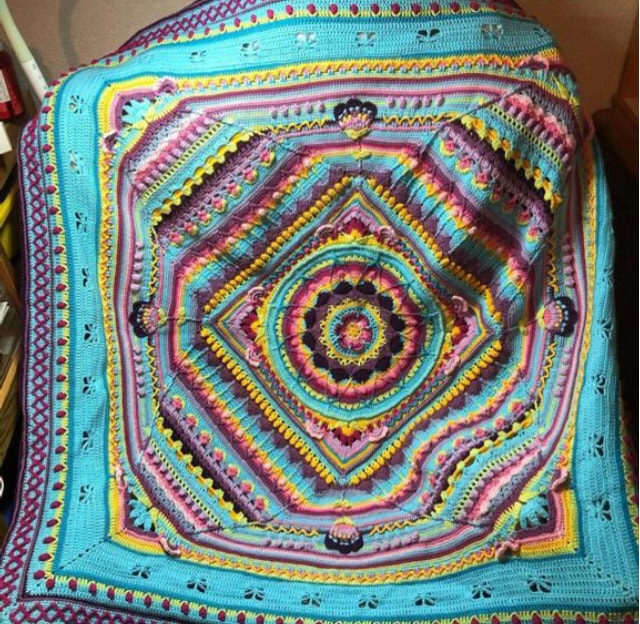
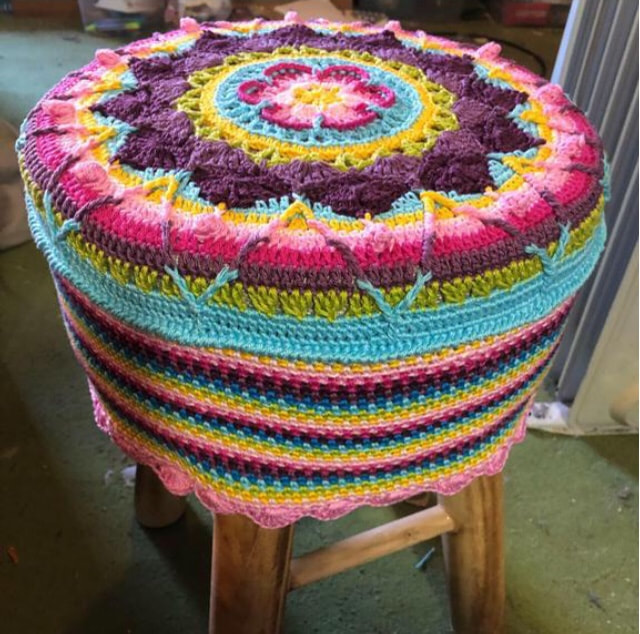
That's all from me today, but next time we will be moving on to a new section and soon, we will finally start doing some knitting and crochet! Until then, happy crafting. Caiti Learning and Inspiration: Top BooksHello and welcome back to the blog! Today, we will be looking at the best books and authors for learning how to knit and getting craft inspiration. Knit and Nibble - James McIntoshKnit and Nibble is a great book for knitters of all abilities. Written by James McIntosh, a chef who discovered knitting after experiencing anxiety, panic attacks and depression, the book explores the benefits of knitting, explains the basics, gives tips, shares patterns and even contains recipes for sweet treats to snack on whilst doing your knitting. It also focuses on male mental health and encourages people of all genders to knit. I am yet to try any of the patterns but I have found the other tips incredibly useful and well-explained. I also made and tried a few of the snacks a couple years ago and they were all amazing, particularly the Marshmallow Delights and the Malteser Squares. Here is a photo of the book. 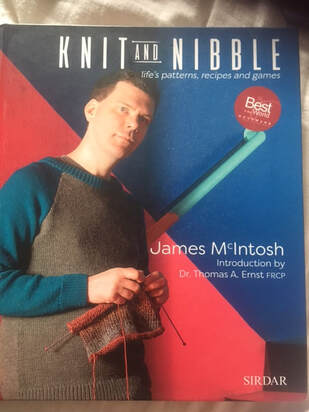 A Little Course In...You can buy these books for knitting, crochet, sewing and even non-craft hobbies such as Pilates! Books in the series go through the stages of the hobby step-by-step, explaining the basics and moving on to more advanced aspects. I have not read these books myself but it was a recommendation I got from Sharon. What's more, they are widely available and affordable; you can get many of the books for under £10.00 via Amazon, eBay, The Works and other shops. Here are some photos of the knitting and crochet versions. Sophie's Universe: Crochet-along by Dedri Strydom UysIf you crochet and want to learn something a little more advanced, this is a great project for you! The book goes through how to make a specific blanket called Sophie's Universe, which is broken into many stages so you can make something as big or small as you like. Another good thing about it is if you are finding the instructions in the book hard, you can find many guides and videos online which go through parts of the pattern in a more visual way. Whilst it is quite complicated, it is explained in detail so you don't have to know everything about crochet before you start. Even if it is a little too advanced for you at this stage, I would recommend looking it up as the pictures of it are stunning and make me feel really inspired! Here is a photo of the book and some pictures of it made up by Sharon Knitting/Crochet MagazinesMaybe these don't quite count as books, but I had to give this a mention as this is where I get a lot of my inspiration from. One of my favourite things to do in my free time is to flick through craft magazines (my favourites being Simply Knitting/Crochet and Knit/Crochet Now), cut and stick patterns onto plain sheets and add them to a folder. I already have a lot of projects on the go at the moment, but it's given me a lot of inspiration; after I've done some projects for this blog (more on that in a few weeks), I may make myself a Pusheen (a famous cartoon cat) jumper from a pattern I found in a Knit Now magazine - it looks so cute! Craft Murder MysteriesYes, you read that right. It doesn't really fall into the category of books for learning or inspiration but I just had to say a bit about them. At the moment, I am reading a book called Casting Spells by Barbara Bretton, which is about a murder that happens in a supernatural town containing a yarn shop, and it's up to the yarn shop owners to resolve the crime. It's the first book in a long franchise and there are many similar series available too. So, if you're looking for an escape from the world and your hands are a little too sore to knit, why not give this genre a go? Here is a photo of the one I am currently reading. 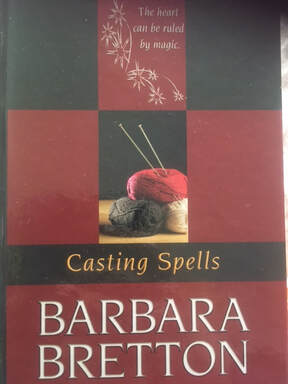 That's all from me for today! Next time, I will be looking at social media sites and accounts that are good for learning and inspiration, but until then, happy crafting!
Caiti Learning and Inspiration: Top WebsitesHello! Happy spring and welcome back to the blog. Today, we're going to start a new section of posts, looking at different ways of learning how to craft and getting inspiration. This week, I'll particularly focus on websites that I recommend, though I will be excluding social media sites for now as we're going to look at that more closely later on. For now though, here are a few websites that I recommend. Learning: This WebsiteIn the past, we have posted a few guides, patterns and knitathons on this site. These are great if you like learning from verbal instructions and pictures, though I wouldn't recommend the patterns until you have a basic grasp of knit and crochet stitches (something that we will cover later in this series of posts). Here are some links to different pages on this website that you can use to learn:
Inspiration: Clothing Shops/SitesSometimes, knitted things don't work as well with the rest of my shop-bought clothes in my wardrobe, so I often find that it is good to get inspiration for colours and shapes by looking at non-knitted clothing. By doing this, I can get the styles of popular clothing but I can also add a bit of personality to them and I have more control. For example, here is a photo of a jumper that I made inspired by a non-knitted garment I saw online. Even though I have made mistakes on it, I wear it a lot more than the other jumper I have made as it works really well with other garments I own.  Learning: WikiHowPersonally, I have not used WikiHow to learn a lot of things; however, I have read some of the guides on this website and I recommend it because I find that they are really clear, using a range of photos, drawings and videos to explain. Some of the guides on this site also quiz you throughout, which can be a little cheesy but it very useful as crafters have a language of their own, so it is good to learn what we are talking about! These don't get in the way, so you can still enjoy the website even if you don't want to use this part. The only problem with it is a lot of the terms they use are American (such as "single crochet" which we would call a double crochet, or "binding off" which we would call casting off), so it may be good to find something online that shows the meanings of American and British craft terms before starting! Inspiration: RavelryWhen it comes to Ravelry, I am not writing from experience as I do not have an account but I know that many crafters love it. With Ravelry, you can find both free and paid patterns and yarn as well as digital tools that allow you to organise the projects that you have on the go. Also, you can socialise with other like-minded crafters by reading and writing reviews of yarns and patterns, connecting via the blog or messaging on the chat section. It's a great way of getting not just inspiration but also motivation to start crafting or organising. Learning and Inspiration: Attic24If you want to learn to crochet, Attic24 is a great way to get into it. This website has a range of blog posts and guides, going through both the key, basic skills of crochet and some intricate patterns designed by the author of the site herself. Not only is this website good for learning but it is also great for getting inspiration because she uses many photos and in my opinion, all of them are incredibly colourful and beautiful, making me feel really inspired to craft and be creative!
There we have it - 5 websites or types of site that I recommend using when learning how to craft. Next week, I'll be looking at books and authors that we recommend, but until then, happy crafting! Caiti Casting Off and FAQsHello! Today's post is our last post about shopping before we start looking at ways of learning and getting inspiration, so I thought a good way to end would be by looking at the questions we often get about yarn shopping. Q: "Do you sell pure wool?"A: We do, particularly on our eBay sites. One that we recommend is Adriafil Regina, which we stock in a wide range of colours. You can order this via eBay, by telephone (leaving an answerphone message) or by emailing us (avicraftwool@gmail.com). Here are some photos of a few of the colours in this range that I love. They aren't the clearest photos as I was trying to take them from a distance, but I do love the colours so much. Q: "What can you use if you have sensitive skin or allergies?"A: Some people are allergic to pure wool, or find acrylic uncomfortable to wear (myself included - my skin is very sensitive!). If you are one of these people, I would recommend bamboo or cotton. Almost all of the clothes I own are cotton, which is great because they are both affordable and really comfortable. However, bamboo is more environmentally friendly and whilst I don't have many things made of bamboo, it is becoming more widely available and more popular. It's also super light, making it perfect for summer in a few months time! Q: "Do you sell gifts or kits?"A: We do! We have a wide range of kits, particularly sewing kits, for all ages and abilities. We can also make up presents containing a pattern, the wool required and needles or hook in the appropriate size. Just email us or leave an answerphone message to tell us what colours, thicknesses, yarn fibres and types of garment you think the person would like as well as a few measurements if appropriate. With this, we can make up packages for a range of budgets depending on the yarn you want. Q: "What is the cheapest wool you stock?"A: This varies, as sometimes we will put things on clearance or have oddments of yarn on offer for reduced prices. However, as a general rule of thumb, acrylic is the cheapest. One budget option I recommend is Stylecraft Special DK, which we stock in over a hundred colours for £2.20 per ball. There are other thickness in this range as well, which are of similar prices. In addition, I recommend checking out our eBay sites to find cheaper alternatives. To learn how to do this, click here and scroll down to our post about ways of shopping with us. Q: "Can I machine wash this?"A: To find out whether or not something can be machine washed or tumble dried, look at the ball band as this will show you a range of symbols. Then, look up different machine washing symbols to find out the washing instructions. This post from August last year gives an overview of common washing symbols - click on the link and scroll down to the post with the title "A Guide to Ball Bands." Q: "Do you sell stuffing?"A: We do not sell stuffing, but what we recommend is that you buy a plain pillow for a cheap price (you can usually find them online for about £1) then cut into it to get the stuffing inside. Stuffing from pillows has to meet certain legal standards regardless of the price, meaning that it is very high quality and great for toys for children. Also, not only do you then get stuffing but you also get a reusable case to keep it in! Q: "Do you do click and collect?"A: At the moment, we can! To do this, just send us an email, voice message to our telephone or message via the "Contact Us" section of this website, telling us what you want and giving us your number if you have called us. Then, we will get in touch with you to arrange payment and collection.
That's all from me for now so until next time, happy crafting! Caiti More that WoolHello again! Isn't it strange to think that it's March already? For the past couple of months we have focused a lot on wool and buying it. However, there is more to being a crafter than just wool - if you want to be a knitter (or crocheter, if that is a word!), there are also a few pieces of haberdashery that I would definitely recommend getting before you start a new project, and today I will be ranking my personal top ten items. 10: A PatternIf you already know your knit and purl stitches or your crochet stitches, getting a pattern to make a jumper or cardigan is a great next step as it allows you to learn different ways to use these stitches as well as how to do shaping. However, I would argue that a pattern is not essential, particularly not if you are knitting for the first time. Instead, once you know how to cast on and do the basic knit stitch, it is easy to make something such as a scarf without a pattern. Also, there are many other ways of learning apart from patterns, which is something that I will be looking at later in this series of posts. 9, 8 and 7: Pins, Foam Mats and Wool WashYou may be wondering why I have grouped these three. Mainly, I did it so that it made more sense, as they are all used for a technique known as blocking, where you wash wool in warm water and wool wash (a type of soap for wool), pin it out on foam to the shape that you want and leave it to dry overnight. It is very effective but only necessary for some projects, such as lace projects so that they curl less. 6: A Sewing Up NeedleThis piece is absolutely essential; the only reason I put it quite this low down on the list was because very few crafters enjoy sewing up their ends at the end of a project! Also, before you get one, I recommend finding a safe place to put your needles so you don't end up losing them and later finding them as they prick you when you least expect! 5. Fabric ScissorsAs I mentioned earlier, very few people enjoy sewing in ends, so scissors often come in handy if you have a long end. This means that instead of having to weave the whole end in, you can weave it a little, double knot it and then chop the rest off. Also, you need scissors when casting off your projects, or else you will end up having all your projects still attached to the rest of the ball! 4: A Row CounterRow counters are always great fun, because whilst you can tally the amount of rows you do, it is much more fun to twist a knob or click a button and see the number change as you finish a row. You can also get row counter apps, which are very satisfying as some tell you how many stitches you have done in your time using that app. 3. A Project BagI have to say, considering that I have put this in my top three, I really don't use project bags enough! So many of my projects are chaotically shoved on shelves, in baskets and across the floor. However, the projects that I do put in bags are so much more organised, meaning I don't end up losing or breaking things. It also makes it more portable - whenever I go on holiday I always have a project bag full to the brim, even if I'm only going away for a couple days! 2: A Tape MeasureHaving a tape measure is vital - it's important to to measure yourself up, measure your knitting up and make slipknots in your tape measure when you're too tired to knit (or maybe that's just me). Make sure you put it in your project bag though, because despite the size, they are quite easy to lose! 1. A NotebookThe project notebook had to come out on top. They are so useful - you can write down measurements and numbers of rows as well as to-do lists and deadlines if you are crafting a gift. If you keep your notebook for a long time, it can also be something for you to look back at when you are older with pride and happy memories.
You can buy all of of these things from us apart from foam mats, which you can easily get online (just search for "play mats for children" and you should find packs of foam blocks that look a little like puzzle pieces). That's all for today! Next week, I'll be rounding off this section and doing a Q&A on yarn shopping and shopping with us, so do send your questions in either as a comment or an email to avicraftwool@gmail.com. Until then, happy crafting! Caiti Shopping with AnxietyHello and welcome back to the blog! Today we are going to look a little more into the experience of face-to-face shopping. Some people love going shopping and are looking forward to going to the high street after this lockdown; however, this is not the case for everyone. For some people, particularly those with anxiety, shopping can be a stressful and even painful experience. Whilst there is no miracle cure for this, there are many ways to make the experience a little more manageable, and today I will be looking at just a few of these. But first, it's important to remember that different techniques work for different people. Of course, trying new things can be a daunting prospect so if any of these suggestions don't quite work, stop, reward yourself for trying and try again or try something else when you feel ready. Tip One: Removing the PressureWhen I was preparing to write this post, I talked to a few of my friends who have anxiety about what they do to make shopping less stressful. Knowing that quite a lot of people like structure and recommend planning in other scenarios, I was expecting at least one person to say something such as "write a list." Instead, many of my friends suggested that you shouldn't pick time slots or have precise plans as doing this can give you less room for change and less time, leaving you feeling more anxious about things not going a set way. If you do find it hard to make decisions without plans, maybe be a little less specific on your plans by not constraining yourself on time and not trying to do tons at once. For example, instead of thinking "I must go to Tesco at 4:00pm to buy this specific list of ingredients for dinner," perhaps try and think "At some point today, I will try to go to the local supermarket to look for dinner options." That way, you can go wherever and whenever it is best, for as long or as short a time as you want and you can pick whatever things take your fancy - there is no way of "failing" or "messing up" with this plan. Also, by thinking of it as "trying to get ideas" rather than "having to get things", it means that there is no problem if you are unable to get out and unable to buy anything that day as you can always order something in if going out feels like too much pressure. Tip Two: Background KnowledgeWhilst people didn't recommend planning, one did suggest getting a little background information about the shop or area you plan on going to. For example, it can be good to look on a map and make sure you know your route as this can reduce fears of getting lost or being unable to get to the right place. Also, I particularly recommend looking at a shop on Google as this gives you opening hours (though with some shops being shut or running differently because of COVID, this is not always accurate) as well as contact details, links to shop websites and photos of the shops (though it is important to note that some photos of shops online are a few years old and shop layout may have changed since then). For some shops, you can even get 360 degree photos inside or outside, which is both helpful and fun to explore! Another thing you can find out when searching larger shops is their busier and quieter times, which can be very valuable if you have social anxiety or you struggle with loud noises. But as a general rule of thumb, the least busy times to go in a shop are early in the morning or late at night on Tuesdays or Wednesdays. Tip Three: Go With a FriendOne thing that nearly all of the people I talked to suggested was going shopping with a friend who you trust. This person can be there just for moral support, be a distraction from the stressful aspects of shopping or can help you doing things that you find harder, such as asking for directions or paying at the till. At the moment this can be harder as you do have to socially distance from friends outside of your household or bubble, and some shops (including us when we open) only have space for one household at a time. However, it is possible for you to go in whilst your friend stands by the door to give you moral support, or for your friend to go in and pay whilst you make sure they have got the right thing. Also, if you or your friend live alone or one of you is a single parent, you are able to form a bubble with each other as long as neither of you are in bubbles already. This means the two of you can meet both indoors and outside without social distancing, which can help if you need support with shopping. However, I would recommend that you check the Government website before doing this to make sure that you are being legal and safe. Tip Four: Have Personal Items to Help You RelaxThis is less about social anxiety and more to do with other types of anxiety and hypersensitivity, though it can work for people with social anxiety too. If you find shopping hard because of the bright lights, strong smells, loud noises or uncomfortable textures of some items, you may want to try wearing sunglasses, ear defenders and gloves, or using perfumes in preferred scents that can block out overwhelming smells. Also, I really recommend having something to fidget with in your pocket, such as a small knitted toy, a fidget cube or a fidget spinner as these can be really useful and healthy ways of reducing negative energy and adrenaline caused by anxiety. Tip Five: Shop OnlineWhilst I do think shopping face-to-face is good, I think that it is more important to do what works for you. If it is going to be too daunting to go out shopping that day, you can always buy online. Just because you don't feel able to go out on a certain day (or week, or month, or however long!), it does not mean that you are weak; in fact, doing what you need to do to cope and listening to yourself is a sign of great strength! Tip Six: Remember that You Are Not AloneOne of the ironic things about anxiety is that it is one of the most common health conditions in the world, yet when you have it, it is hard to believe that anyone understands what you are going through. When you next go into a shop, remember that many of the customers or even the staff around you either are going through or have been through something similar to what you are going through. For example, I get very anxious when on the phone to people and find it really hard to know what to say in certain situations, so I was very proud of myself when I processed a telephone order of wool this week! If you do feel comfortable telling the person serving you how you are feeling, that can really help, but if not, do not worry as staff members will usually treat all of their customers with patience and work hard to give you the best help possible.
So, those are all of my tips for making shopping less stressful - don't plan too much; try and get a little background knowledge before shopping; go with a friend; have some items that can keep you relaxed; shop online if you need to and remember that you are not alone. I hope that these suggestions help. However, please do not use these instead of professional advice. I cannot stress enough how important it is to talk about how you feel and seek help if you need. So until next time, happy crafting and happy shopping (if that's your thing!), Caiti |
AuthorMy name is Sharon the Sheep, the owner of Avicraft Wool Shop in Bromley Kent.. Archives
February 2022
Categories |


 RSS Feed